
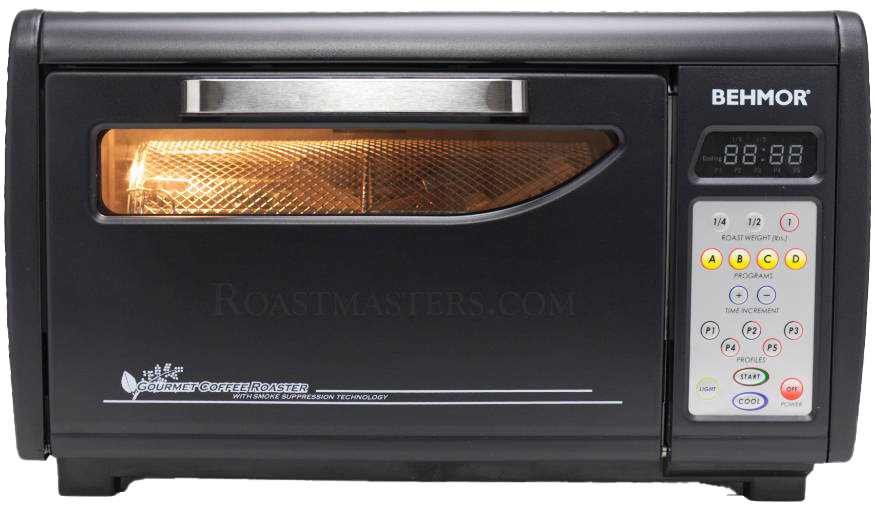
The Behmor 2000 AB Coffee AND Cocoa Roaster.
History:
The Behmor (pronounced Be More, not Bay More) has come in 4 different iterations.
Behmor 1600: The Original
Behmor 1600+: The profiles were tweaked but it roasted cocoa the same.
Behmor 2000: The entire control code was re-written. What was changed?
A dead man safety protocol was put in place (Err 7)
We were given manual control and a peak at some internal temperatures.
A faster drum speed option (from 16 to 32 rpm)
The ability to extend the roast indefinitely
Behmor 2000 AB: The unit turn “All Black”, hence AB, the code was further refined and a beeper was put in place to warn of impending shut off (dead man switch) and the final 30 second countdown.
Currently (2024) the Behmor (in all incarnations) is the first and only commercial roaster on the market that does a good job at roasting cocoa with no* (major) modifications.
*I want to clarify that point very quickly before anyone thinks "oh no, I have to hack something else". Nope, that is not what I mean. All I mean is that the Behmor 2000 is designed for one pound of coffee. The only thing you have to do to make to Behmor behave for Cocoa Roasting is roast more cocoa. If you load instead of 1 lb, 2 - 2 1/2 lb, it behaves perfectly for cocoa (since cocoa roasts so much cooler compared to coffee).
The Behmor comes with 5 pre-programmed options plus the ability to manual adjust the power levels for more control. For roasting cocoa, you only need to concern yourself with the default profile, P1. I don’t recommend any of the others and won’t be discussing them. We are going to go over how you can use the Manual feature to fine tune your roast.
While not a set it and forget it roaster, it is remarkably simple to roast cocoa with the Behmor.
The TLDR for roasting cocoa is as simple as roasting 2-2.5 lb of cocoa on P1 and stopping the roast around 18 minute, when the aroma starts to become sharp. Easy peasy, lemon squeezy. That said, you should NOT attempt to roast less than 2 lb of cocoa as it is way too easy to over roast it.
This page is periodically updated to match the information for the most current model available.Behmor Cocoa Roasting Beginner’s Quick Start Guide

Do not pre-heat the roaster.
Load 2 lb of cocoa.
Press 1 lb
Press Start and start an external timer counting up.
Roast until you smell the roast (not just hot air) around 11-12 minutes elapsed time.
Note the time and roast another 5-7 minutes.
If the aroma starts to smell sharp, you can stop the roast at 5 minutes.
If the aroma continues smelling good and maybe even chocolate like, roast the full 7 minutes.
Press Cool.
Allow the cooling cycle to finish and the beans to rest at least 6 hours before cracking and winnowing.
Important Notes:
At 4:30 remaining (not elapsed) the display will start blinking. You must press Start within 30 seconds or the roaster will shut down and display Err 7.
If you have roasted close to 18 minutes and the countdown timer is running out, you can press + to add more time OR C to add 3:10. I recommend the later.
Behmor Cocoa Roasting Intermediate’s Quick Start Guide

Do not pre-heat the roaster.
The room you roast in should be between 70-75 F.
Load 2 lb of cocoa between 70-75 F.
If any of these conditions are different, the times given may not be accurate.
Press 1 lb
Press Start and start an external timer counting up.
Press P5 - This will put the roaster in Manual mode.
Press D to increase the speed of the drum.
Press 1 lb to put the roaster back into Profile 1 automatic mode.
Roast until you start smelling something nice OR something a bit sharp. Press P4 to reduce the Power to 75%. Note the elapsed time
Note, this will be no sooner than 11 minutes elapsed time. If you smell something sharp before that time you have either loaded less than 2 lb of cocoa or you are not identifying the sharp smell I mean. The later will come with experience.
Continue roasting 5-7 minutes.
If the aroma turns sharp turn for the remainder of the roast, turn the Power down via P3 to 50%, otherwise let it be at P4 / 75%
Note: You don’t need to turn the power down again if everything smells good.
Roast a minimum of 5 minutes and a maximum of 7 more minutes after having reduced the power to P4.
Stop the roast by pressing Cool if the aroma turns sharp in that 5 to 7 minutes window.
Press Cool.
Allow the cooling cycle to finish and the beans to rest at least 6 hours before cracking and winnowing.
Important Notes:
At 4:30 remaining (not elapsed) the display will start blinking. You must press Start within 30 seconds or the roaster will shut down and display Err 7.
If you have roasted close to 18 minutes and the countdown timer is running out, you can press + to add more time OR C to add 3:10. I recommend the late
Learn how to modify your Behmor
a Behmor Roaster to take a thermocouple probe. It should go without saying if you modify your roaster and it starts on fire that's not our fault, or Behmor's fault. DO SO AT YOUR OWN RISK. that said, it's a fairly simple modification that will help you better gauge your roasts.
Behmor Cocoa Roasting Advanced Quick Start Guide
Prepare Your Roaster
Modify (and void your warranty, sorry/not sorry) your Behmor to accept a thermocouple probe.
How to Modify the Behmor for Profile Roasting
Starting
Do not pre-heat the roaster.
Load 2 lb of cocoa.
Insert the Type K thermocouple into the bean mass.
Press 1 lb
Press Start and start an external timer counting up.
Press P5 - This will put the roaster in Manual mode.
Press D to increase the speed of the drum.
Press 1 lb to put the roaster back into Profile 1 automatic mode.
Record the temperature every minute and calculate the average slope every minute.
Slope Goals
Try to maintain a slope of 9-11 F/min until 212 F. The roaster should do this naturally.
Try and maintain a slope of 8-10 F/min between 212-232 F.
Try and maintain a slope of 6-8 F/min between 232 F and the end of the roast.
Helpful Signposts
It should take 2-3 minutes to go from 212 F to 232 F. This is called the Development Phase.
It should take 3-5 minutes to go from 232 F to the end of roast. This is called the Finishing Phase.
Controlling the roast and determining End of Roast (EOR)
After the roast is above 212 F, reduce the power using the P1-P5 buttons as needed.
You’ll use the Power buttons to slow the roast because
the slope is too large
The aroma is sharp
Note: The roaster has momentum. It may take a full minute or longer to slow the roast after pressing a lower power setting. Be patient.
A standard End of Roast temperature is 254-262 F and indicated by a sharp aroma.
The roast is done if the aroma turns sharp in the 3 to 5 minutes window of the Finishing phase.
If the roast never turns sharp smelling, roast to 262 F or 5 minutes in the Finishing phase, whichever comes first.
Press Cool.
Allow the cooling cycle to finish and the beans to rest at least 6 hours before cracking and winnowing.
Important Notes:
At 4:30 remaining (not elapsed) the display will start blinking. You must press Start within 30 seconds or the roaster will shut down and display Err 7.
If you have roasted close to 18 minutes and the countdown timer is running out, you can press + to add more time OR C to add 3:10. I recommend the later.
Other notes about the Behmor 2000 AB
The Behmor is NOT a set it and forget it roaster.
DO NOT WALK AWAY FROM A ROAST
P1 vs P1
There are 5 pre-programmed pseudo-profiles (P1 - P5) in the Behmor 2000AB and the ability to control the Power levels of the roaster during the roast.
You need to wrap your head around that he P1-P5 buttons have TWO functions, separate and distinct.
Profiles P1-P5 apply different amounts of power at certain times during the roast when picked before the roast starts. We are only concerned with the default Profile, P1. It applies power the whole time (up to a maximum safety temperature).
Once you have started the roast, P1-P5 act as Power buttons.
P1: 0%
P2: 25% power (Element duty cycle, 2 seconds on, 6 second off)
P3: 50% duty cycle (4 on / 4 off)
P4: 75% duty cycle
P5: 100% duty cycle
A and B temperature buttons
The buttons A and B show you the Roast chamber (A) and Exhaust (B) temperatures when pressed. The DO NOT correlate to the temperature of your beans. Just ignore them. The path to trying to correlate them lies disappointment, frustration and madness. If you don’t believe me or want to understand why, read Ask the Alchemist 202.
Err7
There is a anti-Darwin award safety feature that requires you to press the Start button when the roaster shows 4:30 minutes (assuming the default profile P1) to prove you are present. If the Start button is not pressed within 30 seconds the roaster will turn off and show Err 7.
Other odds and ends
You do not need to use the Chaff tray when roasting cocoa.
The 12 minute cooling cycle works just fine. There is no need to cool faster.
Read More About Roasting


A practical guide to scaling chocolate equipment without guessing. Learn when Behmor + Sylph is enough, when Yoshan + Flux makes sense, and how weekly output, labor, and bottlenecks shape the right upgrade path.