
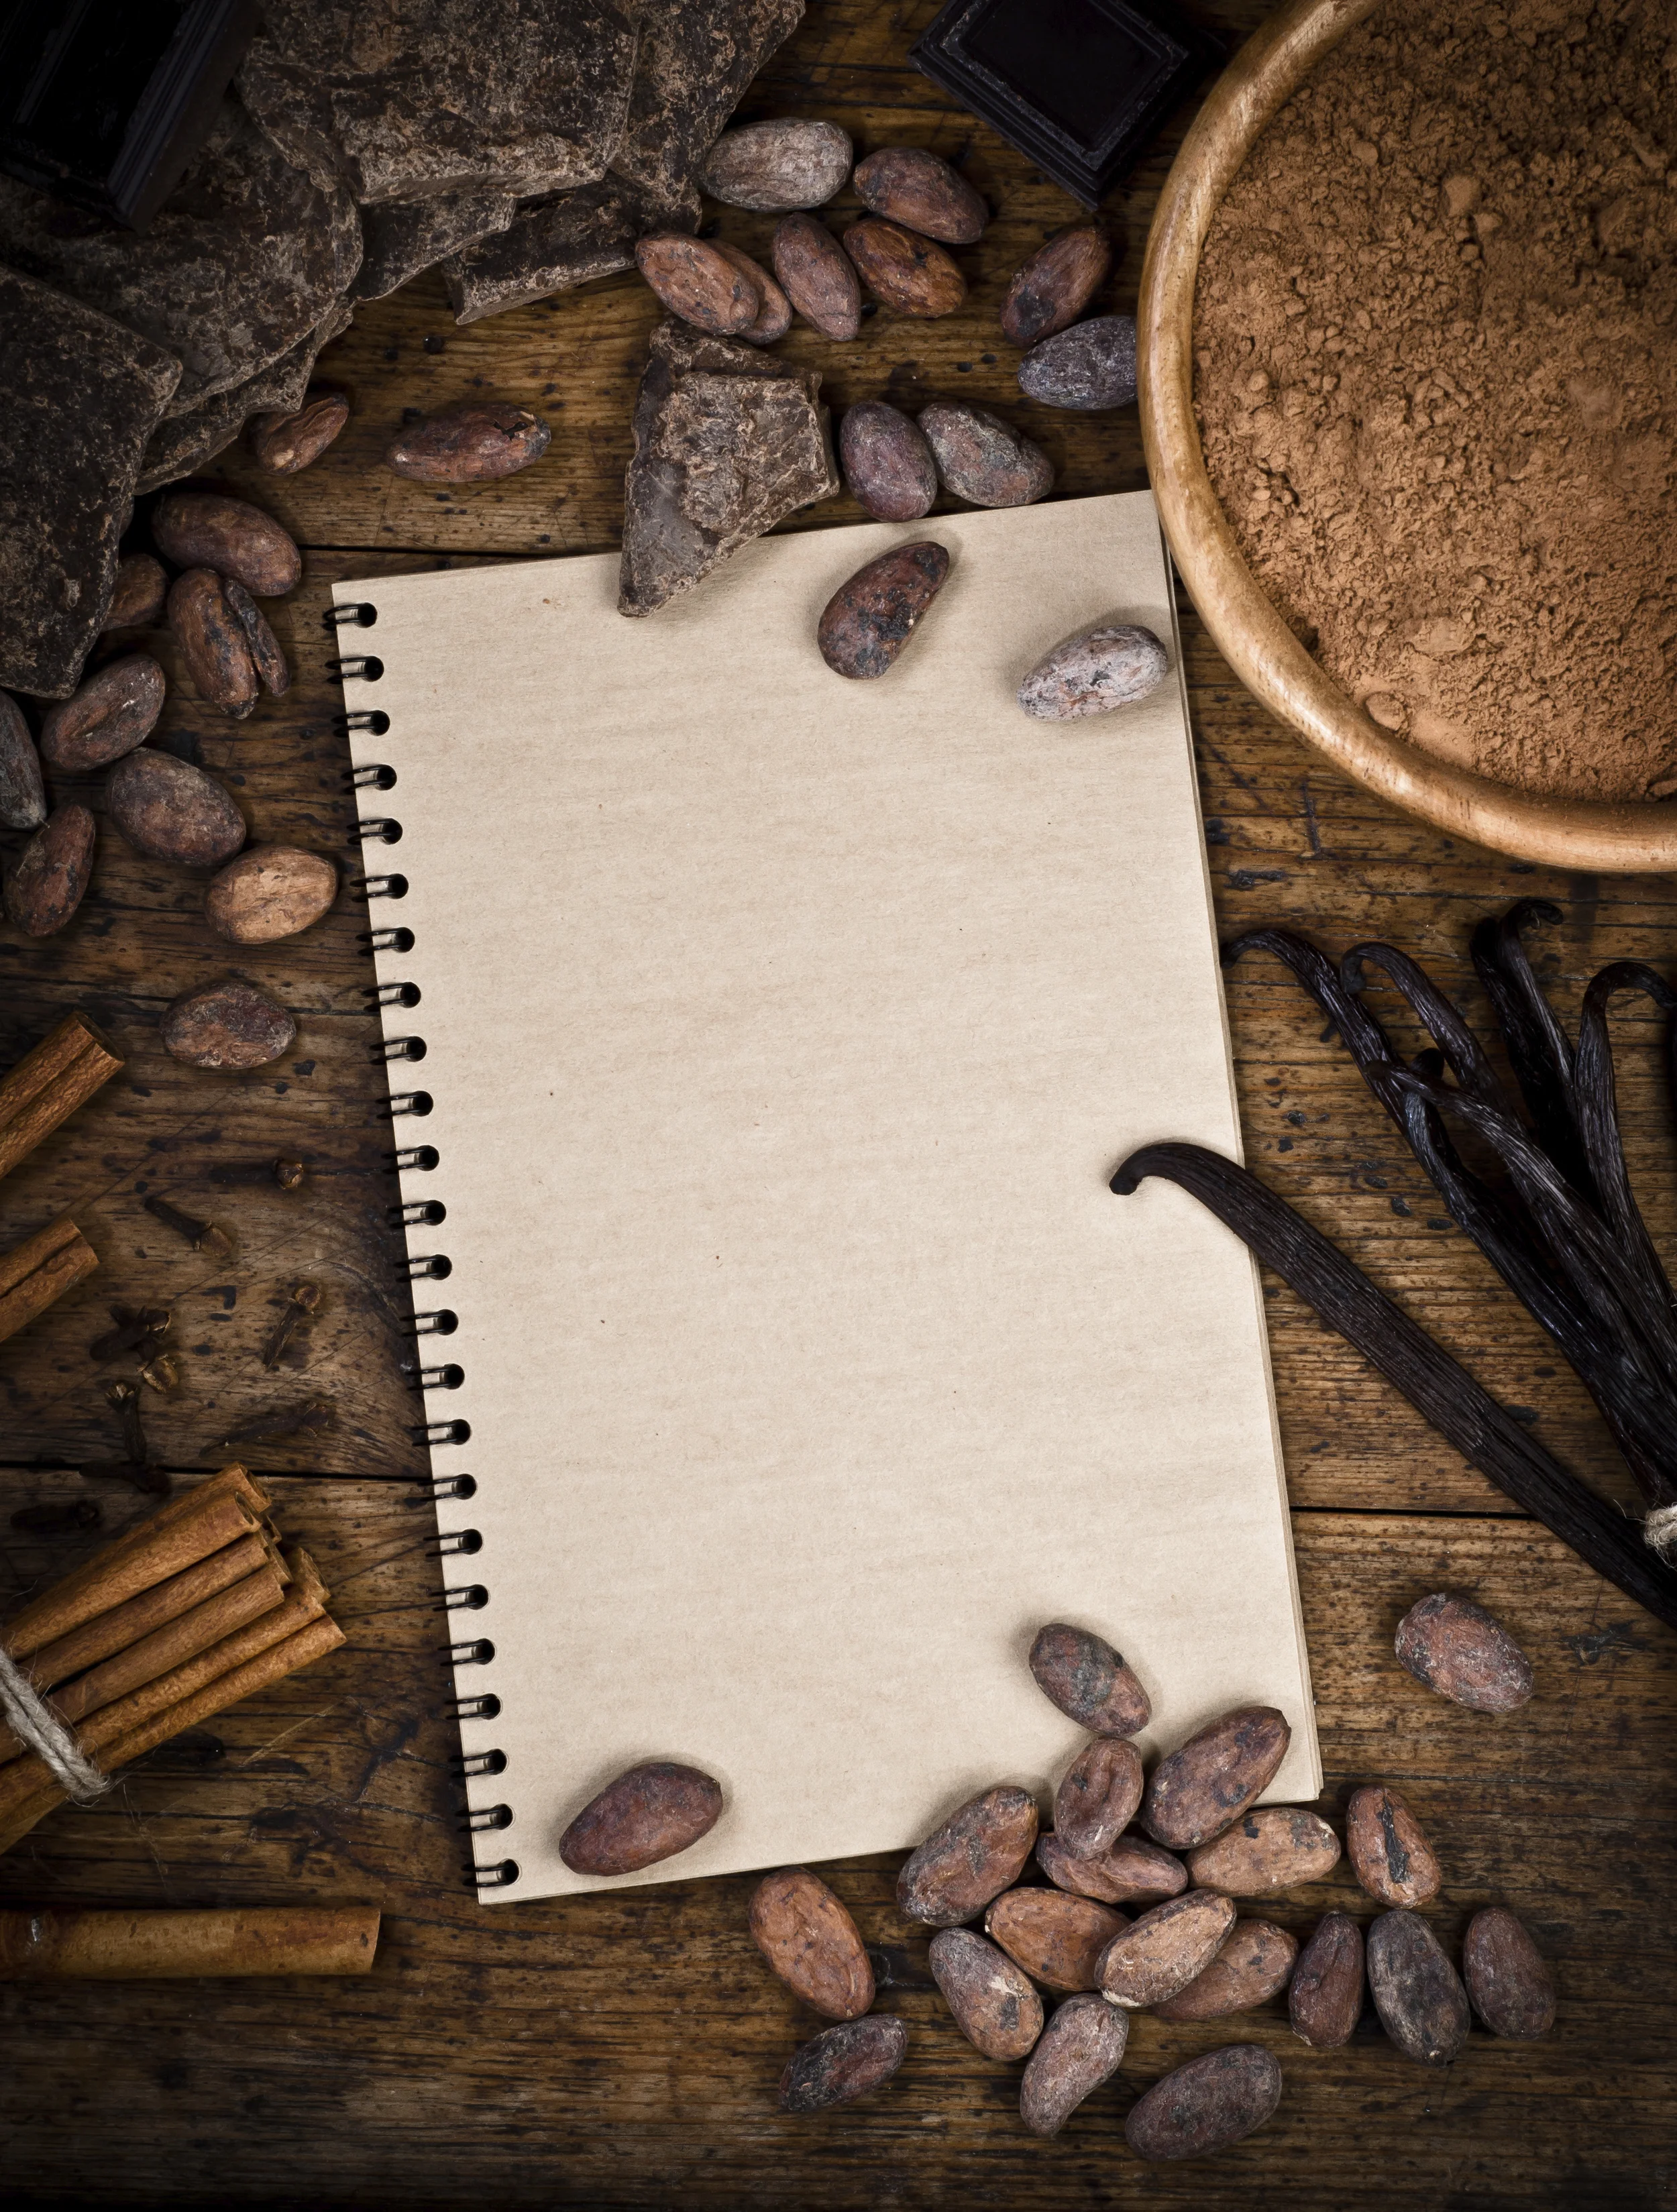


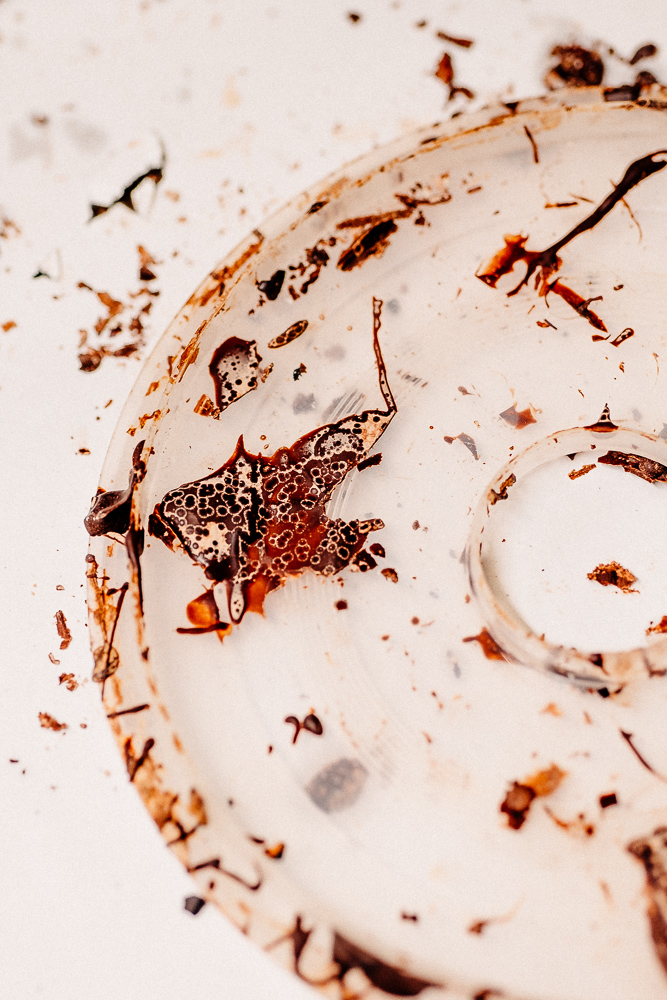
How to Make Chocolate
How to Make Chocolate
Making Chocolate At Home: 101
THIS IS THE SHORT, FAST, WHAT YOU NEED AND HOW IT HAPPENS GUIDE TO GET YOU GOING IN THE RIGHT DIRECTION.
Making Chocolate At Home: 101
THIS IS THE SHORT, FAST, WHAT YOU NEED AND HOW IT HAPPENS GUIDE TO GET YOU GOING IN THE RIGHT DIRECTION.
How to make chocolate?
That is THE QUESTION isn’t it? It is sort of the Schroedenger’s cat of questions in that it is both, and at the same time, very simple and incredibly complicated.
The simple version is this:
Roast good quality fermented cocoa beans.
Get rid of the outer husk.
Grind the nibs and some sugar in a melanger until smooth, 24-48 hours.
That’s it. You have made chocolate. I told you. Simple.
The more complicate version:
Note, this is why Chocolate Alchemy is over 4 million words spread over 1000s of pages.
In those pages you’ll discover:
What makes a cocoa bean good?
Different ways to roast.
How to crack the beans and winnow away the out husk.
That you can add other other ingredients like cocoa butter, milk powder, vanilla and/or lecithin.
Different ways to refine chocolate.
How to temper, even though that isn’t technically chocolate making.
And so much more…..
Let’s get into some of the details.
On This Page
Making Chocolate 101
Cocoa Beans
Roasting
Cracking & Winnowing
Grinding
Conching & Refining
Tempering & Molding

Equipment list:
Roaster:
It's possible to use your own oven, either conventional or convection. I am not a fan of that method due to a distinct lack of control but many people do it with a lot of trial and error. The Behmor drum roaster is probably the best option on the market for small scale. Other varieties of larger professional coffee roasters beyond the Behmor can work. Pan roasting and air poppers really don’t work all that great.
Tip: The Alchemist uses his home built one or a slightly modified Behmor currently.
Cracking the Beans:
I like the Champion Juicer to crack beans. It's fast and efficient. It gives you double duty since it can also turn roasted nibs into liquor. Peeling by hand is low tech and the way it was done long ago (and in some origins), takes a while, and may be more or less efficient for winnowing at the same time depending on your technique. It's less efficient on time. The Crankandstein cocoa mill works ok but I find the pieces a bit large for winnowing. For the serious Maker, we have developed the Deluxe Cracker that pair with our winnowers.
Winnowing:
The lowest tech method (after hand peeling which isn’t technically winnowing) is a hair dryer set to cold, or a small shop vac set to blow over a large bowl of nibs and husks. The bowl is circulated with a tossing motion of the hand bringing nibs and husks up slightly into the air, giving the husks a chance to blow away. After that, there is the hand fed Sylph or the automated Aether and Flux. Expect to lose about 25% in husk by weight.
Grinding:
Champion Juicer: there doesn't seem to be a good substitute for this one yet except not doing it. Regular food processor and grinders don’t work well. With a small amount of nibs (1-8 lb) you can skip the grinding stage and go straight to the Melanger, but the larger batches take more time, often a couple hours but is still viable.
You lose a set amount every time you put cocoa beans through the Champion -- six ounces (6 oz) no matter what weight you are processing.
Most any grinder that can make a nut butter will make cocoa liquor.
Refining/Conching:
You need a Melanger, full stop. Either the Spectra 11 for home use or one of the larger ones if you need more capacity. There's not a kitchen appliance substitute for this. Melangers are motorized granite bottomed bowls which have two granite rollers that crush the cocoa nibs (along with your other dry ingredients and extra cocoa butter, depending on what you're making) into something you'll want to hand to your friends and grandma.
A separate Conche is not required and more to the point, doesn’t currently exist for small scale chocolate makers. A melanger both refines and conches naturally at the same time.
There are also currently no small scale ball mills for chocolate.
Optional Equipment
Most of these pieces of equipment will make your job a bit easier. Most are not specific to chocolate making, the exception being tempering machines.
thermometers
bowls
spatulas
tempering machine
sous vide
chocolate molds
Edible Ingredients
What ingredients make good chocolate?
Edibles
Sugar
Makes your chocolate sweet. Must be dry sugar, not honey, syrup, etc. There are many you can use including some alternative sweetners. Brown sugar, turbinado, demerara, etc. If they crawl you need to dry them.
Read in detail about the various Sugars in Ask the Alchemist 319
Use between 20% to 40%. Outside of those ranges can work but are not common.
Milk Powder:
You need dry milk (powder) if you want to make milk chocolate. It can be whole or skim. You can't use ANY liquid ingredients. You can also use cream powder, oat powder, buttermilk powder, and the like.
Use between 5% and 25% of various milk like powders.
It is not recommended to use more than 5% heavy cream powder as the extra butterfat can make the chocolate very hard to impossible to temper, making it extremely soft.
Cocoa beans:
The variety is your choice and you need to start somewhere. Look for something that resonates flavor wise. The Alchemist loves strong, deep flavors; smoked meat, dark ale and whisky and tends toward strong deeply flavored chocolate. Leather, loam and such. Two pounds is a good amount to start with because you loose some weight in the winnowing process, and some more if you grind them. If you don't get them from the Alchemist he won't have sympathy for you if they taste bad. (the Alchemist is smiling at this as he reads it - not that it isn't true). He puts in a ton of work to only offer quality cocoa beans that make good chocolate.
Use between 10% and 20% for typical milk chocolates.
Use between 20% and 40% for dark milk chocolates
Use between 40% and 60% for sweet chocolates
Use between 60% and 80% for dark chocolates
100% cocoa is called cocoa mass, cocoa liquor or unsweetened chocolate.
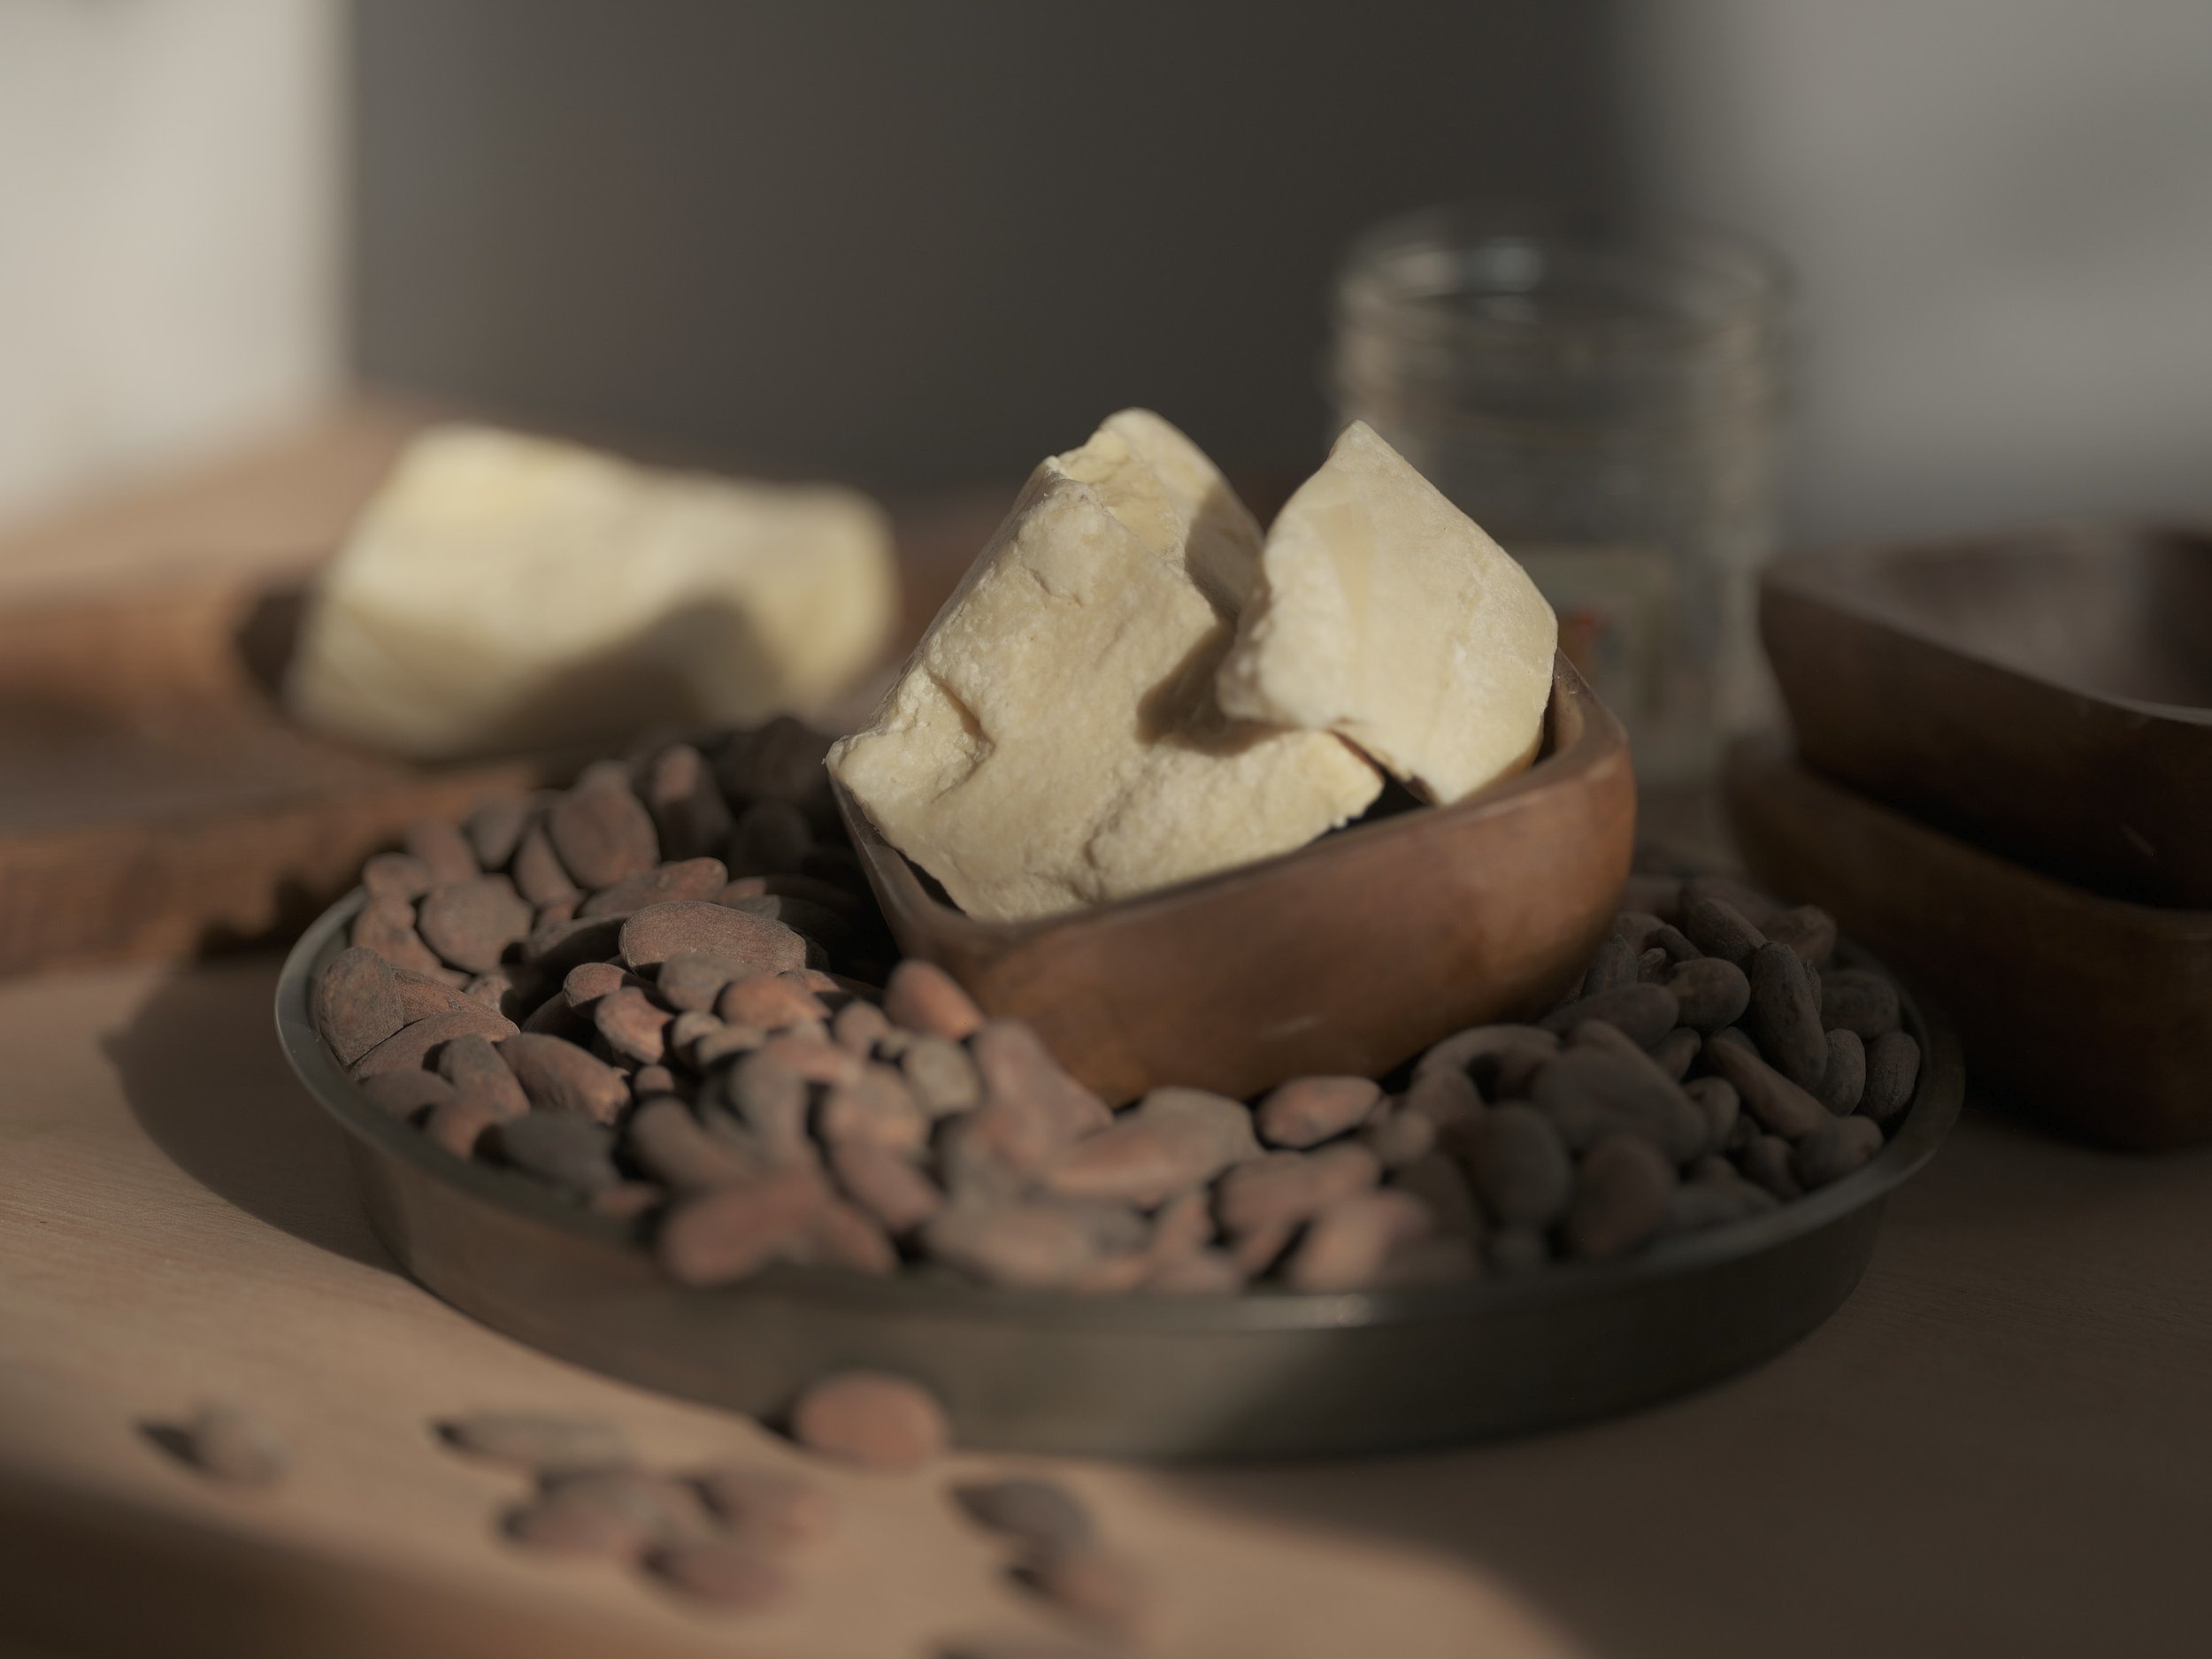
Cocoa butter:
Cocoa butter is technically optional but sometimes required for certain recipes so there is enough fat to refine properly.
A little counter intuitively, the addition of 5% cocoa butter makes for a fuller and bolder chocolate since it will melt a little easier in the mouth
Use between 20% and 40% for typical milk chocolates.
Use between 10% and 20% for dark milk chocolates
Use between 5% and 20% for sweet chocolates
Use between 0% and 15% for dark chocolates
Lecithin:
Lecithin is made from soy generally but sometimes sunflower and even egg. Although most people think of it as an emulsifier, this is not strictly true for chocolate making. In this case it modifies viscosity; it makes a thinner chocolate. It is often used in place of cocoa butter since it is cheaper, but also isn't a direct replacement. It is not a waste by product or toxic.
Use between 0% and 0.4%.
Excess lecithin can make your chocolate thicker.
Recipe Formulation:
The percentage of a chocolate is the addition of the cocoa beans and cocoa butter. A chocolate with 65% cocoa nibs and 5% cocoa butter is a 70% chocolate as is a chocolate with 70% cocoa nibs and no cocoa butter.
Cocoa nibs contain about 50% cocoa butter.
A final recipe requires around 35% fat meaning a chocolate with 70% will contain about 35% fat and is about the lowest you can go without adding additional cocoa butter or other fats.
Milk chocolate often require at least 40% fat or they will be too thick.
It is a little old school, but you may find this Formulator handy.
Other ingredients:
As long as it does not contain water, many ingredients can be added to chocolate anywhere in the 1-20% range.
Coffee
Spices
Herbs
Nuts
Fruit powders
Essential oils
If the ingredient contains an oil, like nuts, you can include that percentage in your total minimum fat needed (35 - 40%) but testing is recommended. Not all oils play well with cocoa butter and might make your chocolate behave oddly. In particular, coconut oil inhibits tempering and makes the chocolate extra fluid and difficult to harden.
In nearly all cases I suggest you do small test and methodically experiment before ruining a whole batch of chocolate.
The Basic Steps to Making Chocolate
The Recipe:
Possible the most common question I get is either what recipe should I use? or what cocoa bean should I pick?
The recipe is both the least and most important part of making chocolate. It is hard to get where you are going if you don’t have an idea where you are going but at the same time, there is no perfect recipe and few recipes on their own are going to make bad chocolate.
Using bad beans or not roasting them correctly is going to impact how good your chocolate is way more than the recipe.
Getting cocoa beans from us guarantees you have good beans.
It can’t get any easier than getting a Chocolate Making Kit. These come with roasted nibs and allow you to jump right to refining.
We also have a number of Recipes. Any will get you started just fine.
If you like developing your own, this is a basic Formulator to help you out.
As for picking a bean, read the descriptions and pick one that sounds like something that sounds good. It is not really any harder than picking what you want to eat at a restaurant.
If this is your first go, I recommend a pre-portioned kit or roasted nibs. It removes the roasting variable right from the start.
Storage
Unless specifically labeled, the cocoa beans or nibs you have purchased from us are raw. They are best kept in a cool, dry, sealed location. Like this, they should remain "fresh" 6 months to a year. I don't recommend refrigeration or freezing as it is easy to trap moisture which is not good for cocoa beans.
I recommend leaving them in their raw form until you are ready to use them. Roasted beans go stale quicker than raw beans, usually with a shelf life of around a month.
Cocoa doesn’t go bad, but it can go stale.
If you have raw beans, it is a good idea to read our article about cocoa moths and their implications.
Roast your cocoa beans:
Once roasted, cool them to room temperature. It's easiest to do this at least half a day before anything else. Six hours is the minimum and a full day would be even better. Roasting cocoa beans often smells like baking brownies. Expect to attract spectators if there are any around. Depending what you roast in, cocoa beans can be roasted in 15-30 minutes and end up in the range of 245-265 F at the end.
Crack and Winnow the beans:
Either with the Champion without its screen in, or by hand. You feed the beans in the top and the nibs and husk come out the bottom. Then you do the blowing air and tossing nibs part until there is little or no husk left in the beans if you are using a blow drier.. You'll also have about a six foot circle of husk around you. Winnowing is best done outdoors, or in an area that's open and easy to sweep up. The kitchen is not such a good option. A neater alternative is to use the Sylph or the automated Aether and Flux. You will lose about 25% by weight to husk.
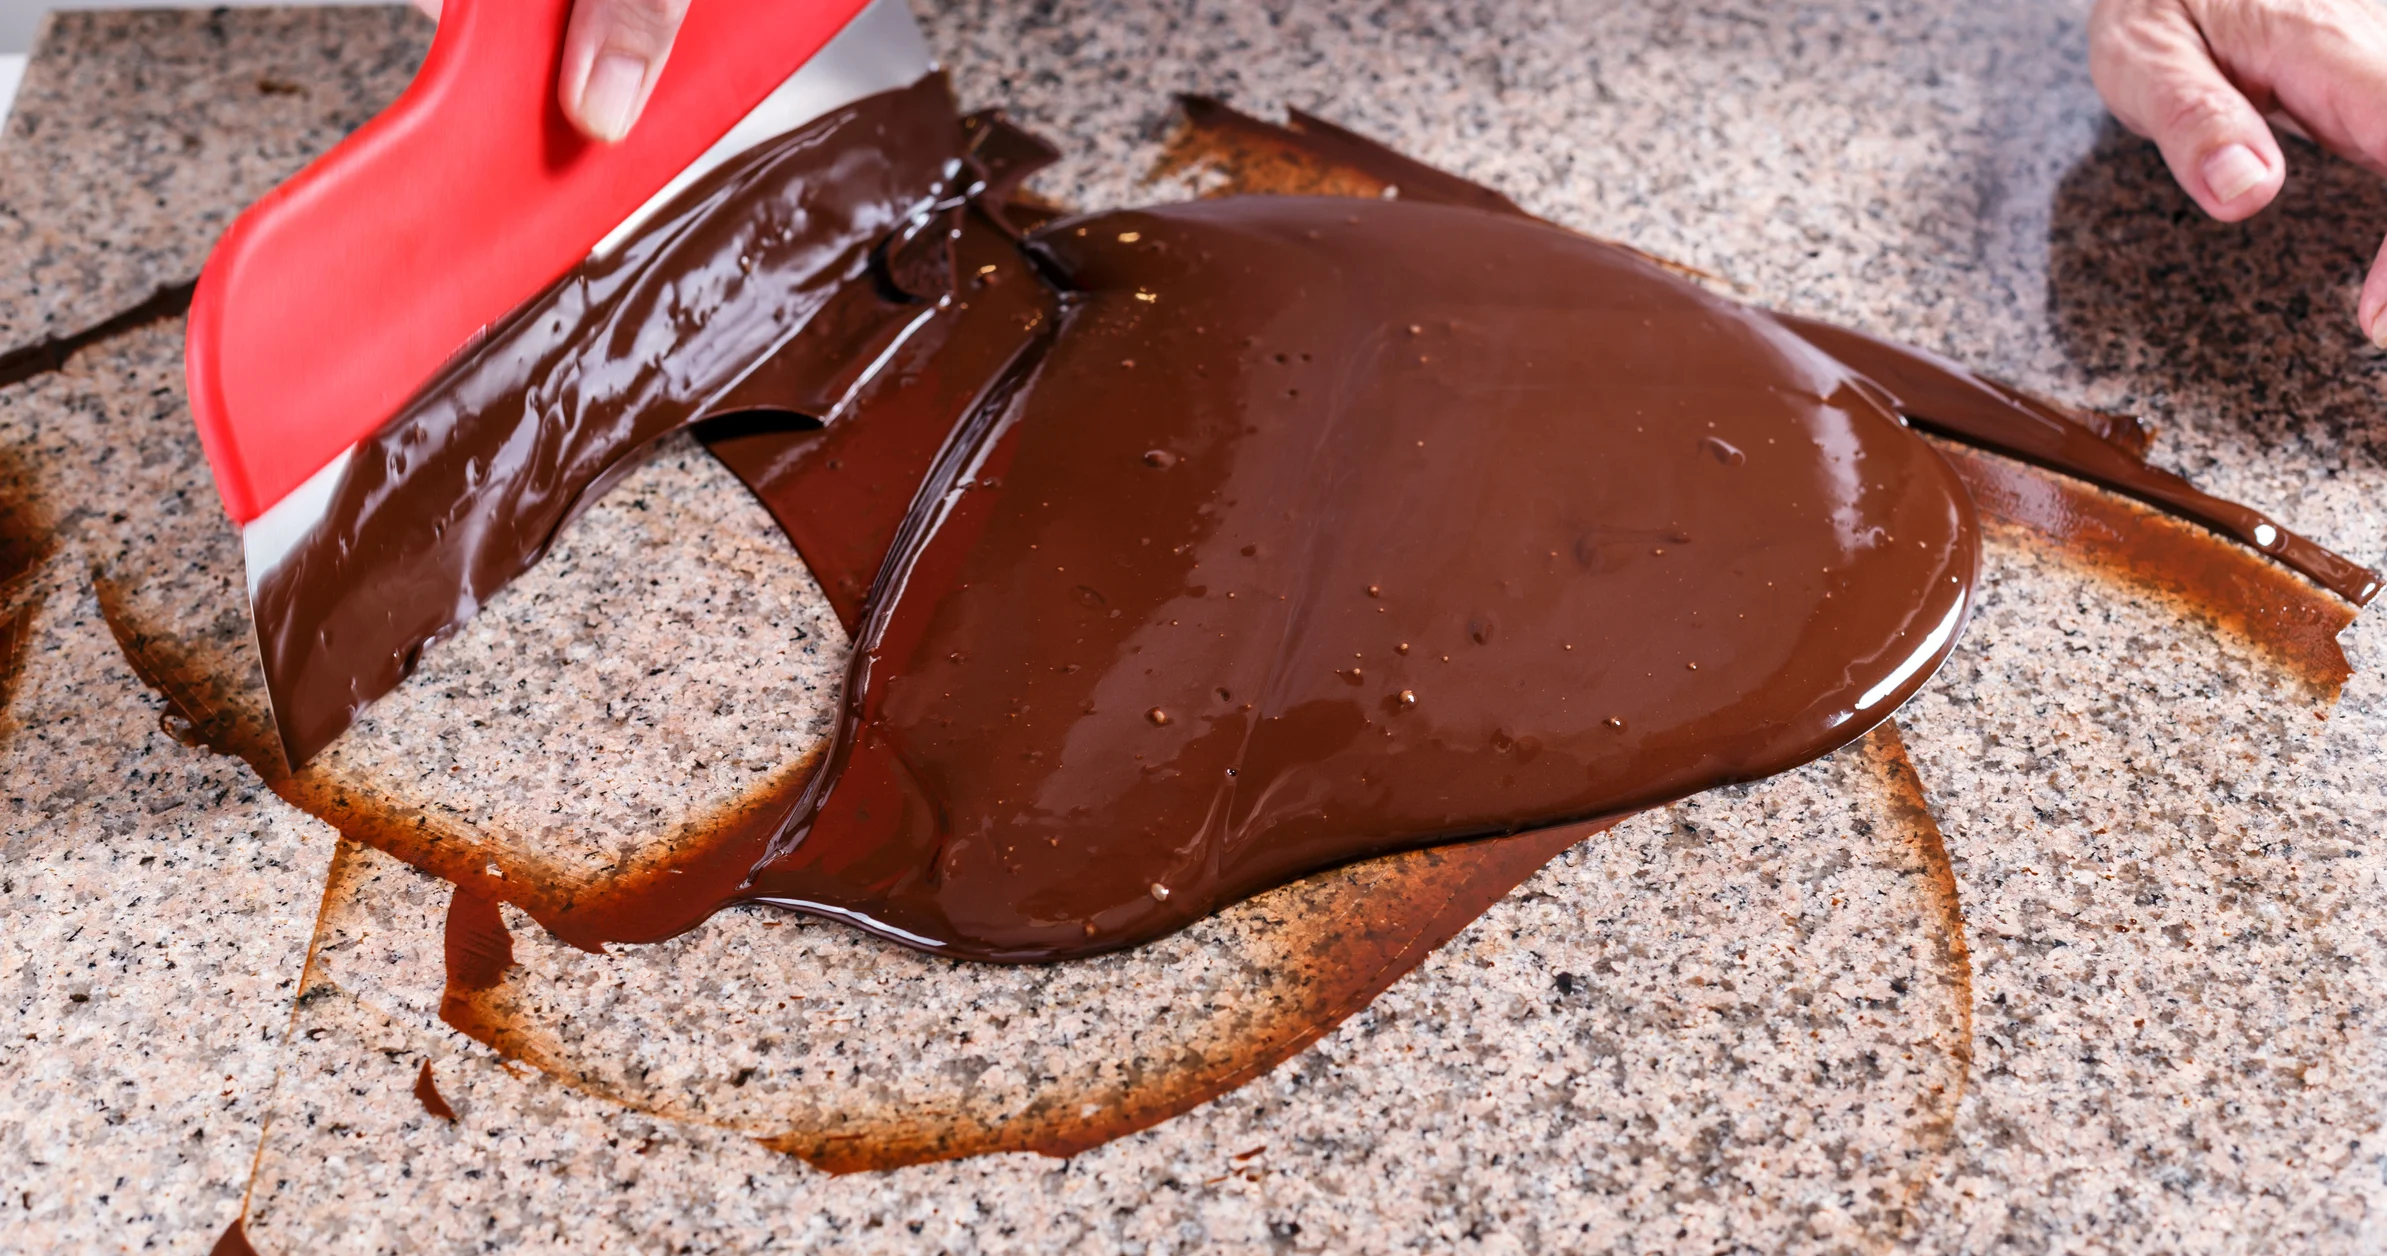
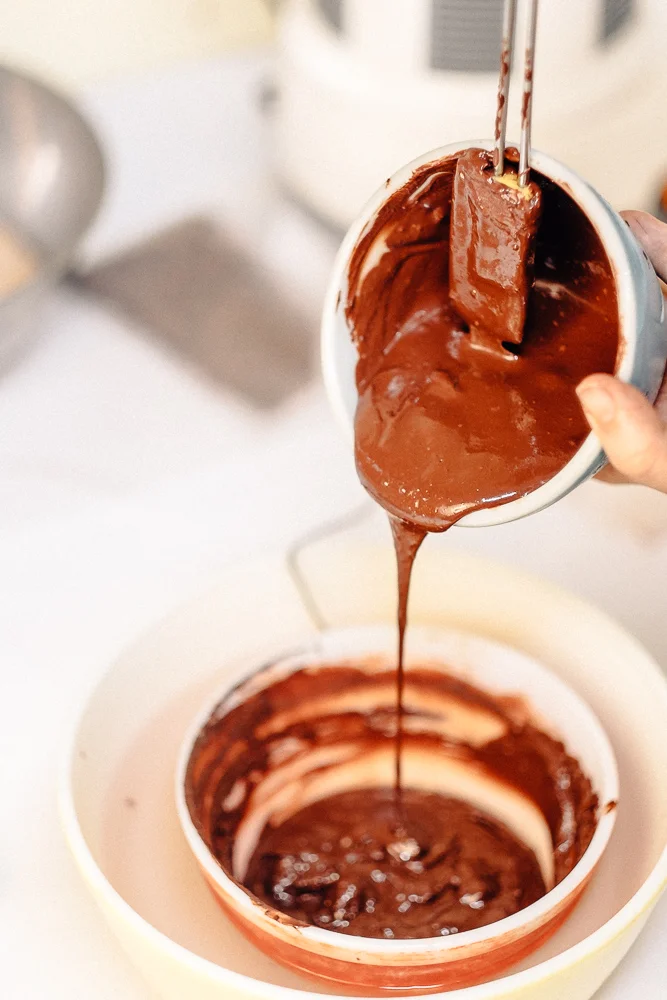
Refine/conch:
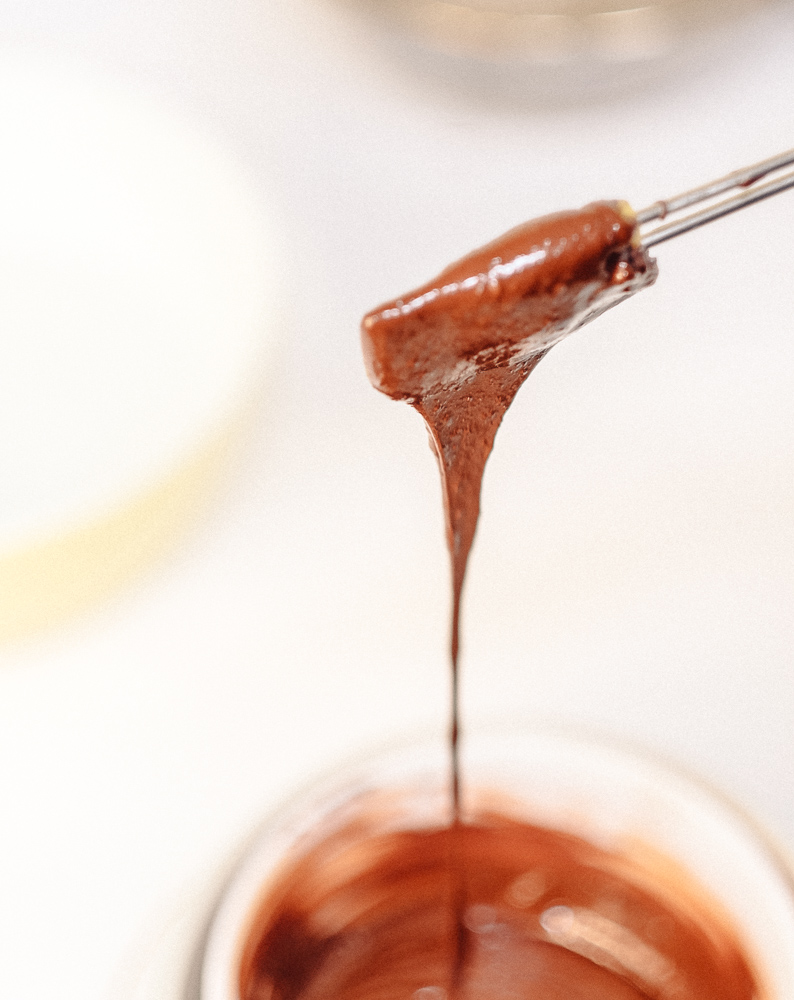
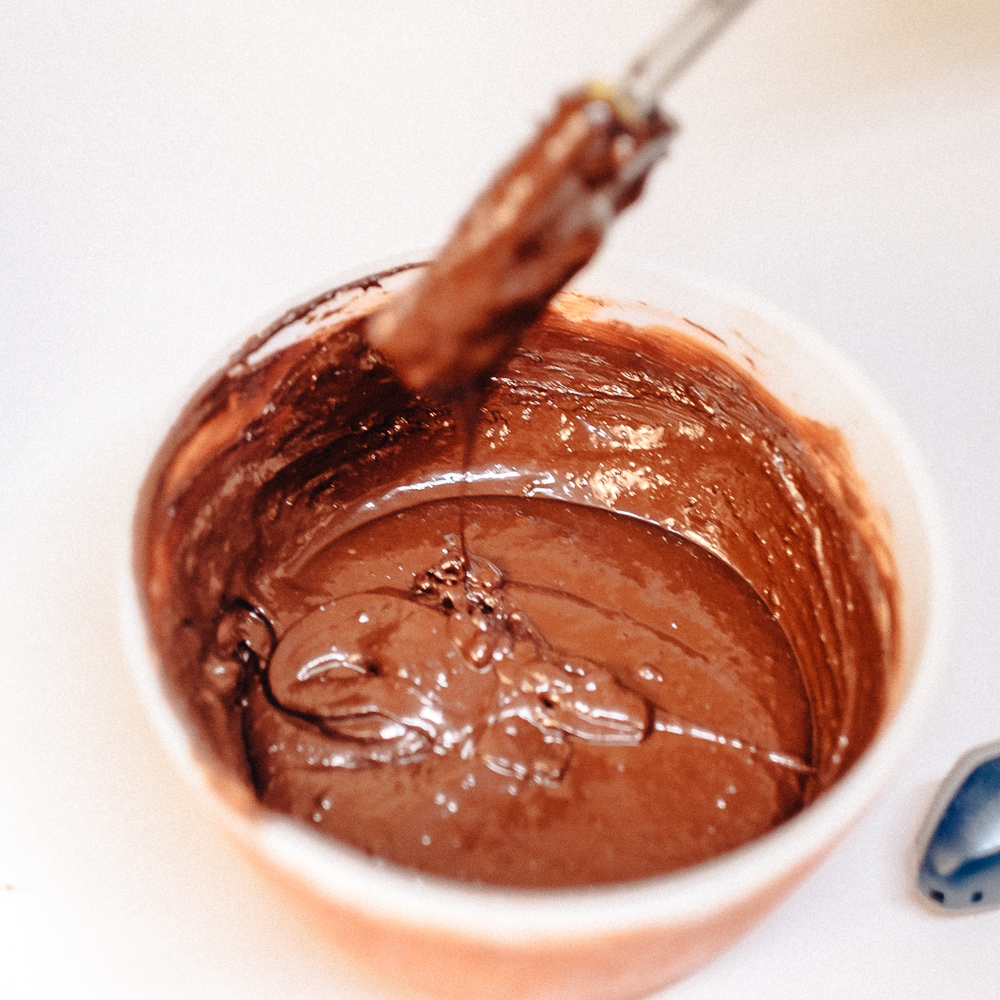
If you are starting with liquor (ground cocoa nibs) melt it (100-120 F) and put it in the Melanger. If starting with roasted nibs, warm them to 120-150 F and slowly add them to the melanger. If your recipe calls for cocoa butter (I recommend it) add that first to help everything along. Keep adding the nibs taking care not to stall the machine. Once the chocolate is running smoothly add the other ingredients a bit at a time. There is no need to wait to add your sugar but neither is there a problem doing so. And remember NO WATER BASED LIQUIDS! It will seize your chocolate.
It takes 18 to 48 hours depending on the chocolate and other ingredients for it to become smooth. You can stop it and check how smooth your chocolate is by dipping a spoon in (like tasting batters). It is difficult to over refine chocolate in a melanger.
There is no need to relax the pressure on the tension knob. Some people claim this is conching but it isn’t. It is time wasting and won’t change your chocolate at all. The heat from friction and the continuous stirring of the rollers will naturally conche the chocolate.
Tempering:
If you want shiny chocolate you have to temper it, which takes warming and cooling chocolate a specific way to cause the right crystals to form. As for all of this, see the Alchemist's real instructions for how to do it. Silk is a GREAT way to temper.
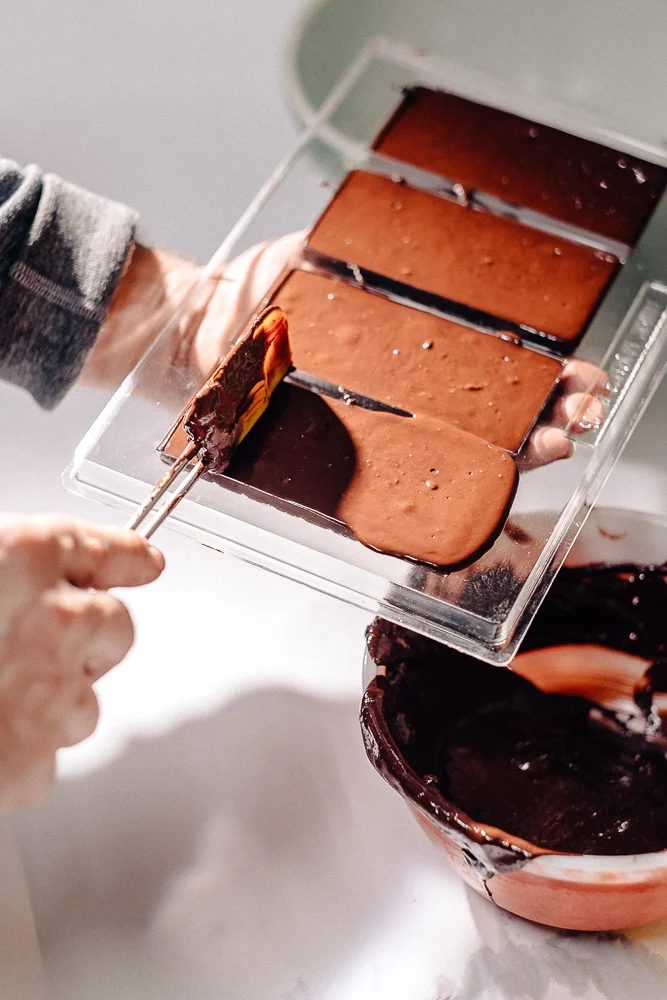
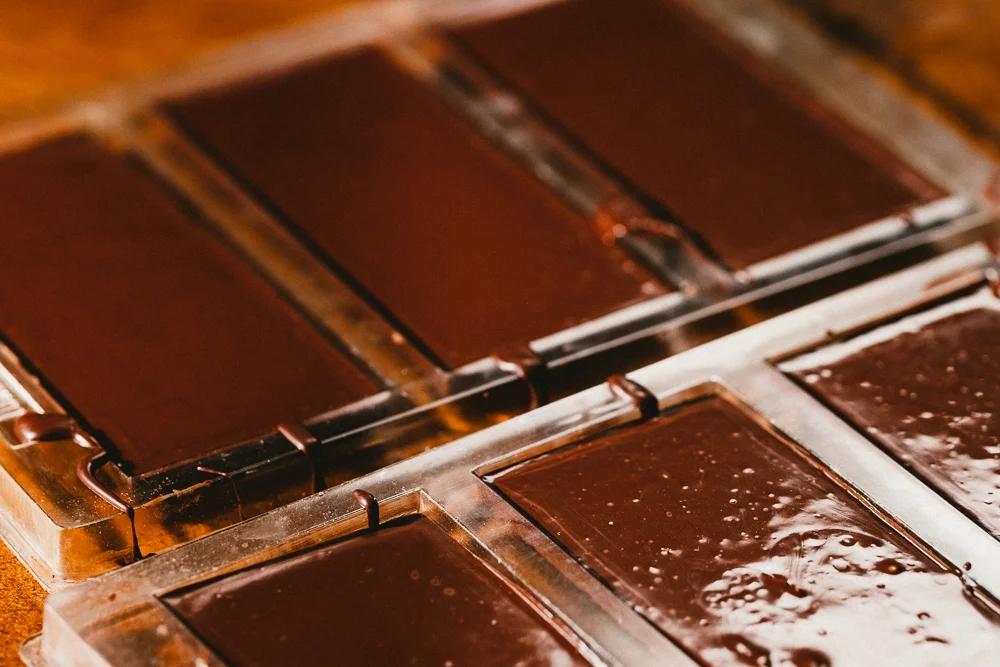
Mold your chocolate:
once the chocolate's smooth and no longer feels grainy. Temper it and pour it into molds, or whatever final holding device you're using. Clean up for as long as it takes go get all the chocolate off the Melanger and you're done. The molds need to cool for a few hours before the chocolate comes out of them.
Have Questions?
What Now?
As I said at the beginning. This is quick and dirty. It's not meant to teach you how to make chocolate but to give you an overview.
Read on for the full story.
Cocoa Beans
Cocoa Beans
Cocoa beans have numerous similarities to coffee beans, with some important differences in processes. They are both fermented (fermented cocoa almost looks already roasted), roasted and ground for use. Cocoa beans come in three primary varietals, Criollo, Forastero, and Trinitario but there are hundreds of strains for each. Very loosely, Criollo are analogous to Arabica coffee in that it is the cream of the crop and has the most delicate and complex array of flavors. But in many cases, this can also mean a very mild chocolate.
The Forastero can be compared to Robusta coffee in its disease resistance and higher production, but that is where the comparison ends. Where robusta is just horrid 99% of the time, Forastero is not like that. It has a strong full cocoa flavor, but depending on the grade and preparation, can be rather one dimensional. Well prepared Forastero is what most of us are used to eating in chocolate.
Finally, Trinitario is a hybrid of the two, and can have various characters of both parents. Often a Trinitario bean is spoken of as having a strong or weak Criollo influence.
I really like how the C-Spot lays it out. I recommend you check them out instead of me copying all of their stellar information here. I will quote this though.
Practically every popular resource divides cacáo into 3 primary varietals: Criollo, Forastero, & Trinitario; an overly simplistic & deeply flawed scheme, & by no means hard & fast distinctions because cacáo is notoriously promiscuous, engendering classification nightmares, & often plain guesswork. With so much genetic cross-pollination, hybridization, mutation, & recombination, it’s rare & increasingly difficult to find any pure forms. To adapt a thought from Immanuel Kant… out of the crooked timber of Theobroma cacáo, nothing entirely straight can be picked. And yet complex crosses are necessary in order to select for genotypes with fine flavor, high yield, & resistance to diseases/pests.
You may see a 4th general varietal mentioned, Nacional. I tend to fall into the class of folks who consider it more of a Primary Strain along with the following:
Amazon
Amelonado
Beniano
Bicolor
Contamana
Criollo
Grandiflorum
Guiana
Juruá
Nacional
Purús
The next step down in granulation are Cultivar Strains.
Amazonas, Bahia, Cacao Monka, Canoabo, Carenero, Catongo, Caucano, CCN-51, CCRP, Ceylan, Chuao, Chuno, Comum, Cumboto, Cuyagua, EET, Esmeraldas, Guasare, ICS, IMC 67, Indio Rojo, Java, La Red, Maracaibo, Matina, Merideño, Nicaliso, Ocumare, Pajarito, Pandora, Perija, Playa Alta, Porcelana, Rio Caribe, Sur Del Lago, Theobahia, Trinitario
Roasted vs Raw
I know there is a lot of information out there about the health benefits of chocolate, and I know some people like to eat cocoa in it's raw form for "maximum" health benefits. Personally, I do not recommend eating ANY cocoa raw. All commercial cocoa beans have been fermented by various yeasts and micro organisms, and are often open air dried. In addition, e.coli and Salmonella can be present on the surface of the husk. Proper roasting completely kills any potential surface contamination that may be present, makes them safe to eat and develops the flavors associated with chocolate. And proper, delicate roasting does not significantly reduce the health benefits of cocoa - after all, the benefits were originally found in finished chocolate, not raw cocoa beans. Keep that in mind.
There is even some debate as to whether the nutrients and various flavonoids are even nutritionally "available" in the raw form since roasting alters the physical structure of the cocoa bean and makes it easier to digest. If you do want to eat cocoa beans whole as a snack, go right ahead - just roast them first. And if you really don't want to roast them, please peel them.
Sorting
I strongly believe that cocoa beans should not be sorted for anything except foreign materials.
The very short version are my observations that
1) The look of a bean bears no correlation to its flavor, either good or bad.
2) Unpalatable flavors on their own can lend complexity and depth of flavor (think clove or all spice).
3) As beans preparation has become more sorted and pretty, flavorful dynamic chocolate have become more rare.
Why you should not sort in more depth.
If you are in doubt I suggest making two batches, one sorted and one not. Taste them blind and see what you think. Let science and observation be your guide.
Recipe Formulation and names:
To get you started, here are some basic windows for making different types of chocolate. Just don’t forget your total much always equal 100%. Our Formulator is helpful for that.
Dark/non milk chocolate
Cocoa nibs 60-80%
Cocoa butter 0-10%
Sugar 20-40%
Milk Chocolate
Cocoa nibs 10-40%
Cocoa butter 10-30%
Milk powder 10-25%
Sugar 20-40%
White Chocolate
Cocoa nibs 0%
Cocoa butter 30-40%
Milk powder 30-40%
Sugar 30-40%
The FDA regulates what certain types of chocolate are called when they are sold.
White Chocolate:
0% cocoa solids
More than 20% cocoa butter
More than 3.5% milk fat
More than 14% milk solids
Less than 55% sugar
Sweet Chocolate
More than 15% cocoa liquor (total of cocoa solids and cocoa butter)
Less than 12 milk solids
Milk Chocolate
More than 10% cocoa liquor (total of cocoa solids and butter)
More than 3.39 % milk fat
12% milk solids or more.
The U.S. Food and Drug Administration (FDA) states that dark chocolate, whether labeled bittersweet, semisweet, or dark, must be at least 35 percent cocoa.
There is a more in depth here:
Those rule only apply if you are selling your chocolate. If you are making you chocolate at home for personal consumption you can do whatever you wish as long as you hold to some basics that assure the recipe can actually be made.
There are two big rules in chocolate making.
#1 NO WATER
#2 Make sure you have enough fat in the recipe to allow sufficient fluidity to refine.
For #1 that just means no honey, syrup, etc. Chocolate is what is known as a non-Newtonian fluid and in this case, if you add water in any form, it stops being a non-Newtonian fluid so it stops being chocolate. Feel free to geek out about it here in our Viscosity Article.
For #2, it is notoriously hard to give exact answers but there are really good rules of thumb. Basically, most dark chocolate recipes require around 35% fat. There is a good margin of safety there. In some cases you can get down to 30% fat and all is good. If you dry all your ingredients you can often get away with even less fat.
On the other hand, milk chocolates often require upwards to 40% fat or more due to interesting chemical bonding that occur between some of the milk protein molecules that lead to a higher viscosity.
How much more cocoa butter do you need? I don’t know as there are just too many variables involved. What I suggest is that you add it empirically while you are making the chocolate and record your numbers.
At the end of the day, that is the real key to recipes.
Make it.
Taste and evaluate it.
Make an educated guess what is and isn’t to your liking and either add more of one or more ingredients to it (recording everything of course) or make it again and repeat the process.
Said another way, iterate, learn, iterate again until you are happy.
Our Formulator is helpful when you are contemplating changes as it gives you how much fat and various proportions that are in your proposed recipe.
Other ingredients
There are a large number of non-standard ingredients that can be added to chocolate for a variety of flavors and textures.
For ones that you want or need to refine in, I strongly recommend you do very small test batches to determine if they are even compatible.
Start with very small (<1%) amounts of essential oils and other strongly flavored ingredients.
For bulk ingredients like coffee and various freeze dried fruit powders start at 1-2% and work your way up.
Cocoa Bean Roasting
Cocoa Bean Roasting
Most cocoa beans that you will encounter for chocolate making are fermented, but are not roasted yet. Regardless of how hot the fermentation was, these are still refereed to as raw cocoa. The fermentation process does darken them up considerably and you may think they are already roasted, but the lack of an evenness in color and texture is the key to telling when they are unroasted. Roasting accomplishing a number of things.
It helps separate the outer husk from the inner bean and makes cracking and winnowing much easier.
It also virtually sterilizes the cocoa bean. This is rather important as the conditions in which cocoa beans are fermented are naturally full of bacteria, fungi and molds. There is a "quantifiable" risk of infection from unroasted cocoa beans. Roasting reduces this risk.
Various chemical reactions occur when cocoa beans are roasted and proper roasting is integral to good flavored chocolate. The vinegar smell from fermenting is driven off. Raw beans don't taste like chocolate. Roasted beans do.
Finally, for those of you who have read about the nutritional value of chocolate and cocoa beans, and worry that roasting destroys these nutrients, please remember that all of the research (to the best of my knowledge) has been done on fully roasted, fermented cocoa beans and chocolate. Sure, if you over roast or over process it, you may well loose some nutrients, but I personally take the nutritional benefits of chocolate as a benefit, not a goal. The flavor is my goal at Chocolate Alchemy.
Whole beans or nibs? Ignoring the fact that no roaster out there will roast nibs, the biggest issue with roasting nibs is the danger known as tipping in coffee. The uneven nature of the nibs can lead to over roasting the edges because they dry out so fast and introducing defects that can lead to harsh acrid flavors. Whole beans roast a whole lot more predictably. Stick to those if you can. Plus, we are mostly discussing how to use cocoa like coffee, and as we will get to, using the whole bean (ground up) makes a better beverage the just nibs.
That said, if you do want to roast you own nibs, you’ll have to stick to roasting in an oven and treating them a bit more gentle that you normally would lest you damage them.
Options for Home Roasting Cocoa Beans
There is a ton of information out there on the web about roasting coffee at home. If you can roast coffee at home (I do), you can roast cocoa beans at home. Sweet Maria's is a great source for coffee roasting information and some supplies.
Unlike coffee, which roasts anywhere from 400-460F, cocoa beans need more gentle treatment. In that there are no hard or fast coffee roasting rules, the same holds true for cocoa. In general though, they can be roasted from 5-35 minutes anywhere from about 250-325 F. To do this, there are four options, but only two are feasible:
Coffee roaster (the Behmor 2000 is our pick)
Oven roasting
Air roasting (not feasible)
Drum roasting with a gas grill (not feasible).
With all of the methods, the basic technique is the same. Subject the cocoa beans to a high temperature initially, slowly reduce the temperature and stop the roast when the beans are "cracking", but well before they start to burn.
The initial high heat lets the beans gain some thermal momentum and allows for a good separation of the husk and nibs as the beans expand. You lower the ambient temperature so as not to burn the outside of the bean, but let the interior continue to roast. Finally, the cocoa beans will start to pop and crack as water vapor is explosively released. This happens when the cocoa bean temperature is around 250 F. This is your sign you are just about done roasting. Experience and smell (you don't want any burned smell) are the key indicators when the beans are roasted. Once the cocoa beans are roasted and cooled, try separating the husk from one. If it comes off easily, you did well and the beans are fully roasted. Likewise, taste some. They should have a nice cocoa flavor, with no raw or burned flavors.
Generally I like to have a roast take 15-20 minutes, regardless of method. Under that amount of time and the beans seem to retain a raw unfinished flavor. Over that and they start to taste baked and sort of flat.
Drum Roasting
If you are going to be serious about roasting cocoa beans at home, and/or making chocolate, this is the method I recommend. It has the most flexibility, the most consistency and gives the best overall product for the least amount of work.
In this category there are three ways you can go. Going from simply to complex they are:
Home made, using a gas grill.
Stand alone home coffee roaster
Commercial coffee roaster.
All have their advantages and disadvantages.
Gas Grill
In the early years I used and recommended this method. It worked well enough but takes quite a bit of user competence and is difficult to make solid recommendations since you basically have to construct it yourself. Many home coffee roasters use the RK Drum but I’ve found they don’t do great with cocoa due to the large mixing vanes. Unlike coffee that has predictable audible cues, 1st and 2nd crack, cocoa doesn’t have this so unless you go through the not insignificant job of modifying the RK Drum you will be roasting mostly blind. I mention this mostly out of posterity.
Home Coffee Roasters
There are only two off the shelf coffee drum roasters that I know of that can do a reasonable amount of cocoa beans on a small scale. The Behmor 2000 and the Hot Top.
Between the two, there is just really isn't any contest. The Hottop will do 6-8 oz of cocoa, maybe 12 oz if you push it. I don’t recommend it.
The Behmor 2000 roasts 2-2.5 lb. I suggest not trying to roast less than that. Using it is very simple.
Load 2 - 2.5 lb of cocoa
Roast on Profile P1 for 18-22 minutes, stopping when you smell the characteristic chocolate brownie smell.
Cool
In the same way you can use a Behmor 2000, you can use pretty much any commercial drum coffee roaster if you have the use of one. There is no cross contamination of taste either. I roast coffee and cocoa in the same roaster and both taste as they should. I personally use an old Royal #5 which runs off propane and can handle 15 lb of coffee. But because cocoa roasts so much cooler than coffee, I routinely roast 30-35 lb of cocoa.
As a rough guide pre-heat to 350-400 F, and drop in the cocoa. With a thermometer in the bean mass, the temperature usually drops to the low 100's. I typically roast, adjusting my heat input, to reach 250-260 F over about 13-18 minutes. Yours of course may vary, but as a bench mark, for me, the beans just start to crack in this temperature window.
How to use a Professional Coffee Roaster for Cocoa
None of that above really tell you how to roast cocoa, only the equipment that can be used.
Let’s get into the weeds of how to roast. I’ll grant it is a learning curve, but the benefits are numerous.
Profile Drum Roasting
I have developed a method of Profile roasting cocoa that is remarkable similar to the profiles used by coffee roasters. You have a drying, flavor development and finishing phase.

In lieu of repeating (for now) what I have written in great detail, I recommend you go read Ask the Alchemist 200 through 206. I go into each phase in great detail and how you can adjust each one to reliably alter the flavor profile of your chocolate to suit your tastes.
I want to make it VERY CLEAR this is about DRUM roasting and can NOT be applied to oven (even convection) roasting.
Oven Roasting
That I am aware of, virtually everyone has an oven in their kitchen, and you can roast cocoa in it. Unfortunately it is not quite as simple as baking a batch of brownies.
Over the years I have written a lot about the difficulty of roasting in an oven. I’ve settled on two moderately robust methods that I outline below as Option 1 and 2. If you care to see why I recommend drum roasting, feel free to dive in.
Issues with long and low roasting.
In general, if you try oven roasting, you will start hot (350-400 F) for a short amount of time and slowly lower it to your target temperature (275-300 F). This is for about 2 lb/1 kg of beans. The more you are roasting, the higher your initial temperature can and has to be and the time will probably be a little longer.
Option 1
Remember, you want to roast the cocoa beans, not bake them. This is how that looks:
Whole cocoa beans
375-400 F 5 minutes
350 F 5 minutes
325 F 5 minutes
300 F for 10-15 minutes or until done*. Look for the aroma of baking brownies and/or pops. Both are good indicators you are there.
*For an even better indicator of a complete roast, use an infrared thermometer and roast until the beans show 250-260 F. Make sure you stir the beans before taking your reading so you don't have a high bias.
If you have nibs, you both can and need to take them a little more gentle.
350 F 10 minutes
325 F 5 minutes
300 F 5 minutes
275 F for 5-10 minutes or until done (again 250-260 F IR thermometer reading)
That is really it. Of course, there are LOTS of other ways you can do this. I know some people roast at 250 F (or even 220 F) for 45 minutes to an hour or even two. I am personally not a fan of this style, but you may be.
Option 2:
I find this procedure works pretty well and is a little simpler than the method above, having fewer adjustments. It is moderately predictable, repeatable and although not as dynamic and controllable as a drum roaster, does a good job.
You will need an IR thermometer.
Roast 2 lb of beans.
Preheat your over to 350 F.
Place your cocoa beans in a single layer on a baking sheet and into the oven.
Stir the beans at 5 minutes and check the temperature.
Continue roasting until the surface temperature reads 205-215 F (it may well vary across the beans).
At that point, turn your oven down 10-15 F above your target end roast temperature (EOR)
If it is 255 F then add 15 and set your oven to 270 F and continue to roast without stirring every 5 minutes until approximately 255 F.
Again, there will be variation but the beauty of this method is having turned the oven down it is difficult to over roast. If you do find your roast is progressing too fast, adjust accordingly, starting at 325 F and/or changing your target to 265 F. Overall you may well roast 30-40 minutes. The important part here is to get good momentum going in a hot oven and then basically coasting to finish.
What about <insert name> roaster?
There are a number of small home coffee roasters out there and I mention them here for completeness. Spoiler, none really work for roasting cocoa.
All Fluid bed Air roasters including but not limited to the FreshRoast, Poppers, Sonoffresco, etc.
Pros: None
Cons:
The won’t lift and fluidize cocoa beans.
Nibs tend to ‘tip’ or have their ends scorched.
Nibs can fall through the holes at the bottom.
Capacity tends to be quite small. In some cases if you have temperature control (most don’t) you can control tipping but the small amount you can roast isn’t usually worthwhile other than for novelty sake.
GeneCafe:
Pros:
Not many. Beans tend to not mix well due to their size.
Nibs are ok.
Cons:
Capacity is low
The airflow tend to strip flavor from the nibs and beans.
Mixing is subpar.
No bean temperature probe
Hottop
Pros: None
Cons: Beans tend to jam and nibs fall through the drum
Allio Bullet
Pros:
Has temperature probe
Cons:
Whole beans jam and nibs sound crunchy and might damage the roaster
Expensive
Cooling your cocoa beans?
Whatever method you use for roasting, it is important to cool your beans in a reasonable amount of time so they don’t keep developing. Anywhere from 5-15 minutes is just fine.
Cocoa Bean Cracking and Winnowing
Cocoa Bean Cracking and Winnowing
To make chocolate, this husk must be removed from the cocoa bean.
The goal here is to crack the cocoa beans into pieces and then separate (winnow) the husk from the nib.
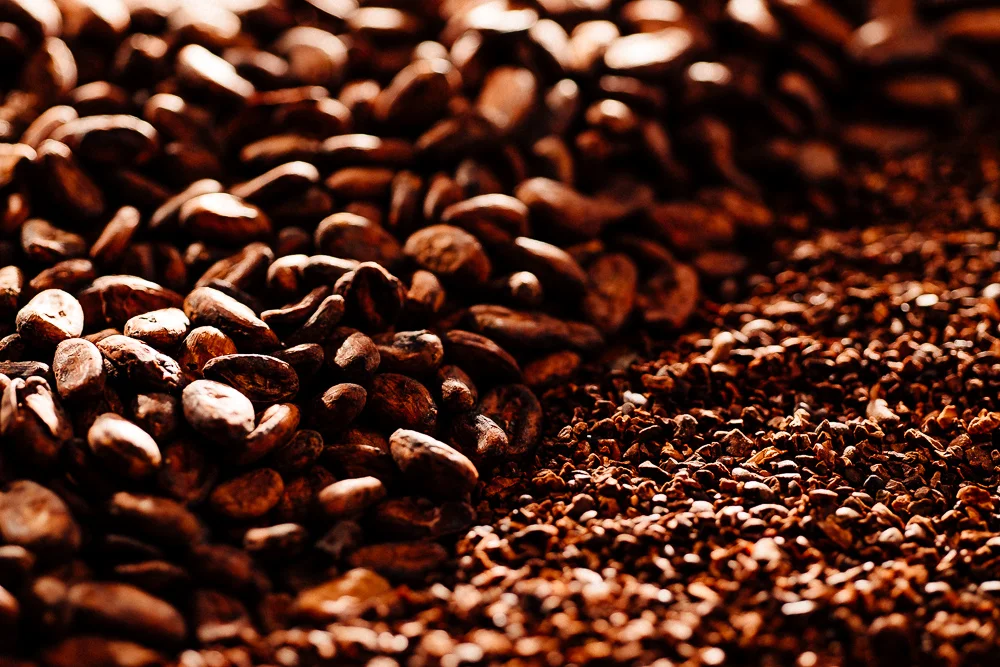
The goal is to go from whole beans to nibs.
Cracking
It can be done by hand, but this is rather tedious and not very approachable. Like most things, there are many things that do not work, and only a few that do work. Here's a basic list of various ways you can and can not crack cocoa beans.
Do not work for Cracking:
Meat Grinders
Food processors
Grain mills
Coffee grinders
Works OK, but not great or not feasible
Hand peeling
Corona type
Works Great
Champion Juicer w/o bottom screen (see it attached to the Aether below)
Deluxe Cracker - a stainless steel and brass cracker build for the Aether for extended lifetime and faster cracking.
After proper roasting, you will notice the outer husk is much looser and easier to remove. It sounds simple enough but just a few years ago, there were no equipment that worked off the shelf. I contacted two companies to see if they had any interest in modifying one of their products to handle cocoa beans. Crankandstein worked with Chocolate Alchemy and the Crankandstein Cocoa mill was born - a heavy three roller, dual drive, set gap mill. Sadly they decided to stop making them.
At this point I can recommend the Champion Juicer for cracking both raw and roasted cocoa beans.
Winnowing
After your beans are cracked, you then need to separate them husk and nib. In exactly the same vein as cracking, there are a range of things that work and don't work. In most cases you should expect to recover about 75-80% of nibs by weight.
Does not work well:
Champion Juicer - years ago I proposed separating (not really winnowing as no air is involved) the husk and nib as you grind. I technically will work if you are doing small 1-2 lb batches, but it is VERY hard on the Champion and the cocoa and not something I generally recommend any more. It's fine for a final filter (see below) but not the initial separation.
Works ok, but not great:
Long tube PVC winnowers. There are various permutations of these winnowers. Some have one fan, some have two, some have speed controllers, some have valves, most (maybe all) are hand feed. Most work well for seeds, but none work simple and easy with a single pass and without a LOT of hands on user intervention.
Hand peeling - 1 lb/ hour. 'nuff said. Well, I will say more. Works fine, but is slow, tedious, hard on the hands and not approachable.
Works Good:
Bowl/Blow dryer Method
Works Great:
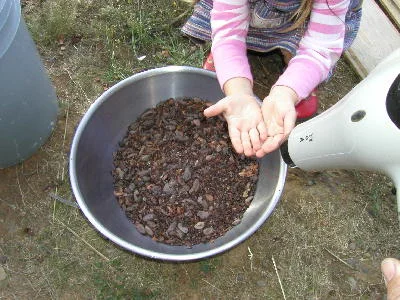
Winnowing the cocoa beans with a hair dryer
Bowl/Blow dryer Method
The goal here is to blow the lighter husk away but leave the heavier nibs. It's a bit messy, and not good of indoors, but does a fine job. I recommend wearing a dust mask. There is definitely user technique involved. Once you find that technique, you can expect to do about 0.75-1 lb/minute.

3-4 minutes later, just over 3 lb of Homemade Cocoa Nibs
Use any old hair dryer, although a small shop vac works great. Come in high and stir with your hands (or those of your apprentice, you can see my daughter Logan helping below). You will soon work out how close the blowing air needs to be to blow the husk away, but not the nibs. After a few minutes, you should have a nice bowl of nibs ready for the Champion Juicer or Melanger.
Don't fret too much about a few pieces of husk here and there. The industry standard is less than 1.5% husk. That's actually quite a lot. This method can easily get you under 1%. The screen in the Champion will remove those few bits if you are making liquor, and actually make a very nice filter bed if you go that route. And otherwise, nibs can go straight into your Melanger.
Aether Winnower
After many years of hand winnowing via the above method, and seeing that no one else was coming up with any good versions of compact, simple, reasonably priced winnowers, I finally invented the Aether Winnower. Currently there are two versions. The full sized Commercial Aether, and the smaller table top Sprite.
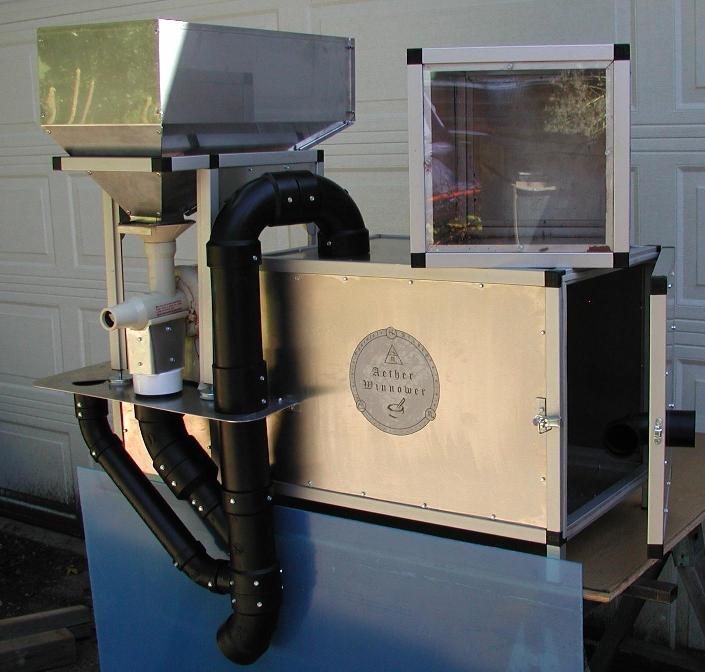
You can find more information for the Aether here:
Sylph Winnower
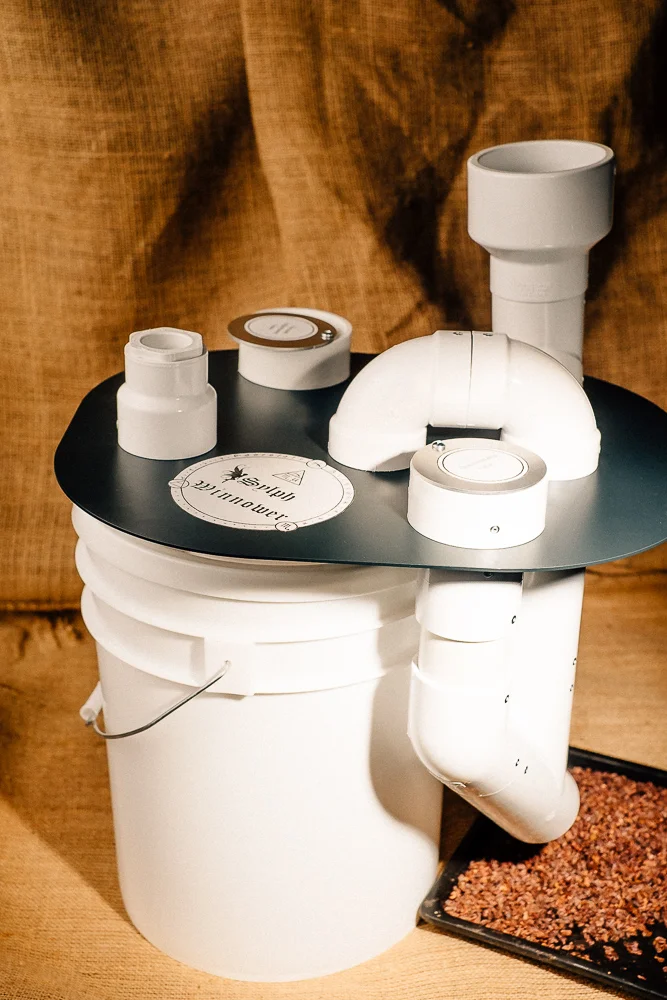
Sylph Winnower

Here is a nice overview of both the blow dryer method and using the Sylph.
And likewise more information about doing it yourself (DIY)
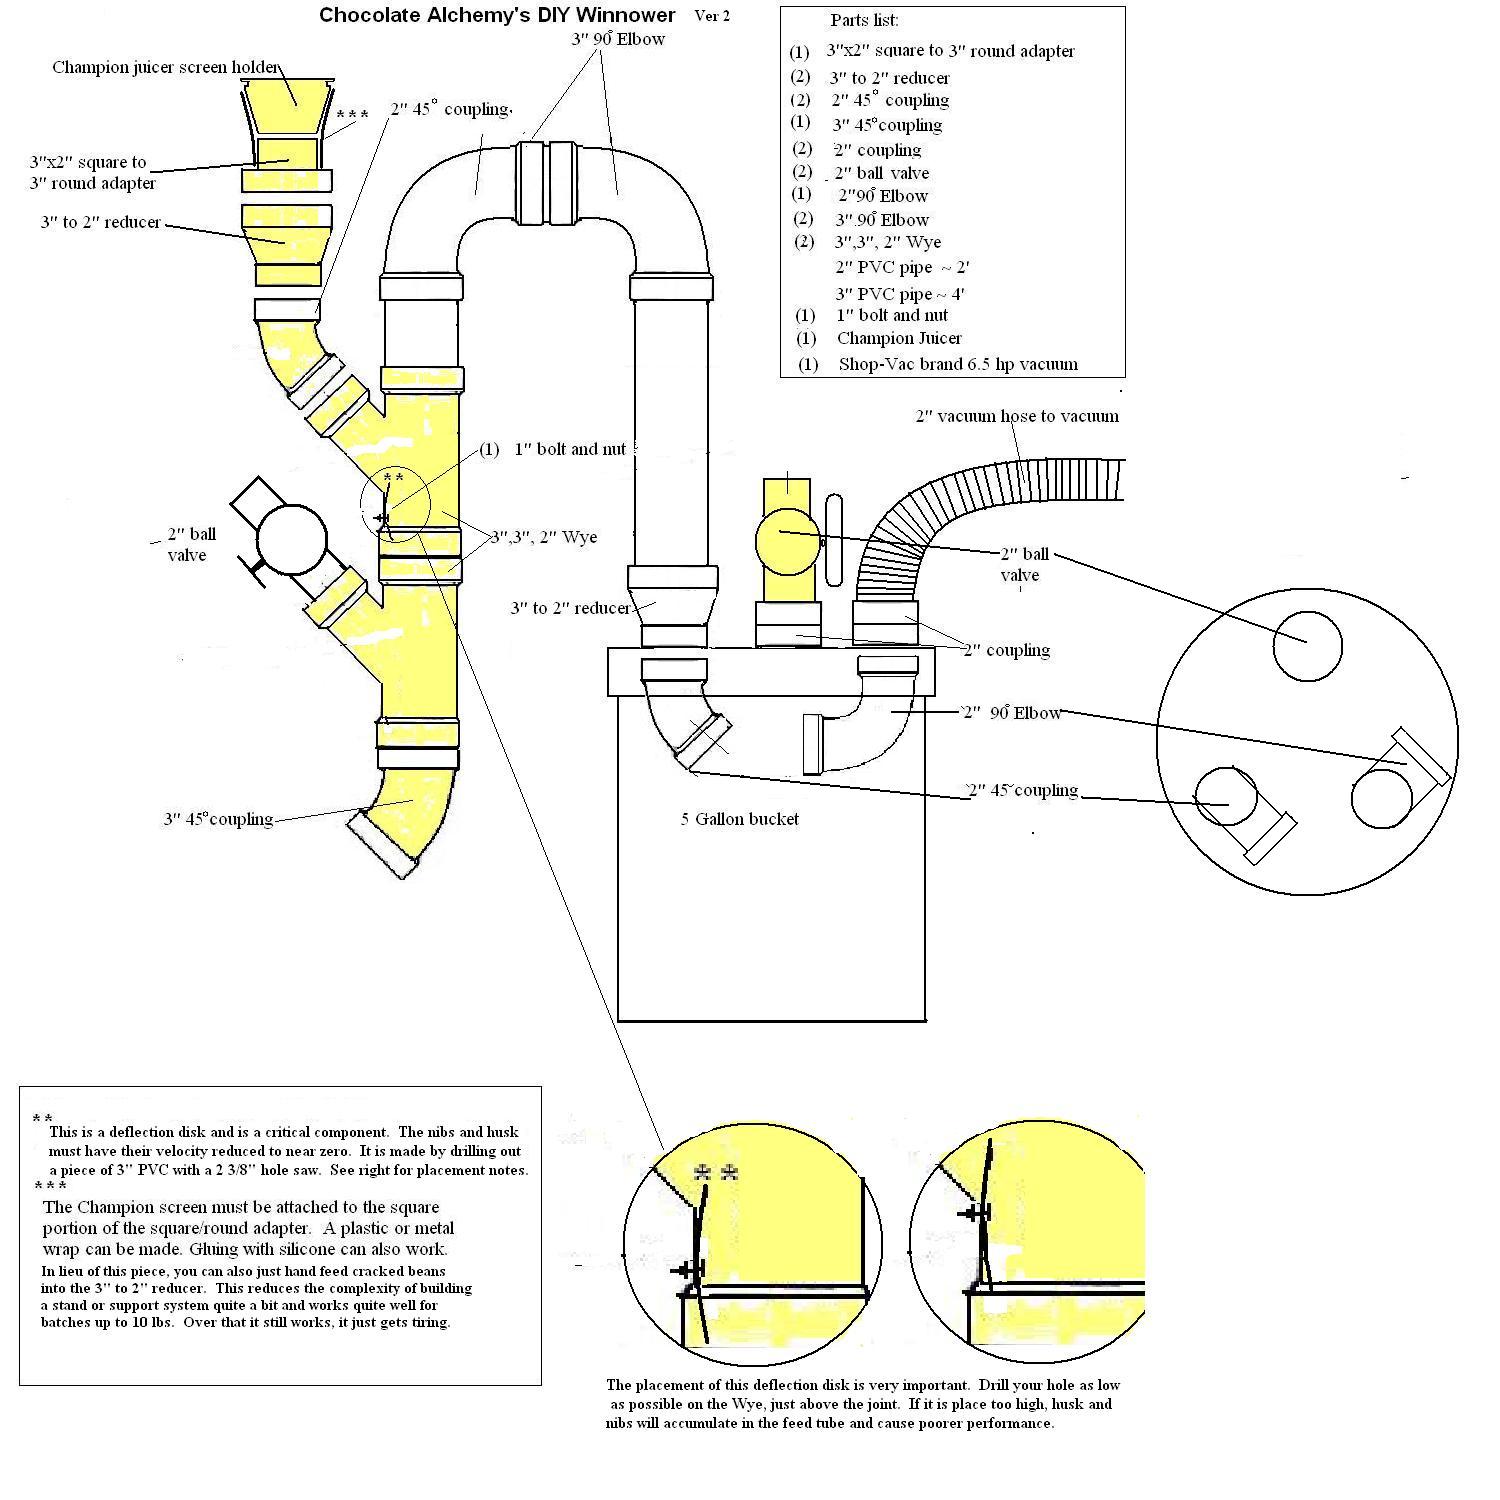
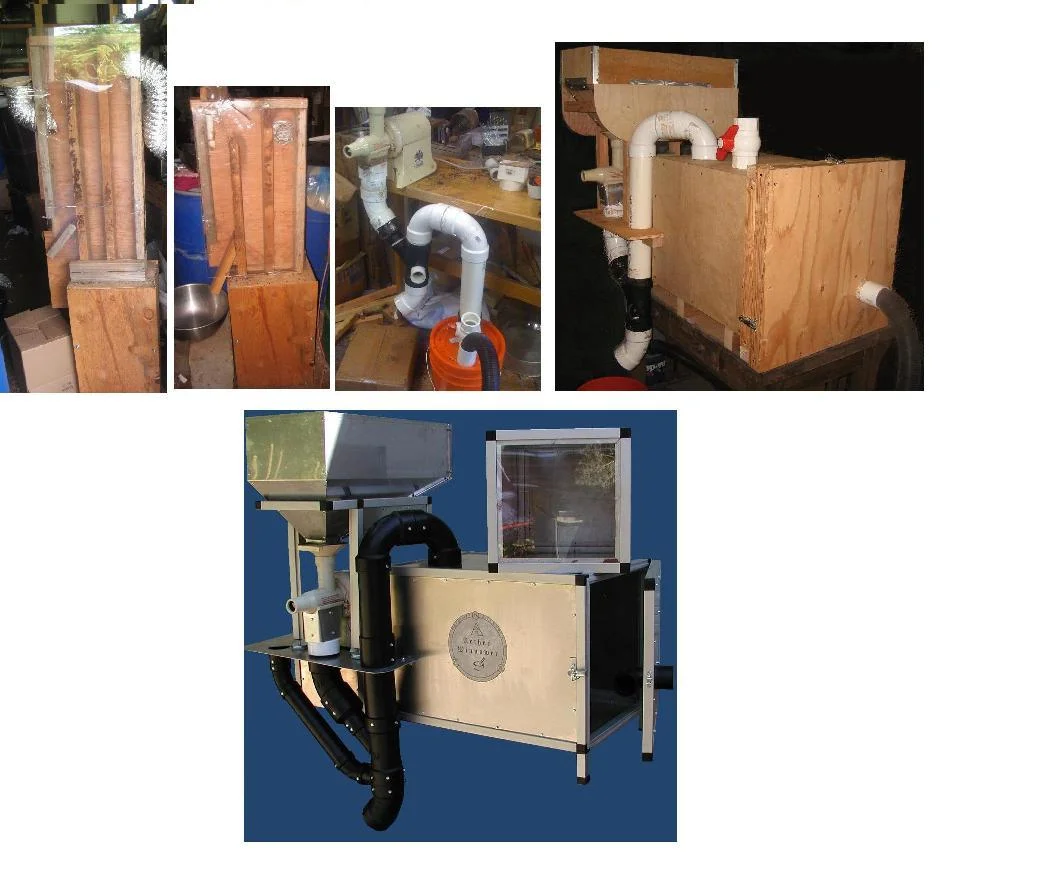
Chocolate Alchemy’s DIY Winnower
Chocolate Alchemy's DIY Winnower Part 1
Chocolate Alchemy's DIY Winnower Part 2
Chocolate Alchemy's DIY Winnower Part 3
I need to point out that those were the first posts and plans, and as you can see in the photos above, the design has changed slightly. Below are MUCH better.
What I need to point out is it is a hybrid of both winnowers, neither quite full sized Aether, nor smaller Sprite. It uses the larger PVC of the Aether, but the basic bucket configuration of the Sprite. It shows no supports, and has purchased ball valves instead of the slider valves I have on the working models. Most important though it has the Discriminator air flow in the 'correct' place, namely fully under the nib/husk entrance, instead of somewhat adjacent to it as in the first design.
You may be saying to yourself, 'self, isn't that a PVC winnower that above he said didn't work well?'. And I will answer, no. This has three critical differences:
There is no long drop tube. Instead there is a deflector to stop the velocity of the nibs and husk, which was the only reason for a long tube.
There is a Discriminator air flow below the nib/husk entrance. Honestly I am not 100% sure why it works from a physics standpoint (although I could ramble and give some semi-half-baked ideas, but I won't), but I do know it works with it, and does not work without it. 'nuff said.
It's simple to operate.
Eventually there will be both full plans available. But there is more than enough information to make your own, and I will always answer questions if you have them.
Finally, for those that like to see the progression of an invention, this is the Aether Winnower start to finish.
Grinding
Grinding
Grinding
Expect a Mess!
After your cocoa beans have been roasted, and cracked and winnowed , the next OPTIONAL step in chocolate making is to grind them until they liquefy into cocoa liquor.
Expect a MEss!
What does not work:
I have found many pieces of equipment that just are not up to this task. To name a few, General food processors
Vita-Mix
coffee grinders (burr and blade)
meat grinders (manual and electric)
mortar & pestles (we are talking alchemy here after all)
None are up to the job.
I have heard that a Cuisinart juicer attachment can work, but most juicers will not work. None of the slow and cool juicers will work.
What does work:
The Champion Juicer. It grinds and separates any remaining husk rather nicely. It does take a few of passes, and care must be taken not rush, as the cocoa mass can become too hot, and flavor can be impacted. I have successfully done a 4 pound batch of cocoa beans in about 30 minutes. The only real downside aside from the time and mess is you will lose about 6 oz of liquor in the grinding hub/snout so if you only put in 8 oz, you are down to 2 oz. It is much better to do 2-3 lb so your loss is minimized.
How To use the Champion Juicer
Feed the nibs into the Champion (with the fine screen on now) a handful at a time, using just enough pressure on the tamper to feed the nibs in, but don't bare down - it will just overheat the motor. After two or three handfuls you should see cocoa liqueur coming out of the bottom screen, and whatever husk is left coming out of the spout. Put all of your cocoa nibs through and collect the liqueur. Don't put it through the Champion again as it does not really do anything and just makes a mess.
On the other hand, you should now pass the husk and cocoa liqueur that came out the spout back through the Champion. Each pass will allow more and more husk to be separated out until only husk is coming out of the spout. If you have winnowed well, you may not have any come out by the end.
It is no more complicated than that.
Conching and Refining
Conching and Refining
Conching & Refining
At this point you are in the home stretch and there is very little you have to know or do for success. Everything up to this point, the bean selection, the roasting, winnowing has set you up for finishing your chocolate. I’ve found a trend in making it way more complicated than it is and it need not be. If you want to just get right to it, feel free to jump there (link to running the melanger).
To that point, I have noted that there tends to be some confusion when people talk about refining and conching chocolate. It probably does not help that I have even put the two processes on the same page. You need to understand that they are two separate processes with two different goals in mind. Sometimes refining and conching can happen at the same time, but they do not have to and often you do not want them to.
Refining: The process of reducing the particle sizes of both cocoa solids and sugar crystals in finished chocolate. The goal is somewhere in the range of 15-25 microns. Your tongue loses its ability to determine texture and grittiness at around 30 microns. Under about 10 microns the chocolate can get gummy.
Conching Conch comes from the Spanish word concha, which means shell. The name "conching" arose because the original vessel used to hold the chocolate was shaped like a conch shell. It involves a process of heating and aerating chocolate to both introduce oxygen and to remove unwanted volatiles.
What doesn’t work:
On a weekly basis I get asked if there is another less expensive way to refine chocolate at home. Trust me (hopefully you do), if I knew of one, you would know about it. Although the list is by no means conclusive, different things we have and failed to use as chocolate refiner are as follows:
Ice cream maker
VitaMix
Cuisinart
Blenders (many makes and models)
Juicers (including the Champion, which is the only juicer we know of that will liquify the cocoa nibs, but still doesn't touch sugar)
The oh so romantic Mortar and pestle
Metate
Ball mills (homemade they were just too expensive)
Rock tumblers (with steel shot)
What does work:
There are three ways to refine chocolate, and only one is viable for the home chocolate maker.
Melangers both refine and conch. Their primary job is to refine the chocolate by grinding it between spinning granite wheels. Conching happens enough because the grinding create heat via friction and the chocolate is somewhat aerated. Fortunately for us, it happens naturally and to the right degree. It is difficult to over refine and over conch in a melanger.

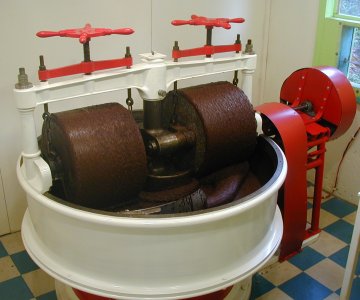
In a nod to history, Chocolate Alchemy brought melangers to the bean to bar world before there was even a bean to bar world. We worked with Santha (now Spectra) to convert Indian wet grinders into what we know know as melangers. The Spectra 11 is the melanger we offer and support. You’ll notice, it looks a lot like a commercial old style Melangeur. That similarity is what got the whole ball rolling.
Ball mills are another way refine chocolate and are kind of ingenious. A bunch of very hard balls are placed in a container along with what you want to grind. Then either the whole thing is rolled (rock tumblers are basically ball mills) or vanes are put in and the balls are stirred that way. Currently there are no small scale ball mills that come anywhere close to affordable.


Roller mills. They are sort of a different version of the grain crackers turned cocoa cracker I talked about here. Their main difference is that instead of having a gap between the rollers of 3/16” it needs to be 100 times closer and although that might sound easy (you just push them together right?) it is devilishly difficult. TANSTAAFL. To get rollers that close and not move apart when the chocolate is going through them requires a LOT of heavy and very expensive metal to hold it in place. Once again $$$$$$.
I go into a bit more depth on all three of these methods in this Ask the Alchemist article.
Conching
Here is what you need to know about conching.
1) There are no small scale conchs, so the question of whether you need one is a completely moot point.
2) The only reason you might need a conch is if you are using a ball mill or roll refiner. If you are using one, then you will need to get a small scale conch and they are available.
3) Reducing the pressure on the Spectra 11 or any melanger does not turn it into a conch and is not conching. Because there is no pressure, there is no friction, so there is no heat, so there is no conching.
4) Melangers both refine and conch and are all you need.
So, how do you use the Melanger?
There is a lot of misinformation out there and people get into the weeds of details that simply don’t matter.
So, how do you use the Melanger?
The TLDR is to put everything in the melanger, taking care not to stall it by adding things too fast, and let it run 24-48 hours until you are happy with it.
Details
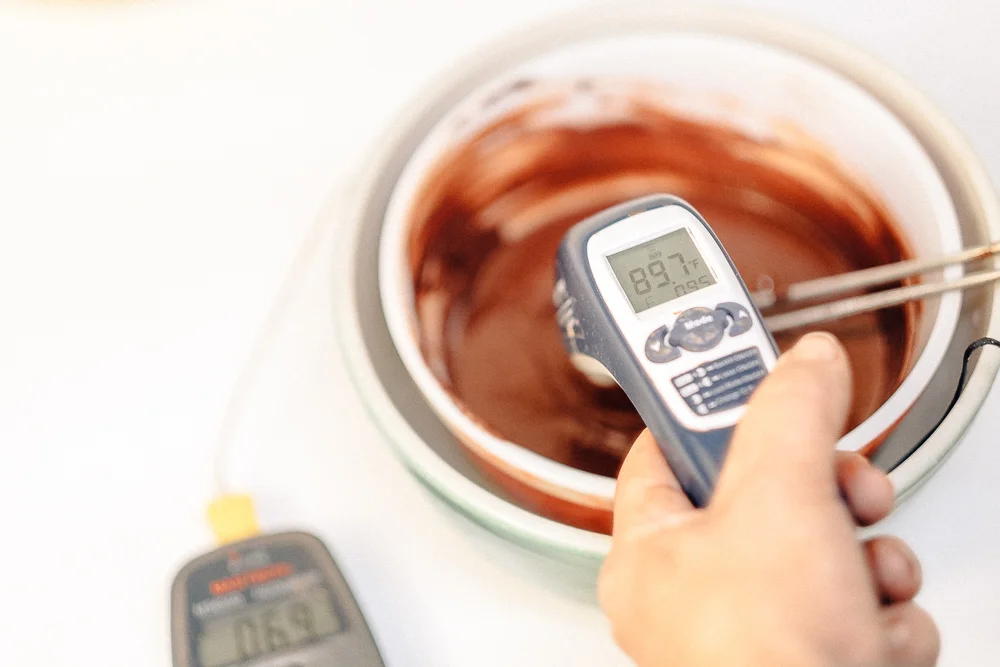
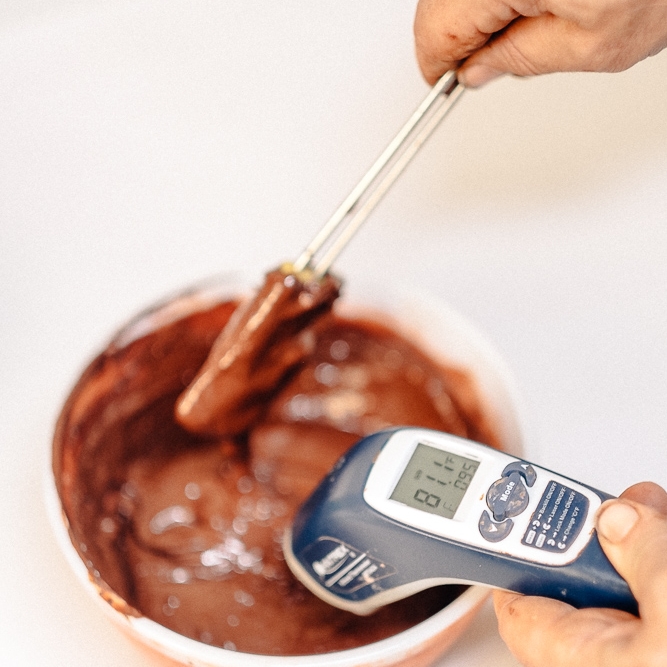
Pre-heat the bowl and rollers. Don't go over 150 F as the epoxy can fail, or worse, the plastic can melt. Put everything in place on the melanger and tighten the tension cap a turn or so.
Melt any cocoa butter you are using, anywhere from about 120 F on up to 250 F, and add it.
If you are using cocoa liquor, melt and add it to the melanger.
If you are using nibs, heat them to 120-150 F and add them in small handfuls, giving the Melanger time to grind them down. Add more as it gets smooth.
You can add your pre-heated sugar, milk powders and any other ingredients at this point too.
The goal in all this pre-heating is to have the soon to be chocolate over the melting point of chocolate, plus a little.
Once everything is incorporated, tighten the tension cap down until it is fully tight.
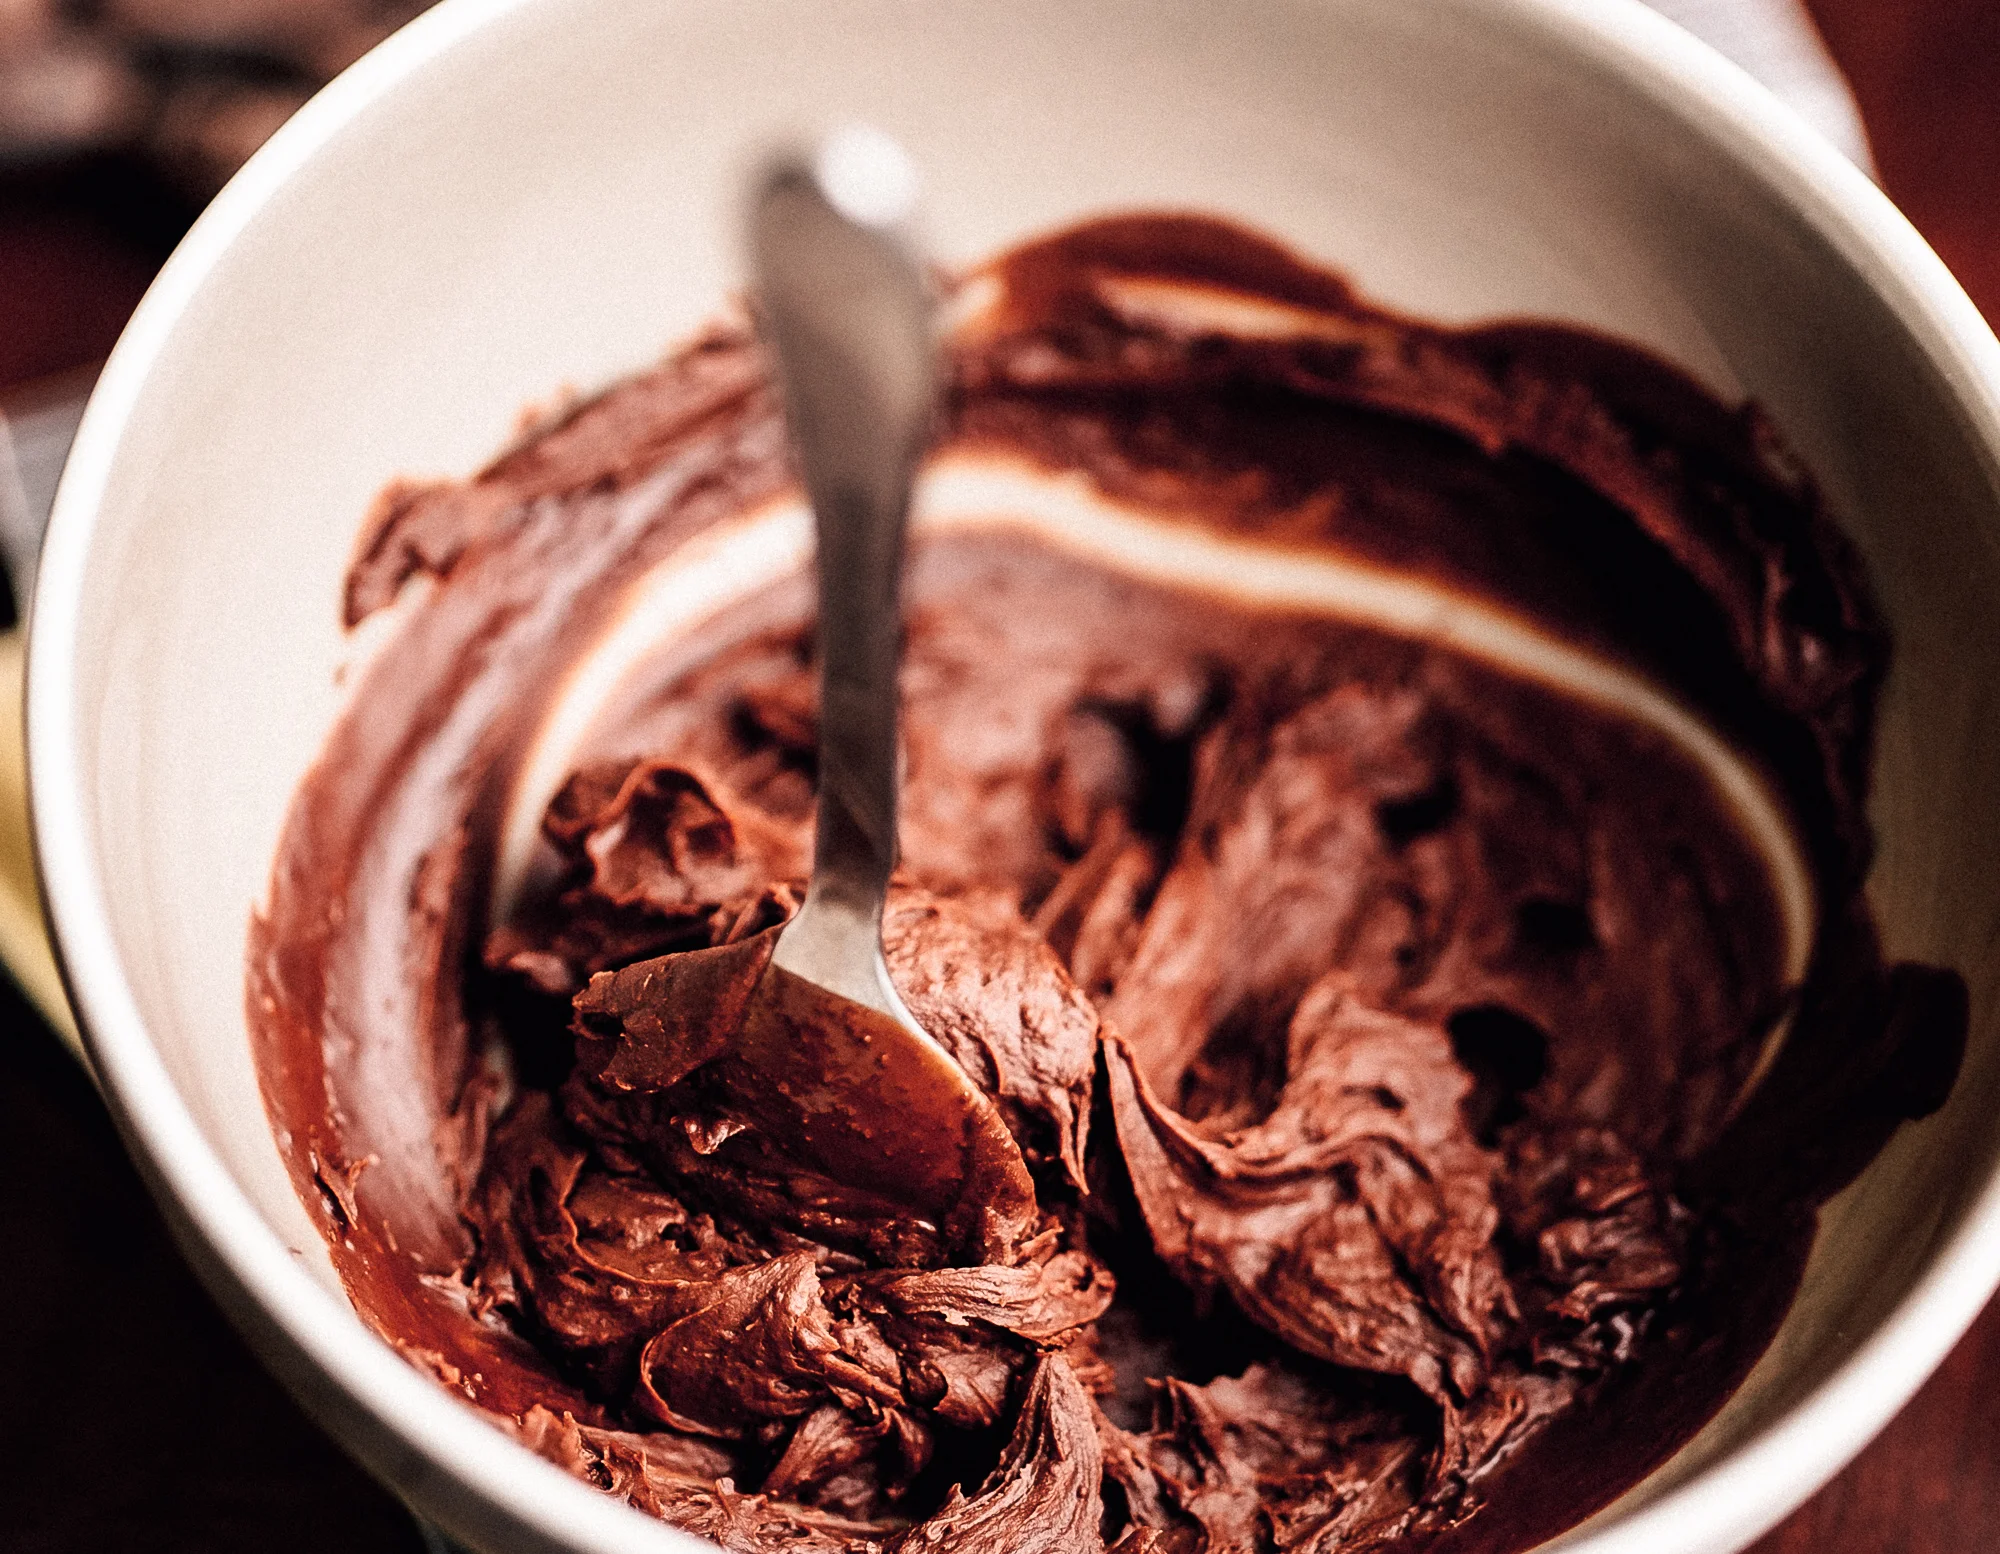
Refine the chocolate 24-72 hours. Less than that and there might still be sugar grit and over that, while not hurting anything, is rarely doing anything productive.
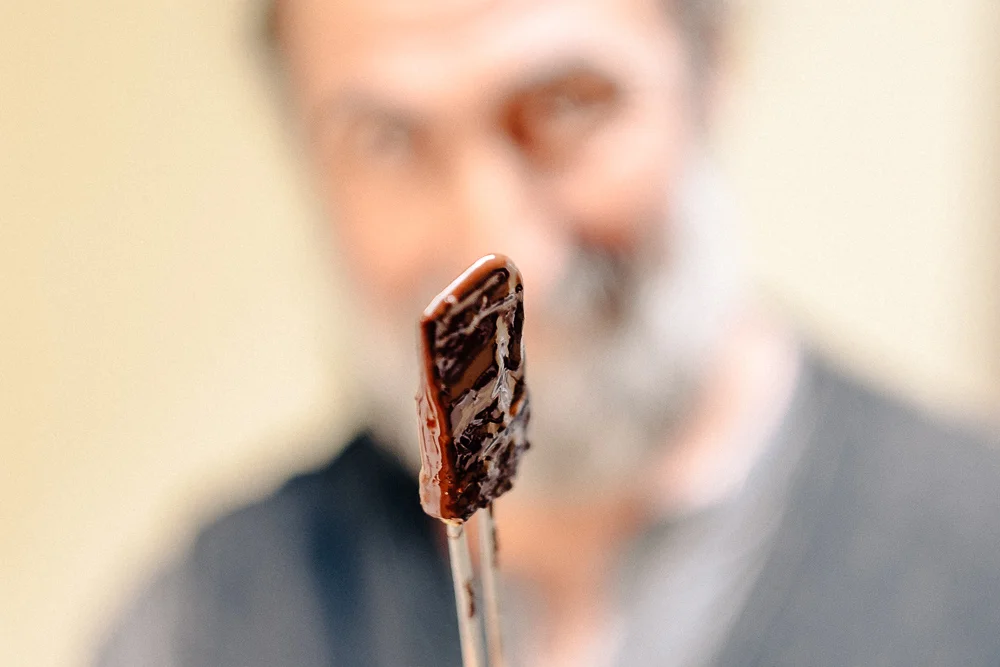
Stop refining when it is smooth and tastes like you want. It is no more complicated than that.
You can either temper it immediately or store it for later tempering. If you don’t temper it, it is going to bloom and look pretty unsightly. It has not gone bad.
Is my bloomed chocolate ruined?
Important information
Do not add ANY water based ingredients to your chocolate in the Melanger. The chocolate will seize and you can damage your Melanger.
Make sure you room is warm enough so the chocolate does not solidify. Above 70 F is warm enough due to the heat generated by the friction of refining.
What you don’t need to worry about
There is no need to pre-grind the sugar or nibs. It might take an hour off the refining time and in the long run, it is more hassle than it is worth.
It does not matter when you add sugar. I’ve certainly know about people having strong opinions whether to add it immediately, at 12 or 24 hour and after exhaustive controlled testing I never found any difference in the chocolate, either good or bad.
Having the tension on the melanger anything less than full pressure. People think reducing the tension is conching. It is not. See Above for why it isn’t.
Refining too long. In theory you can over refine chocolate but it takes a combination of many, many days and a very small amount of chocolate.
Using a measurement tool to see if the chocolate is fine enough. You don’t need it. Just use your mouth. It is the best tool you have.
Aging your chocolate. Chocolate can change slightly over time and in some cases, less than ideal tasting chocolate can taste better. Chocolate isn’t wine or cheese where aging is critical.
What temperature the chocolate is. It won’t naturally get too hot and I’ve already mentioned about making sure it is not so cold it solidifies.
If you need to stop the refining, just do. It will not hurt a thing. Just put the bowl, rollers and chocolate into a warmed oven (about 150 F, with the oven then turned off) and let it set overnight. It will often still be liquid in the morning and you can just restart the refining. If it does solidify, just turn the oven on about 150-175 and melt the chocolate.
Tempering and Molding
Tempering and Molding
Tempering and Molding
Why temper chocolate? It is what gives the chocolate bars you eat that finished glossy, shiny appearance and that nice snap when you eat it.
If you don't actively temper your chocolate, you might get lucky or you might not.

Untempered
-Unstable
-Matte
-Melts easily
This is of a piece of chocolate that is not tempered. It has just a matte appearance, is soft and melts readily if you try and pick it up. After a couple of days untempered chocolate tends to "bloom".
Bloomed
-Coarse
-Unstable
This is Bloom. It still tastes fine, but I find the texture of bloomed chocolate a little odd. Kind of coarse.
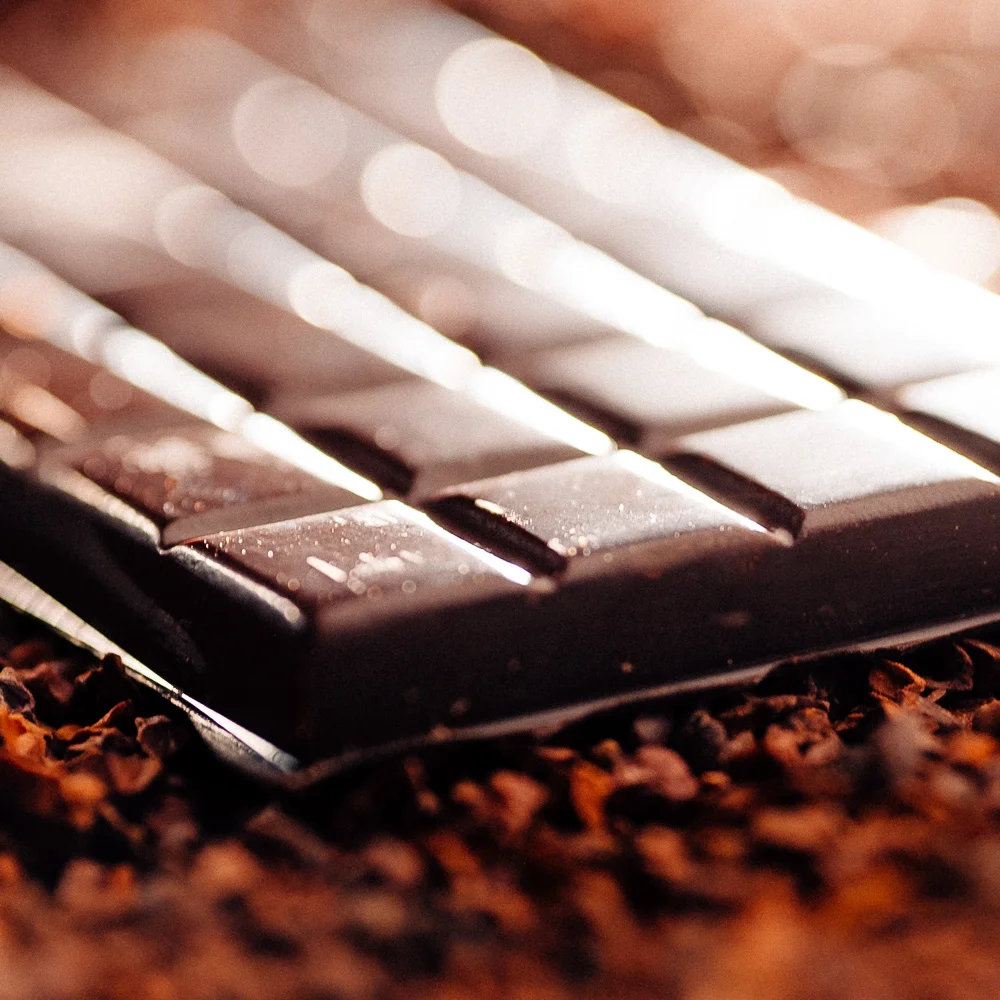
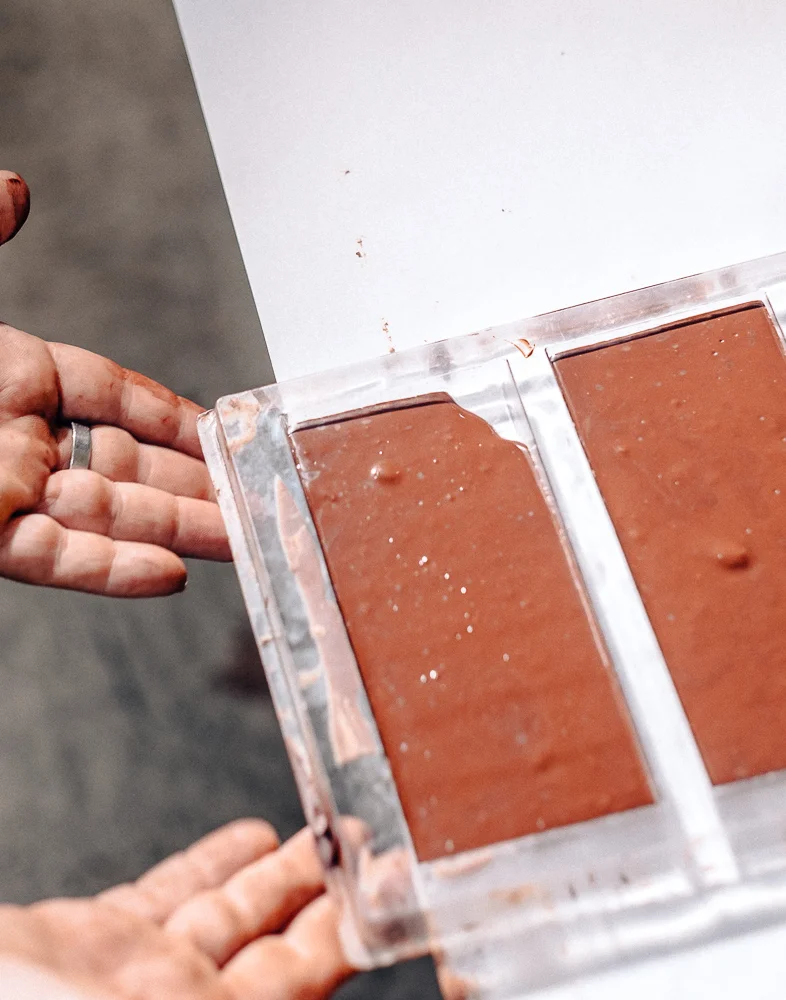
Tempered
-Stable
-Shine
-Snap
Finally, this is tempered chocolate. It has a nice shine, snaps when you break it, and does not melt as you are trying to pick it up.
Tempering involves bringing your Alchemical chocolate creation to a temperature at which the cocoa butter reaches its most stable form—which conveniently is a form humans like to eat and humans eating our chocolate is why we make it, but also why we learn the dark art of tempering.
Related Reading
In case you ever wondered what is actually happening inside your chocolate during tempering.

A few words about moisture and chocolate
Chocolate will crystallize (incorrectly) if any moisture gets in it. When tempering chocolate, you must keep your chocolate dry at all stages, after all, you just spent days refining it to remove the water.

Just look what a little bit of water can do!!! If you really get into making chocolate, it might be worth it to consider purchasing a chocolate tempering machine although I personally prefer the hands on process. These appliances take much of the guess work out of tempering.
How to Temper Chocolate
There are lots of ways to temper chocolate and they are all over the internet. And the details can vary quite a bit.
Here are a few basics that everyone should know that hopefully lets you relax about some of the details
You can temper over and over. If your chocolate blooms, it is not ruined. Just melt it again and start over.
You may see you need to melt your chocolate anywhere from 100 F to 135 F. Anywhere in there will work.
You will not burn your chocolate even if it gets above 160 F. Many milk chocolates refine that hot. What is important is that you use a double boiler to heat your chocolate. Heating chocolate directly in a pan over heat can indeed burn chocolate because the surface of the pan, even on low, can get above 300 F.
I recommend tempering in bowls. There is nothing special about using a machine, or a marble slab. I find I have more control with bowls and can work without rushing.
An Overview
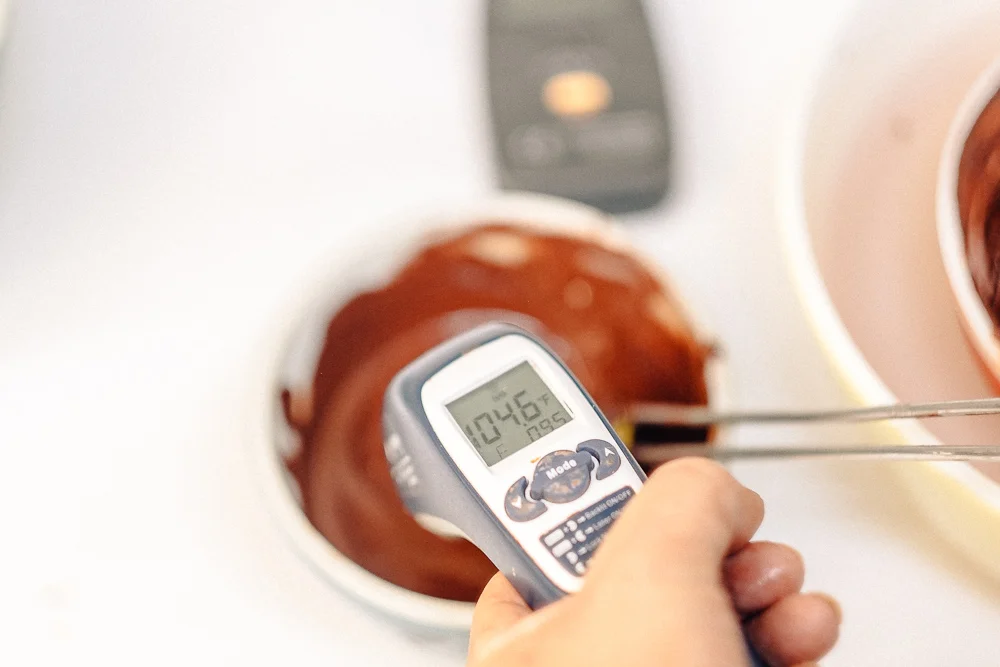
Melt your chocolate in a double boiler until the chocolate is at least 105 F.
Pour about 2/3 into another bowl. Set the other 1/3 to the side and keep it warm.
Stir the 2/3 portion until it starts to thicken. This happens about 79-81 F. The thickening is a sign you have created seed.
Slowly add parts of the warm chocolate to the cooler, seed chocolate.
Do it little by little until the temperature is 88 F (86 F for milk chocolate).
Pour up into molds and let set up.
Unmold and enjoy
Now the details. Let’s do this.
But First, On Why You need a good thermometer
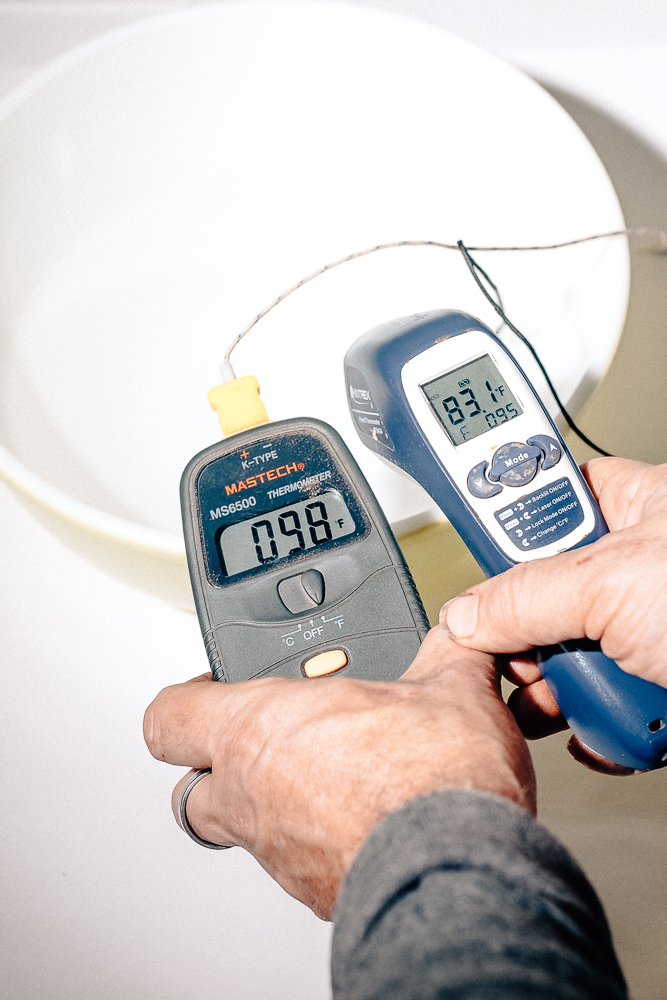
Why you need a Probe Thermometer
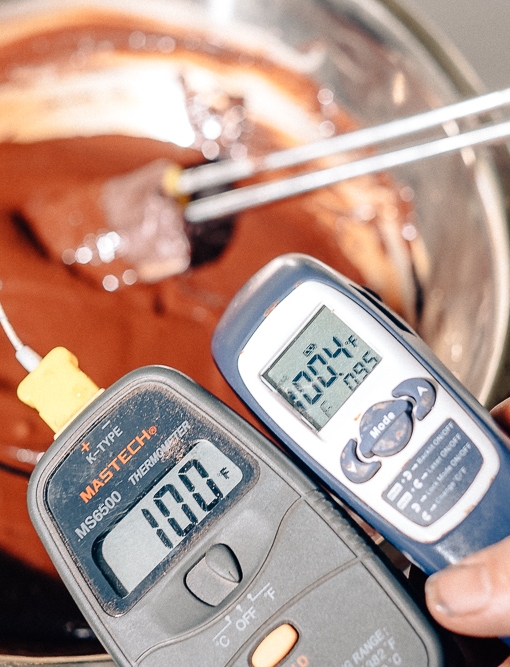
They should read the same temperature.
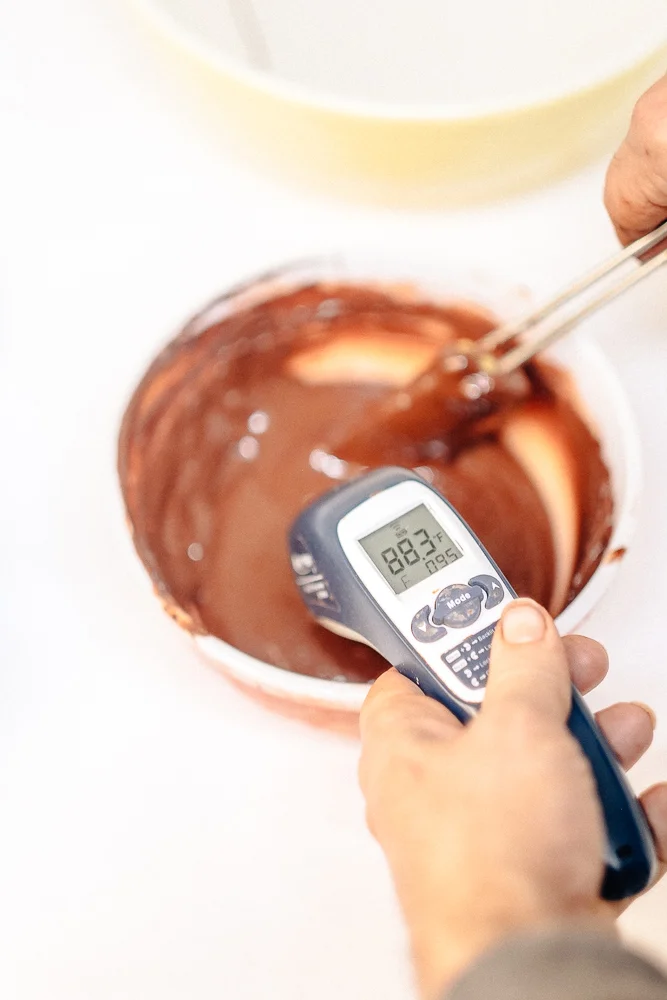
The first thing is you need a good thermometer. One where you can see 1 F increments. That means no candy thermometers. The just are not accurate enough. Also, you cannot use IR or laser thermometers on the water. You need a probe thermometer for that. The laser needs something to bounce off and water screws it up. Have a look (left picture, note the differences in temperatures).
You can of course use either for chocolate and I personally like a laser thermometer.
Other items you will need:
4 bowls that nest together.
Towels
Spatula
Molds
Double boiler/pan
Tempering Temperature Charts
Fahrenheit
Celcius
* If the Silk is solid and you grate it, 95 F. If you are stirring in softened Silk, you bring it on down to your working temperature
** The cooling point of all chocolates is until it slightly thickens. That is more important than an actual temperature
*** coconut oil inhibits spontaineous tempering and can only be done with Silk.

Tempering Step by Step
Step 1
Melt your chocolate in a double boiler until the chocolate is at least 105 F.
You don’t need an official double boiler here. Just a bowl on top of a pan was warm to simmering water. Again 105-130 F is just fine. The higher you go just means you have to wait longer for it to cool to a reasonable temperature before you can use it.
Key Understanding:
Chocolate or more specifically cocoa butter forms 5 different types of crystals. Our goal in tempering is to make one called Type V. Heating the chocolate above all of the melting points gives you a clean slate to work with.
Step 2
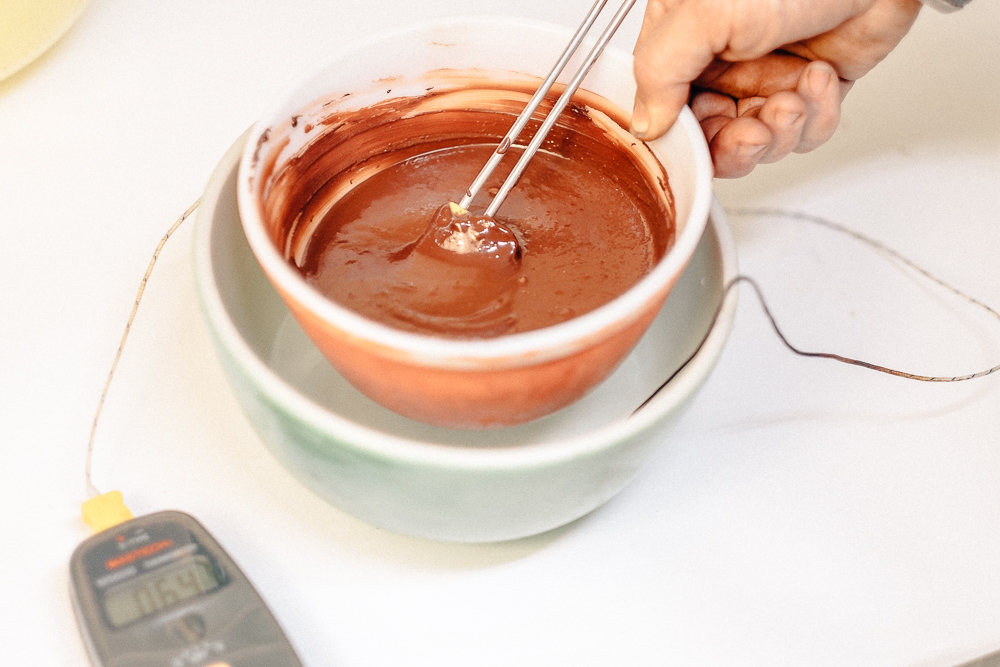
Pour about 2/3 into another bowl. Set the other 1/3 to the side and keep it warm.
I find it very helpful to put my bowl of warm chocolate into a bowl that contains warm water. 90-95 F. Remember, use a probe thermometer, not an IR or laser..
Likewise, put the other chocolate into a water bath that is cool. 60-70 F works well.
Key Understanding:
Water baths help either keep the temperature stable or move the temperature in the direction you need it to go. Make sure the lip of the inner bowl is higher than the outer bowl or water may spill into your chocolate.
Step 3
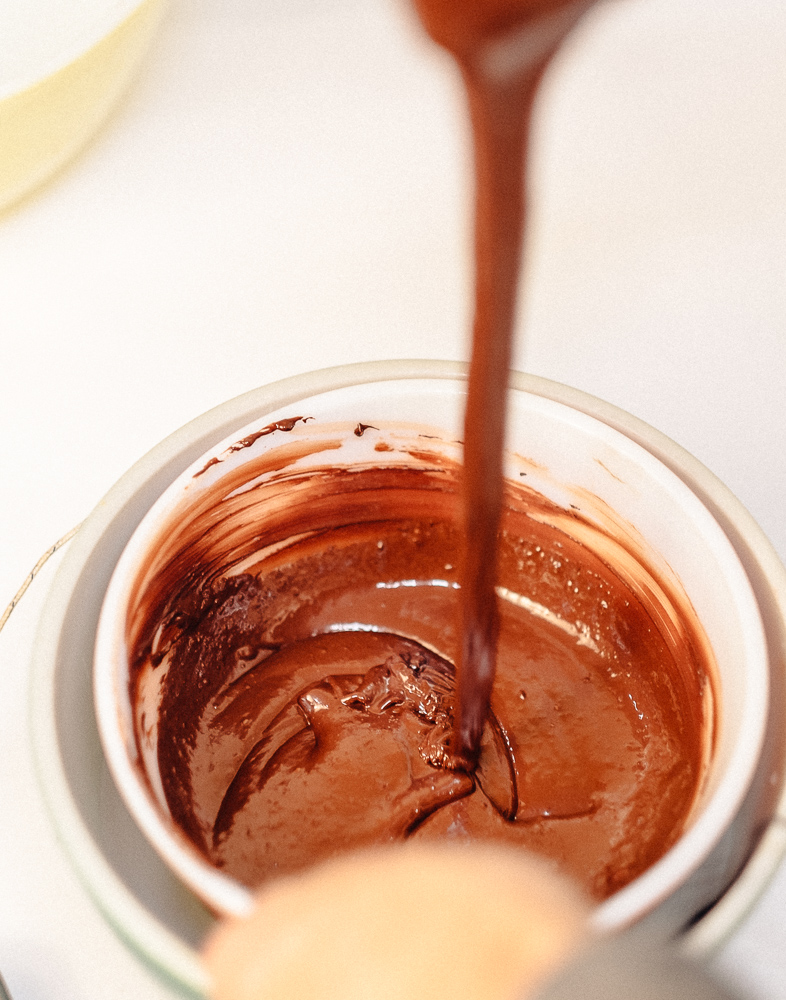
Stir the 2/3 portion until it starts to thicken.
This happens about 79-81 F. The thickening is a sign you have created seed. You may also hear it referred to as cooling until the chocolate traces.
Note: If you happen to cool your chocolate too much and it gets very thick, nothing is ruined. It is only harder to work with. Just stir in a little of the warm chocolate you have in to make it workable, or change water baths so the thick seed chocolate is in the warm one. Once it is workable, just proceed as normal.
Key Understanding:
At this point you have created Type IV and Type V crystals. When you cool chocolate both naturally form at the same time. The thickening is the sign you have enough Type V to ensure a good temper. The exact temperature does not matter. It is often helpful to still have a thermometer handy to see how close you are getting.
Step 4
Slowly add parts of the warm chocolate to the cooler, seed chocolate.
Your initial goal here is just to raise the temperature a little so the chocolate is easier to work with.
Step 5
Do it little by little until the temperature is 88 F (86 F for milk chocolate).
Key Understanding:
At 88 F only Type V crystals can survive. The Type IV that you created when cooling will melt. Now that there is only Type V present, the chocolate has a scaffolding to build upon and the chocolate will crystalize properly giving you tempered chocolate.
Step 6
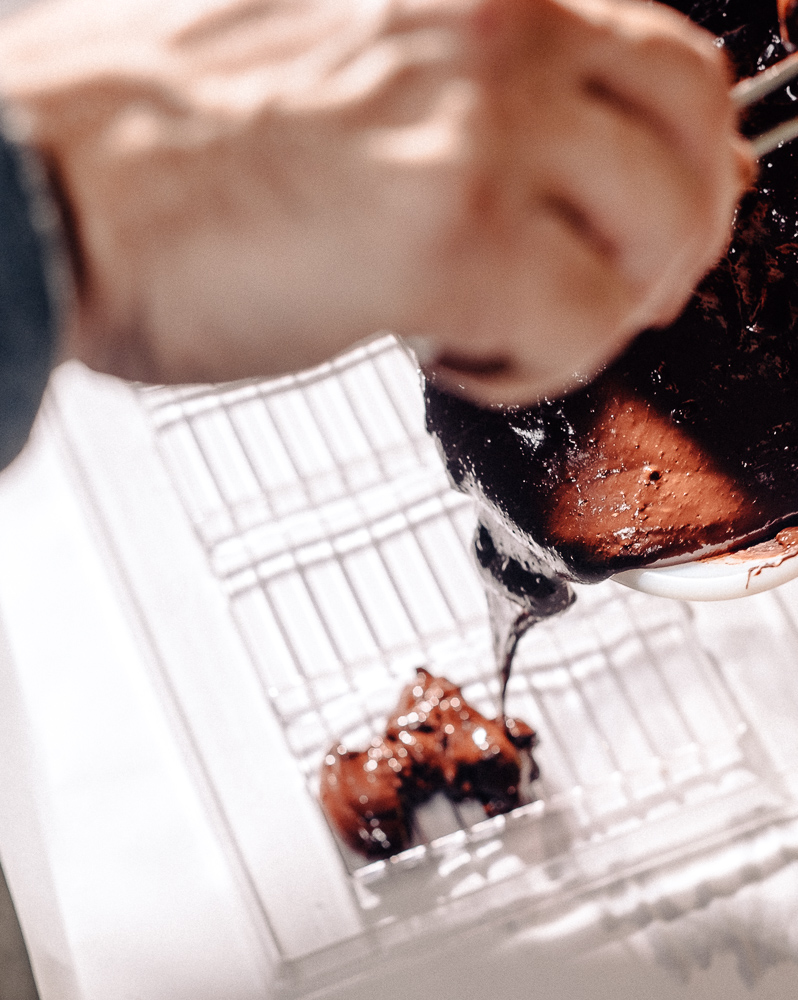
Pour up into molds and let set up.
Pointers for Success:
Pour directly from the bowl into your molds.
Make sure you wipe the bottom of bowl so no water drips in.
Use a large ladle. Do your best not to use more than one scoop per cavity.
Multiple fillings of the same cavity can lead to surface bloom

Step 7
Rap the molds on the table to settle the chocolate.
What to do if you over pour?
Don’t scrape the chocolate off at all possible. If you must scrap because you poured too much, do it only one time and then rap the molds again.
Key Understanding:
Crystals are fragile. Scraping and disturbing the chocolate while it is setting up can disrupt the crystals. These disrupted crystals can lead to bloom.
Step 8
Unmold and enjoy.
Wait a few hours for your chocolate to fully cool and temper. Then briskly turn the molds over and you chocolate should pop right out.
I don’t think I need to tell you how to enjoy the chocolate.
Odds & Ends
To refrigerate or not. This is a little of where the art and science comes into play. Some people swear by it, some find it causes issues. Here is what I can tell you.
If you have a lot of Type V crystals and your room is on the cooler side (under 70 F), you probably don’t need to refrigerate at all. The crystals will build upon each other just fine and your chocolate will temper perfectly.
If you are a little low on Type V crystals, or the temperature is a little warm (above 75 F) you probably want to put your chocolate into the refrigerator for 5-10 minutes. But watch out. If they are in too long or it’s too cold you can rush the temper, causing it to be unstable and bloom will be the result after it comes out of the refrigerator.
What to do if your room temperature is 70-75 F? My recommendation is to try and let your bars set up at room temperature. If it works and they temper, you are good to go.
If you find they are a little slow to set up or you have minor bloom issues, let them set at room temperature 4-5 minutes. Then put them into the refrigerator again for about 5 minutes; just enough to kick start the process. Then let them finish setting up at room temperature.
I mentioned before there are lots of ways to temper and way more to tempering.
Check out the links below for more.
One of my favorite ways is using Cocoa butter Silk:

A deep read on the science of tempering:
Now, Go Make Some Chocolate!
Additional Reading on Tempering:


Tempering silk butter is the bomb.