Viewing entries in
Roasting

Comment

Ask the Alchemist #102

I am confused by your suggested start temperatures of 350-400F. This is almost the temperature range one would charge a batch of coffee!

If I read roasting temperature suggestions here, are they referring to environmental temperatures (ET) or bean temperatures (BT), so indicating air temperature above the beans or approximation of the product temperature? For sure the temperatures stated around tempering are referring to product temperatures. But what about those roasting temperatures?

Even if those temperatures would indicate ET at charge time, they feel quite high to me as in other sources I am reading of temperatures (ET or BT?) in cocoa roasting should not exceed 300F to avoid those burned notes.

Being aware that absolute temperatures depend on machine, probe placement and measuring equipment, I charged my last batch at ET=170C (338F) and BT=138C (280F), quickly falling to ET=150C (300F) and below and never exceeding and BT rising to and stabilizing at 125C (257F) after the initial drop. It turned out quite nice, taste wise. Would those temperatures be too low for a proper debacterilization?

Let’s get the easy stuff out of the way. Yes, those temperatures are indeed the level you would roast coffee at. But I am not suggestion you roast as you would coffee. Your confusion actually makes for a great point. Unless an author tells you what they mean, you really don’t know. Whether it is ET or BT. Most of the time, it is ET as that is how oven are controlled. But it sometimes switches to BT to indicate an ending surface bean temperature. Ok, so that was not very easy or clear, or at least helpful. What it really does is illustrate just how difficult it is to roast ‘by the numbers’ when everyone is using different equipment.

The other easy stuff. In theory, your roasting should be a fine kill step (debacterillization) but roasts rarely (if ever) stabilize at one temperature, so when you say that, it’s hard for me to know what you mean.

So let’s back up a little, and walk through a roast. It’s all about differences in temperature and how you use those and that information.

Charging temperature. Basically this is mostly hot air. Really. I don’t mean it is not important. I mean you are reading an air temperature. And there is not a lot of energy in hot air. It’s the reason you can stick your hand in a 500 F oven and not be hurt. It’s all hot air. So I guess I do mean it’s not really important. At least as a really critical ‘target’ temperature. It, like many other temperatures, are just indicators for other things. Why do we pre-heat our roasters and ovens? It’s so we are not wasting time and energy heating up the surrounding material. It’s so we can get down to the business of roasting. It’s why you pre-heat a grill or a pan. It’s to get the process moving. Nothing more, nothing less. And that air temperature isn’t meaningful as the AIR does not contribute much of anything to the roast. But what is does do is tell you the walls of your roaster/oven are HOT and when we put our beans in, we can get right down to roasting. That’s all. And remember, that air temperature is going to be hotter than the walls. As an example, if the air is 400 F, then the surfaces are going to be something substantially less. 300? 350? And as soon as we load the beans, that horribly hot (sarcasm there) air is going to drop, both through heat lost through the opening and as it goes into the beans and suddenly you will see it is barely above the temperature of the room temperature beans. And with that temperature drop, you are miraculously (and significantly) out of the dreaded “over 300 F” range (which is by no means a hard and fast rule). And I mean seriously out. My average drops are to the low 100’s. It frankly can’t be any other way.

On a quick side note, that you say you drop to a ET of only 300 F and your BT is 280 F…something seems really wrong there. There isn’t any way for the beans to get that hot that quickly. That is an end of roast temperature. It seems obvious to me there is some measurement error there. But it illustrates how hard it is to give a couple temperatures to characterize a roasting profile. Also, you mention that my charging temperature is like coffee. Right you are. Charging temperature only affects the start of the roast. It has almost no effect on the rest of the roast. And I start my coffee and cocoa exactly the same because I am roasting them both.

I said I wanted to walk you through a roast, as I see it. And it doesn’t matter if it’s in a drum roaster, a standard or convection oven, on your stove top (now that’s a real challenge) or some other way. For me it’s all about the delta. In many physics and chemistry equations you have two things you are comparing. Often it’s energy. Or pressure. Or temperature. It’s just a way to describe the difference in two numbers. You are stationary in your car. Now you are going 60 mph. The delta is 60. You were going 20 mph and again you are going 60 mph. The delta is 40 mph. Got it? I know you would. Oh, and why ‘delta’. It’s just the agreed upon symbol. The Greek letter d – for difference. Nothing mysterious there. It’s important here because it lets you think through a roast and how to adjust it no matter the setting. The key is this. And it’s something you already know intuitively. The hotter something is compared to something else, the faster the cooler object will heat up. To rephrase, the greater the delta, the faster something heats up. In roasting, if you want something to heat up fast, you make a large delta. You want the turkey to cook faster, it goes in a hotter oven. You want to the car to go faster in a short amount of time, you give it more gas. See, you know all this. It’s a matter of applying it. So onto a roast as I see it.

It starts with charging temperature. I want the beans to increase in temperature at a pretty fast rate. To do that, I need a large delta. How large? That’s our first bump. For my drum roaster, I like about 60 F (and I mean 60F over room temperature – it’s the delta, remember?). For my standard oven, I like 100-120F. Why the difference? The semi-technical answer is convection. Basically, the more you stir something, the faster it can transfer heat. My roaster moves air. Most ovens do not. How did I find those numbers? By experimenting and roasting for the last 15 years. No, it won’t take you 15 years to learn how to roast. It took me that long to figure out how to describe what I was doing intuitively. I was roasting well in a few months. Moving on. So, I want a delta of 60. That means, if my beans are 70 F, and after everything ‘settles in’ after I put my beans in, I want the air temperature to be about (70+60) 130 F. And so I pre-heat to a level in my roaster that EXPERIENCE has taught me will give me 130 F. That means missing the mark sometimes. For MY ROASTER in MY SHOP, if I am roasting 5 lbs of beans, I need an initial temperature, on average, of 350 F. If I’m roasting 4 lbs, I might only go to 300F. And if I stuff 6 lbs in, I better take it on up to 375 F. In all those cases I should see 130 F after a minute or two for my air temperature and my bean temperature will be 75 F or so. Now, notice I said ‘on average’. That’s my loop hole. What if it is 50 F in the shop. That is another delta. Between my roaster and the outside environment and because there is a larger delta than ‘normal’, I am going to lose heat faster from my roaster, so I need to compensate by increasing my inside roaster delta a little by preheating a little higher. Maybe 375F (as opposed to 350) for 5 lbs. Or if it’s really hot in the shop, say 95 F, I can go cooler and only pre-heat to 300.

Yeah, it’s a lot of numbers. But are NOT supposed to memorize them. What I am trying to get you to do is ROAST. Roast. Keep notes . Learn YOUR roaster in YOUR home. And adjust accordingly depending on what your conditions are and what you want your roast to do.

Which is exactly what I do next. Control the roast. It’s kind of arbitrary, but I define ‘roasting’ as the continuous increase of temperature of what you are applying heat to. That means I always want the air temperature (ET) to be greater than the beans (BT). If it’s not, then there is zero delta, and if that is the case, there can be no temperature increase and that isn’t roasting. It’s stewing or braising or something other than roasting. How fast you want your beans to heat up is at the end of the day up to your tastes, but I like the whole roast to take between 14-20 minutes. What that means is I need to keep a large enough delta to keep those beans heating up so that I hit that time window. Again, experience has shown me that a delta 60 works well for me as my standard conditions. Up to a point. What happens at around 212 F? Water boils, right? Well, cocoa beans contain water and water takes a lot of energy to heat up and even more to drive off. What that means is that once my beans get to 215 F they have driven a lot of water off. Suddenly I need less energy or less delta, to keep the beans heating. It’s like carrying a back pack and putting out a certain amount of effort to go a certain speed. If you put the pack down, you need to expend less effort to go the same speed. If you keep putting in the same effort, you will go faster…and you don’t want that in a roast as that is a good way to get those burned notes. So that means decreasing your delta. In my drum roaster, that means decreasing the amount of fuel I am feeding and letting the temperature gap close. In an oven, that means turning down the thermostat 25-50 F (just like you have seen me recommend). At this point I like a delta 40 and I tend to keep it there for the next 1/3 of the roast or so. During that time, water keeps leaving. This is because we have been following the surface temperature of the bean. The interior is cooler and so contains water still. As that water leaves, you guessed it, we have to decrease that delta again or the roast will progress too fast. And really, it just keeps on like that until I’m down to a 10-20 F delta and my bean temperature is 250-290. Painting with a broad brush, Criollo tends to like a cooler final temperature than Forastero, but you have to determine that for yourself. Personally, I tend to roast all beans at least until I hear a few pops, and then 10-20 F more. Also, I tell A LOT by smell. Acrid almost always says your delta is too large. It can also indicate you are at the end of your roast or you are in the 260-290 range. I often end a roast if all the conditions are right. i.e. time is 14-20 minutes, temperature is 260-290, it is not acrid, pops have occurred (which don’t always) and the smell changes and softens.

So, what you might notice here is I too keep my air temperature below 300 in basically all cases. Even if I am roasting a robust bean that likes a high final temperature of 290, my delta is going to 10 or so. But even with that, I have a smaller sample roaster that I need to keep the delta larger because it is losing heat to the environment. For that one, my air temperature is often 320 F with a bean temperature of 285. There are just very few hard and fast rules. It’s all about technique and learning your roasting set up.

To really drive that point home, it’s like a new driver asking ‘ how hard to I have to push the brake to stop at that stop sign up there?’. How do you answer that? Hard enough to drop your speed so that you never skid, but don’t over shoot either. And you will have to apply less brake as you get closer’. Sound at all similar? It’s exactly the same. And the answers all change if you have a heavy or light load, if it’s raining or icy and how fast you are going when you start. If you are reading this, I suspect you drive. Think of it exactly the same way. It’s just a matter of learning to drive your roaster. Nothing more, nothing less. And you are only going to learn by doing, messing up, and learning from those mistakes. I can only give you suggestions and what worked for me.

Comment

Comment

Ask the Alchemist #82

From reading your forum and my own experience, your write up on how to tweak the Behmor programming is still confusing. Could you at least add Behmor instructions to each bean. And suggest how far over or under you can go and what it will do to the flavor. I know it should all be done by nose, but after over a hundred batches I still don't trust my nose to tell me much.

Let’s talk about roasting a bit, why I don’t give exact profiles for each cocoa bean, and why I tend to only give oven profiles.

There are 5 profiles in the Behmor. Each one applies heat a little more gentle as the number goes up. i.e. Profile 1 is 100% on. Profile 2 reduces the heat about 75% in. Profile 3 is a gentle ramp. In addition, you can add or subtract time from each profile. If you add the time before the roast starts, it stretches the entire profile out proportionally. If you add it after the roast starts, it tacks it onto the end.

Yeah, that can be a touch confusing, but this is really what you need to know. I don’t believe (in the sake of cocoa) that it makes any difference from a flavor standpoint when you add it. How far you take to roast over shadows any subtle nuance that might (or might not) be introduced by when you add time.

That all said, here is the nugget of why I don’t list profiles. If you took one bean, roasted it on each profile until you hear a bean pop, you have 5 profiles. Let’s say increases or decreases only have noticeable effects in 2 minute increments. If we go 2 over and 2 under (5 each) we now have 15 profiles. And if we add in that we can add the time before or after the roast starts we have doubled the profiles to 30. Setting aside I don’t have the time to make 30 batches of chocolate for each bean, the telling point here is that ALL of the chocolate would be good and in a group of people, I am willing to bet each chocolate would be picked either based on ‘favorite’ or ‘tasting the same’ across the board.

The fact is is that the Behmor has great profiles, they all work and all taste good, and there is no one best profile. It comes down to taste of the individual. And learning what you like. But my preferences and tastes are not your tastes. The best I can do is give you tools. But those tools are not exact profiles. The tool is how to learn which profile you like, and I think I can see I have been negligent there. So let’s get into it.

But first, a quick note on oven profiles; You notice those I give a lot more of. The reason is that because there is SO much control there, you have much more of an ability to over or under roast. I’m trying to get you in the ball park with those. With the Behmor, ANY profile will get you in the ball park.

To learn, you HAVE to keep notes. Keep a log. Otherwise it will just all get jumbled in your head and you will end up roasting 100 batches and still not know what you like.

So I WILL give you an exact profile. But note that I am NOT saying it is the best profile. Just your starting profile.

This is for ANY cocoa bean.

Profile 1

16 minutes

2 lbs cocoa

Start.

Let the roast naturally end at 16 minutes, but make notes about what you smell, at what times, and when you hear pops and at what times. These are critical for associations later on.

Now, make chocolate out of it. Save some. Label it. And roast up another batch.

This time, I want you to roast the SAME BEAN, on the SAME PROFILE and increase the roasting time 1.5 minutes. Again, make notes about what you smell, at what times, and when you hear pops and at what times.

Make chocolate out of it. Save some. Label it. And roast up another batch.

In this batch, add ANOTHER 1.5 minutes. 19 minutes. Rinse and repeat about notes and making chocolate.

Oh, and for goodness sake, use the same recipe when making your chocolate. Personally I like 70% cocoa, 5% cocoa butter and 25% sugar. But you can do whatever you want as long as you like it. 50% cocoa, 10% cocoa butter and 40% if you like. Whatever.

Now, it is taste time. And it’s no more complicated than that. I’m not going to ask you to make crazy notes, and come up with flowery language. Just eat some, rinse your mouth, and eat the next….and rinse and repeat (literally). Really, the ONLY thing you are looking for here is which do you like best IF ANY?

Hopefully, one will tickle your fancy more than another. Make that note in your roasting log. Was it a toss up between two? Then maybe you want to try a fourth batch right between those two and taste all three together again. Maybe you like the heavier roast, but think that it would be better with more roasty, nutty flavors? Then try that. Add another 1.5 minutes. Oh, but maybe you want it a touch more sharp and bright and fruity? Then reduce it 1.5 minutes.

Are you getting the picture? You are zeroing in one two things. First off, what you like in general, and maybe where you like your roast level…but don’t make too broad of assumptions here. What may be fine for Peru is not what you like in Ecuador or Madagascar.

Now that you have what you have determined which roast level you like, it’s time to see which profile (IF ANY) you like better. Move on to P2 and roast it to the same SMELL. This is why you took notes. The new profile may and probably will take longer but by and large, roast level correlates pretty well to aroma.

Notes; Chocolate; Do it again for P3.

And in case you find yourself just not being able to distinguish aroma, it is perfectly ok to base your EOR (end of roast) on cracks. Namely, where did you hear the first or second and how did that relate to when you stopped the roast?

It is taste time again. Taste these two new chocolates, plus the one you picked from the first set. No flowery notes needed. Just which one do you like best? What? You really can’t tell much difference? That’s ok. Or maybe you do. You like P2…but think a touch more roast would be good? TRY IT!

Yeah, it’s kind of like a maze. But with your notes, you have a much better chance of not getting lost. You can go back if you need. But without notes, without taking note of specific information, it’s like driving around a city, trying to get to a location you have never been to and being surprised when you can’t get there. You basically have to know where you are going (getting the chocolate you like) and where you have been (roast log) or you will just drive around in circles never getting to your destination. And I will conclude with one final note about that destination with yet again another analogy.

You are planning a trip. You say give me exact directions to the best country, with the most beautiful city, with the greatest restaurant and tell me what to order so I can have the best meal of my life.

How in the world am I supposed to do that? The key is that I don’t know what you like and what I like could well be something you don’t. But that is what you are asking when you want exact profiles (and beans choice and an exact recipe).

This whole endeavor is a journey. And for me at least, it’s all about the journey, not the destination. Sure, I want good chocolate at the end, but it’s the process I love, and what I hope to instill in you - along with some of the tools so you can enjoy the trip and not wander aimlessly, lost in the maze.

I’ll end with a variant of a quote a friend of mine uses about roasting and brewing his own coffee.

“Ultimately the quest for Chocolate Nirvana is a solitary path. To know, I must first not know. And in knowing, know I know not. Each Personal enlightenment found exploring the many divergent foot steps of those who have gone before.”

Comment

3 Comments

Ask the Alchemist #78

How long can raw beans keep prior to roasting? After roasting ? Is the bean roasted, at its most vulnerable stage? How stable is chocolate tempered and non tempered? After removing finished chocolate from the melanger , can or should chocolate be tempered first or can it be put in ziplock bags straight from melanger ?

I for one was blown away by my first hand made chocolate. To this day I think it was due to the freshness. It had a vitality and liveliness to it that I just had never tasted in any other chocolate. But there are so many stages. And clearly some are more important than others. What I had was still months old, so absolute age is not always an indicator of ‘freshness’. Let’s break it down and have a brief look at each potential stage and where you should be careful, and where it isn’t quite as important.

When it comes down to it, staleness (the opposite of freshness) is caused by the beans, nibs or chocolate reacting wit air, or more specifically oxygen. As a good rule of thumb, the cooler you have the beans/nibs/chocolate, the slower the reaction. But I can hear you now “but we roast! That’s really hot”…yep, and I will get to that. Not all heat is bad. It’s a matter of application, length of time and form. Hang tight.

Raw beans are by far the most stable. They are sealed up in the shell/husk/covering. They are basically sealed away from oxygen. Like this, kept cool (let’s just call cool, anything you can comfortably live in), most beans will easily keep 1 year. Most will keep two years. And some will keep 3 years. How do you know? Really, you don’t, but between throwing out 3 year old beans and taking a chance and making chocolate, I’m going to make chocolate. What is there to lose?

Next, a quick side note on temperatures. There is a running joke about this. What do you get if you put your cocoa in the freezer? Cold beans. Ok, it’s not really funny, but the point is is that once you are below a certain temperature, the oxidation reactions are so slow, that they are basically stopped. My experience is around 50 F for cocoa. Below that, are you are doing is making cold beans. Think of it like falling. Once you are within 12 inches of the ground, it really doesn’t matter if you are closer. You simply are not going to be ‘hurt less’ by falling 6 or 3 or 1 inch. You’ve passed the level of ‘hurt’ at 12 inches. Below that you are just closer to the ground. And a quicker side note to the side note. It is even possible that if you freeze your beans, you may even damage them via ice crystals in the cells and such. I don’t know, but think of freezing fresh fruit. It’s great refergerated, but not good frozen and thawed. Such, it’s still ‘not bad’ but that does NOT mean it is good. It’s just not spoiled. Moving on. Next, let’s move to nibs.

At this point, you have exposed the interior to oxygen. Also, they could either have been roasted or raw.

In the case of raw nibs, I find that over the span of about a week, they will lighten in color around the edges. I don’t know for sure what this is, but it seems to be a good enough indication something is going on….but it also stops. So, basically, you have about a week for raw nibs, but the good news is that it’s just a little staling, and not ‘they are only good for a week’. But then they are stable as raw beans. 1-3 years. But since there is more surface area per volume, let’s just be safe and call it 1-2 years.

In the case of roasted beans and nibs, we have introduced heat. Quite a bit of it. But lucky for use, this level of heat does not promote instantaneous staling. It’s way beyond that level and other chemical reactions are happening. But what it does do is give us a new host of chemicals that are in higher energy states that are just ready and waiting for ‘cooler’ chemical reactions, i.e. staling. Analogy time. You have a slab of meat. Or vegetable. Or toast. Toast is a really good one. Toast is a great one. Bread it good (i.e. not stale) for about a week. Fresh toast is not stale right out of the toaster. It’s got this great….toasty goodness going on. And it’s still ‘good’ toast for a couple hours even if it’s cold. But let it sit out all day and by bed time….and it’s gone stale….but then it just kind stops. It continues to dry out, but doesn’t really get any worse. Basically like roasted beans….except I’d give roasted beans a couple weeks. But if we break up the toast into bit, we get croutons. The stale quicker. Why? More surface area. Same with nibs. I’d give roasted nibs about a week.

Now before you all go off panicking that you have been using bad, stale, roasted nibs, keep in mind a few things. First, I was talking about leaving your bread/toast/beans/nibs out in the air. What happens if you seal up your croutons? They keep longer. Much longer. You have excluded oxygen and so you have limited the chemical reactions. And lucky for you and me, I keep everything sealed here, and ship in ziplock bags….for a reason. In a good sealed bag, I’d give roasted beans 1-2 months, and roasted nibs just a little less. 4-6 weeks off the top of my head. But if you were to store roasted beans at 95-100 F instead of 70 F (I’ve done this, so it’s not empirical but experimental) they go stale much faster. As in maybe a week for roasted beans and a few days for nibs.

Are you noticing a pattern here? The less surface area, and the less heat input, the longer they will keep. It’s really that simple. To explicitly answer your question, yes, your roasted nibs are the most ‘vulnerable’…but still not all that vulnerable.

But this is a good place to re-iterate something I’ve said before. Let your roasted beans fully and completely cool before cracking and winnowing. This is why. If you have freshly roasted beans, even if they are cool to the touch after one hour, they are still teaming with chemical reactions and the best way to introduce staling reactions is to break them open into nibs and give them a bunch more surface area. Relax. Let them rest a good 6 hours to tie off those reactions and ‘calm down’.

So, to review. Assuming ‘cool and dry’ and seal in an air tight bag.

  • Whole raw cocoa beans – 1-3 years
  • Raw cocoa nibs 1-2 years with very minor staling
  • Whole roasted cocoa beans - 1-2 months with a little more staling
  • Roasted cocoa nibs 4-6 weeks with just a touch more staling.

Ok, that’s enough for this one. There were a lot of questions in that one questions, so consider this Part 1 of 2. I’ll talk about chocolate next week. Same choc time, same choc station.

3 Comments

Comment

Ask the Alchemist #48

Is the Puruvian bean a slightly less oily bean? The liquor was decidedly thicker than my Conacado.

This is not something I keep track of currently, but painting with a rather broad brush, being a Criollo, it would tend toward having a lower cocoa butter content. That said, the observation and conclusion you are drawing from it isn’t necessarily accurate. From days gone by, when I did actually test the beans for cocoa butter content, it varied from 49-56%. Forastero, on average, had more, and Criollo. So where is the problem? It’s this. That small difference has very little effect on the viscosity of the base liquor. I’ve never noticed much of a difference as long as the fat content is above 40% (once you start adding ingredients).

So what is causing that thickness? Well, I say not to over roast the Peru, and I mention Conacado and accept a heavier roast. What I’d hazard to hypothesize is that the Peru was roasted lighter (maybe a touch too light?) and contained more moisture. And that can and will make a huge difference in the base viscosity. 1% moisture can radically increase how thick your chocolate is. It’s good to keep in mind when reading about light and heavy roasts, that in all cases it should be a full roast to make sure the moisture is properly driven off. And don’t forget to let them completely cool before grinding into liquor. Water continues to be let off for some time after roasting.

I had the bright idea once to use that residual heat to jump start my grinding process….and over and over ended up with a seized mess. Some time later, I sealed up some barely warm to the touch roasted beans (maybe 100F) and came back to find all sorts of condensation in the bag. Moisture! And the cause of my seizing. It’s why I generally recommend 6 hours cooling before processing at all. Let that moisture escape.

So, good observation, but most likely the wrong conclusion, but good for the data you had on hand. I’m glad you asked.

Comment

Comment

Ask the Alchemist #45

"I have been reading about bacteria and pathogen content on the shells of raw cocoa beans, and commercial techniques used to prevent them from transferring into chocolate. Would there be any benefit for home and small artisan chocolate makers to using practices like misting beans with water at the end of roasting, or maintaining a certain temperature during conching and refining?"

The short answer here in no.

Now I’ll explain why. There can indeed be bacteria and pathogens on cocoa. The two that come up the most often are e. coli and Salmonella. And it’s true, it is basically restricted to the outside of the shell. And both of these are killed relatively easily, and happens ‘naturally’ during a roast.

First, let us look at what we are trying to accomplish. In a word, it is sterilization. There are a many ways to approach this, and it’s been well documented. In short, you can have low, long heat, or higher heat for a shorter time. If you plot these various combinations, you get what is called a kill curve. Each organism has a particular kill curve. As mentioned, e. coli and salmonella have relatively mild kill curves.

One of the hardest to kill is the spore of Geobacillus stearothermophilus. This is what most methods use as their indicator of sterilization, with the train of thought being that if you can kill the Geobacillus stearothermophilus spore, nothing else can survive.

A widely used method for heat sterilization is the autoclave. . Autoclaves commonly use steam heated to 121–134 °C (250–273 °F). To achieve sterility, a holding time of at least 15 minutes at 121 °C (250 °F) or 3 minutes at 134 °C (273 °F) is required to kill Geobacillus stearothermophilus spore.

Alternatively, dry heat can be used to sterilize items, but as the heat takes much longer to be transferred to the organism, both the time and the temperature must usually be increased, unless forced ventilation of the hot air is used. The standard setting for a hot air oven is at least two hours at 160 °C (320 °F). A rapid method heats air to 190 °C (374 °F) for 6 minutes.

I know. That is a lot of information and it is NOT what I am suggesting you do to your cocoa beans. But it allows to talk and answer questions. First off, notice the wet heat method. It requires at the shortest time, 3 minutes at 273 F with moisture present. In short, spraying water at the end of your roast does not accomplish this. You spray your water in, it vaporizes, and it’s gone in more like 3 seconds, let alone three minutes. That right there basically shows it’s totally useless from a sterilization standpoint to mist your beans.

Once we recognize that, we move onto the dry heat method. As I am trying to tie this into roasting, I’m not going to consider 2 hours at 320 F. The other is “ A rapid method heats air to 190 °C (374 °F) for 6 minutes”. And because we are talking about the air AND we are only concerned with the thin husk on the outside of the cocoa bean, is accomplished in practically any roast. And even if it is not 374 F, we can apply the principal of lower heat for longer time…..which is just what a roast does.

So that is the theory. How do you know works. This is where it was handy I used to be a chemist and years ago performed an array of analysis on cocoa beans contaminated (on purpose, as a control) with Geobacillus stearothermophilus and e .coli. The final result was any ‘good’ roast, be it a high temperature 5 minute roast or a long, cool 40 minute roast, reduced the levels to non-detectable. The only times I had found any of the Geobacillus stearothermophilus spore was when I severely under roasted the beans and they basically still tasted raw…. But even these had killed the e.coli.

As for temperatures during refining and conching, my take is just to take the care during your roast and transfer, don’t potentially re-contaminate your beans/nibs and you are good to go. But if you do want to look at that, pasteurization (mind you, not sterilization) is either 145 F for 30 minutes or 165 for 2 minutes. That is take care of e. coli but I honestly don’t know about Salmonella.

Happy roasting.

Comment

Comment

Ask the Alchemist #14

At what point in the chocolate making process should I add things like nuts, herbs or spices, and how would this affect refining and tempering?"

I’ll try and keep this short and sweet.

The base answer to when to add additional ingredients is that it all depends what you want.

Nuts – I like them right at the end, while I am tempering. If you put them in while refining, you are going to have the associated oils to deal with, and while homemade nutella (hazelnut and chocolate) is great, the hazelnut oil inhibits tempering and if you use too much (40 % or so) it won’t even set up (since oils by definition are liquid at room temperature).

Herbs and spices – first off, if you are using herbs - Water! Be aware. You really need to use dried herbs or you run the risk of seizing your chocolate. But if you keep them mostly whole and don't release the water, you may be fine.  Next. When? I personally like a smooth chocolate and like the herbs and spices added at the beginning of refining. Some people like the earthy texture of the herbs and spice and add them right at tempering time. Totally your call. Both will work.

As for tempering with chunky bits in there – it has the potential to make it more difficult. Lots of places for lower seed crystals to hide. You are probably going to want to hold at your working temperature (88-89 F for instance for Dark chocolate) for a little longer to make sure all the other seeds (1-4) are gone. And it’s helpful to get your additions (nuts mostly, but herbs and spices too) up to around the same temperature so you don’t plummet your chocolate temperature and wind up with a really hard to work with mass.

That’s about it. Add it either place to your liking. Be aware of added oils and water. Pay special attention to your temperature while tempering and take your time.

Nutted and herbed Holiday gift chocolates....what a great idea.  Glad you thought of it.

Comment

Comment

Website Migration

The site will be migrating today to a new server.  There may (or may not) be some small periods of down time. Also, I've been updating some of the Alchemist Notebook pages - they are not linked in, but you can view them directly here:

Roasting

Cracking and Winnowing (with history of the Aether, plans, and more)

Comment

1 Comment

Does size really matter?

David and Goliath? Me and Mini-Me?

Bigger is better?

The tiny powerhouse?

Frankenstein vs....damn can't think of a small monster.

Well, I really wanted a good one-liner there, but inspiration eludes me.  So I'm just jump into what I want to talk about.  Cocoa bean sizes.  As is the definition of 'average', most cocoa beans you will find and buy are of average size.  This generally means they are 90-110 beans/100 grams - industry convention and standard.  What I have for you today are two great examples of the two far ends of the bell curve.

size1.JPG compare.JPG

What you have here is a tiny wild harvested Bolivian Organic Criollo at a bean count of 160 beans/100 g and a huge Guatemalan Trinatario at 50-55 beans/100 grams.  Below is 100 grams of each:

compare-1.JPG

What does this mean?  Well, many things…and not much.  Huh?  Let me explain.

Neither will be inherently better or worse first off.  The small one isn’t inferior, nor is it packed with flavor because it is small.  Likewise, the large one isn’t large and tasteless, but neither is it better because of it’s size.  Both are simply notable.

In this case, the Guatemalan has a nice rustic flavor, kind of nutty and carries a unique bitterness, but also some great savory notes.  The wild Bolivian…well, in a word, just makes me happy.  It’s pretty mild, being Criollo, but has great flavors.  Toffee, very soft fruits, butter and blueberries.  And it melds all together seamlessly…and makes me smile.  Plus it’s so damn cute.

OK, from a practical standpoint, you may find the Guatemalan’s may not feed as well in the Crankandstein, whereas the Bolivia will feed great, but both will crack just fine in the Champion.  After that, you will find they both basically winnow the same.  You might expect that because the Bolivian is so small, there ratio of husk to nib would be high, giving you less nib than normal…but thankfully that is not the case since it is a Criollo and one with a particularly light thin husk.  Both turn out to give right around 80% nib.

Finally, I should make a note that both of these are of a limited nature.  When they are gone, they may well be gone for good.

I really hope you try them, enjoy them and that they make you happy.

And as a reminder, Refurbished Behmor 1600s are now readily available.

1 Comment

Comment

Roasted beans and customer accounts

A little while ago I acquired an antique roaster.  It's in the process of being refinished, but in the meantime is completely functional.  As a result, all cocoa beans are now available as Roasted.  The odd 35 lb option is because that is the capacity of the roaster.  Right now I don't have an option for roasted nibs as it's just to cumbersome and creates too many loop holes in the store, but I will do roasted nibs if you take the initiative and ask.  Anything 10 lbs and under (total order) I'll do for free as a courtesy.  Over that and it's $1/lb and I'll contact you after the order is in to settle up. Also, I've very please to announce there are now Customer Accounts.  Chocolate Alchemy is coming into the 20th century.  You can look up old orders, the current status of orders, adjust your information, etc.  Please be aware though, and I know it can be confusing, there are TWO sets of customer accounts - one for Retail and one for Wholesale.  I recommend making your user name and password the same if you use both stores, but be aware, there are completely un-connected.

Right now the customer accounts are in beta mode, meaning there may be glitches here and there.  If you find one, please let me know about it.  Likewise, if you would like to see a particular feature, let me know and I will pass it along to the developer.

Finally, I've spent the last week testing out a new model of Melanger from Spectra (formally Santha, but the Melangers are officially being offered by Spectra) - the Spectra 11.  Photos and a review will follow, but briefly, I like it and give it two thumbs up.   It's basically a redesign of the bowl and how it attaches to the motor.  Over the last couple years there have been some shaft bearing issues - leaks basically.  This new design seems to over come this issue by removing the whole bearing.  A semi permanent (it unscrews) shaft now runs directly from the flywheel, through a delrin hub, and and then screws down, covering the shaft, effectively eliminating two weak spots and protects another.  And they have put the lid back to riding on top of the top tension nut (the way it was years ago), so you no longer have to worry about condensation.  It will be retailing for about $40 more and should be available in a couple weeks.

Comment

3 Comments

Raw chocolate, conching, roasted beans and experiments....

It seems to be generally known I don't promote raw chocolate.  It's not that I don't approve of it (although I have some issues about it), it more that I just don't really care for it and even more so, just don't 'get it'.  Although they are not my words, there is an article that I and many others contributed to that spells out quite accurately what I think about it. The 'Truth' about raw chocolate

Item 2.  Conching.  Or maybe  conching vs refining.  I don't actually have any definitive to report here, but circumstance has started me on an experiment.  I'm on day five of a test involving using the Melanger as a conch only - no refining.  The short story is that I removed the tension nut from the Melanger with the intention of pouring up my finished test chocolate...and promptly forgot it.  12 hours later I discovered it was still running, the temperature had dropped from about 118 (note to those experimenting with raw chocolate - the Santha Melanger can refine at or under 118 F if your recipe has a lower enough viscosity) to about 110 F and stabilized.  I pulled a small sample and noted it had not over refined, but had changed in flavor...hrm...sounds a lot like conching.  I've continued to pull a sample every 12 hours and will vertically taste them and report back.

Item 3 - roasted beans.  I now have an old Royal #5 roaster on site, and all beans will soon be available roasted in 15-25 lb batches.  If you have a need now, before I get them officially offered, just drop me a line and I will be happy to accommodate.

Items 4 - experiments.  Mostly thinking out load of things to come.

Long vs short roast times. Again, circumstance tossed me an interesting piece of data.  When I tested out the large roaster I purchased, I did it without any controls.  The result was 20 lbs of beans roasted in about 8 minutes.  Later I repeated the roast with control and doubled the roast time.  Hands down, in blind tastings of the resulting chocolate, the 8 minute roast was preferred.  More fruity, body and a better overall dynamic chocolate.  One time fluke?  more testing...

More conching after my vertical tasting. Broma cocoa butter production.  This is a heated, gravity 'pressing'.  People have asked, I don't know, so I'll experiment and report back.

Winnowing - AFTER I have the current design to the shop, I have two other designs I want to play with.

I'm sure there are more, but that's it for now.

3 Comments

5 Comments

Speed Chocolate or is that deep fried Chocolate?

I find it interesting how new ideas form, evolve, etc. I was putting together a batch of milk chocolate this morning, and really didn't have much time.  OK, and I was a bit lazy because I didn't have liqueur - only nibs.  So I proceeded to melt the cocoa butter I would be using, and thinking about how I often have to add heat to the Melanger when grinding nibs directly, I tossed the nibs directly into the melting cocoa butter.  Knowing I would not have time to bring the sugar and milk powder up to temperature before I left, I took the butter/nib mixture up to 210 F - yes, that hot.  Into the Melanger it went.  In went the sugar and milk powder, and it was off and running.  117 F and flowing perfect with no chance of setting up because it was too cool.

hot-nibs2.JPGhot-nibs1.JPG

Speed Chocolate.

Now, where this leads me to is wondering if you could 'roast' your nibs by heating them in hot cocoa butter.  I noticed as I heated the butter/nib mixture to past 212 F (for just an instance), they started to spit, indicating water was being driven off.  Would deep fried nibs make a good chocolate?  Certainly not viable for a dark chocolate, but it has possibilities for milk chocolate.  I'm going to try this and report back.

And in other news, I will have some "American" cocoa later this month.  Hawaiian cocoa.  Being American grown and all, it's going to be pricey, and I won't have a lot, but I thought it worth offering.  It's a nice, fresh, mild cocoa.

5 Comments

Comment

New Products and Services

I've added an additional variation to the Venezuelan Sampler Packs - there is now a 4 lb version, giving you a full pound of each bean to experience, and it's discounted 30% off the base price.  Almost every week I get asked if milk chocolate can be made with fresh milk and I always have to answer no.  We now have in Organic Whole milk powder which is how it is done.  This milk powder has been spray dried which I found gave more of a full milk flavor and very little boiled milk flavor. And there are two up coming items.  I am going to be dropping the price (around 30%) of all the beans at the 25 lb level.  It should put them very close to wholesale bag price.  Very simply, I want you experimenting, playing, enjoying etc, without as many worries about price and rationing and this is something I can do to assist in that.

Finally, I know a lot of you out there would like to make the jump (or even small hop) to production, be it just a small farmers market, or something a little more ambitious.  I know there is a hurdle in both roasting and winnowing larger amounts.  I am working steadily on the winnower (the current focus is a new Cocoa mill which is just now going from prototype to beta version), but until that time, and maybe after, I will be offering all origins as freshly roasted nibs in wholesale quantities.  To me, freshness is a significant part of what makes homemade (or Artisan made) chocolate so special.  So I won't be keeping bags of stale roasted nibs around.  I will be roasting and winnowing them to order.  That will mean a longer turnaround time (7-14 days) at first, but a set schedule will be available also if you desire 30 lbs (for instance) every week or month.  Until I work out all the details, just send me a note (email address is in the Contact link) and I would be  happy to talk it over and get something moving for you.  My goal in this is to make you successful at your endeavors.

Comment

1 Comment

A few changes and new items.

It's a day for announcements   Just a lot of things to cover. I'll start off with that we have a new bean in, that we have not had in some time.  The Co-op has really stepped up consistency, so whereas before, this cocoa bean had a good flavor, you had to work a bit for it.  Now, you get nice flavor (soft blackberry, malt and biscuit), it's easy to work with also.  Go check out the new review for the Dominican Republic from Conacado Co-op. I have been wanting to do this next item for some time.  I am venturing into Roasted beans with the assistance of a semi local roaster.   There will be a just a select few for a while, plus a weekly roasting schedule for those that don't want or need 10 lbs.  Just order ahead and they will go out as their week comes around.  And as a small bonus, the  Don Homero that I ran out of a month back or so, will be available until it runs out.  If this goes well, I will cycle all of the cocoa bean stock to roasted availability. I have the next version of the Winnow designed up, and will get parts in the next couple weeks.  After that, it goes to a local shop for beta versions.  A couple months still, but coming up and making progress. And finally, a minor note.  I have reduced (pretty drastically) the Sampler pack prices.  Somehow the prices were a hold over from when beans were more expensive.

1 Comment

Comment

Roasting

While roasting up my samples of the up coming Tanzanian cocoa (it's in - look for it over the weekend), I noticed how picture perfect it roasted up.  They went from a slightly rough surface to a nice smooth surface.  Just what you want to aim for.  Also, unlike coffee, note there is not really any color change.  It is virtually all texture. roasted-vs-unroasted.jpg

If it isn't obvious, the roasted is on the left.

And, just to see the more in context, here they are just out of the Behmor.

unroasted.jpg  roasted.jpg 
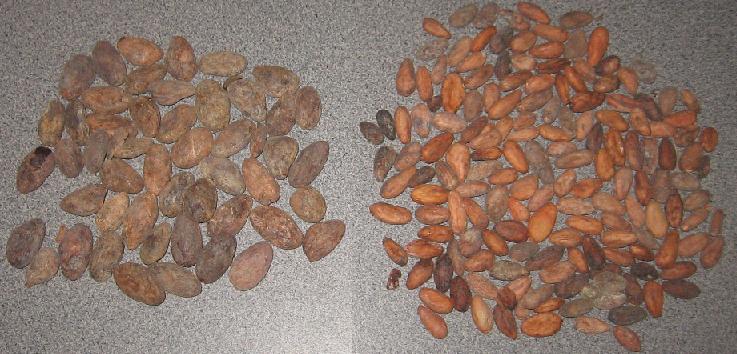
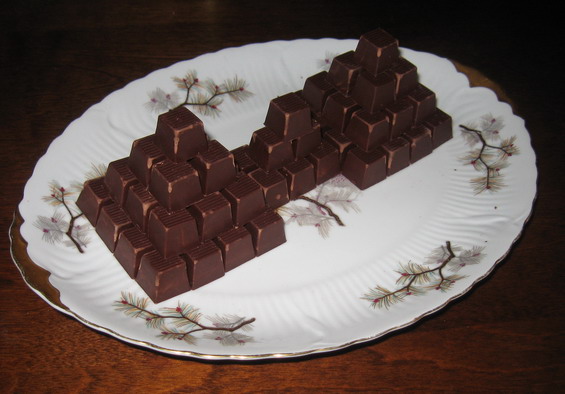
This time the roasted is on the right.  And for those that want to know, this was done on P1, 1 lb setting, 16:15 minutes on the Behmor.  2.25 lb roast size.

Oh, and to comment about the Behmor, the refurbished units, the waiting list, etc.  I have a stock of roasters in.  I am about 1/2 way through the waiting list.  I have plenty of parts.  Due to increased shipping costs, I am only offering for free either beans (coffee and cocoa) or a small grid drum.  Not both.

Related to when Behmors will be available again to everyone who wants one, I will be out of town from the 22nd to July 10 to handle my mom's estate.   No shipping or repairs during that time.  Limited email.  Very similar to when she actually died and I had to shut down.  Behmors should be available mid July.

Take care folks.

Comment

5 Comments

New beans and Behmor deals

It's been a bit I know. New beans should be in within the next month.  Some new Panama, hopefully some Ocumare and Cuyagua, plus two new origins, Nicaragua and Peru.

Also, I am offering what I hope are some very incentive laden deals on the Behmor.  I have currently decided to not restock new Behmor for a few reasons.  Room, sales (lack there of), and better deals elsewhere that I just can't complete with.  But what I can do is this.  Refurbished are now coming with your choice of 2-4 lbs of cocoa or coffee so you can get a feel for the roasting process a little more stress free.  There is also a new smaller grid drum available that I am offering for free.  And, last but not least, I have dropped the shipping weight so shipping costs will also be less.  Just choose what combination you want and away you go.  Oh, and because I have had the question quite a bit, the small drum cylinder is meant for smaller coffee beans, not cocoa nibs.  The nibs still fall through too much.

Finally, on a first come, first serve basis, I have one Refurbished roaster that has a nasty dent on the front top.  It doesn't affect roasting at all - it just isn't pretty.  I don't feel right selling it for even the $199, so I am offering it up with a discount code.  At checkout, (last page), if you enter the Discount Code: DENT it will take $25 off the total.  Again, first come first serve.  If the code doesn't work, someone got to it before you.

5 Comments

8 Comments

Chocolate Making 101

My dear partner Penelope put this together, noting that so far there is not one single page outlining the entire chocolate making procedure start to finish.  Well, now there is. Chocolate Making at Home 101

It won't give you everything you need in detail (hence the '101') but gives a great overview.  For all the detailed information follow the links under Alchemist's Notebook to the right.

8 Comments

3 Comments

12th Night, tortes and the aztecs

How's that for a title? I celebrated 12th night last night (secular form actually) and for dessert I prepared a fresh Tabasco (bean of course) based flourless torte - just to die for.   I thought I would share both parts.

69% Dark Tabasco chocolate - 6.25 lbs 5 lbs of Tabasco cocoa

5 oz  Natural cocoa butter

30 oz unrefined cane sugar

Roasted the Tabasco cocoa in two 2.5 lb batchs in the Behmor, Profile p1, 14 minutes roast time.  Cracked the cooled beans in my Cocoa Mill, winnowed them and ground them into liqueur in my Champion Juicer.  I melted my cocoa butter in the Melanger, added the Tabasco liqueur.  I did something I have never tried before which was a little elevated temperature refining.  I put the drum and contents in my oven until everything was 140F.  I heated my sugar to 180 F (and no, is doesn't melt).  I then started the Melanger running and added the sugar.  Brought the whole mass to 155 F.

Now, before you try this at home, I have an aluminum center mount for the wheels (the nylon gets brittle) and have replace the seal on my Melanger (don't ask why I had to do that) so I can take mine over the 150 limit.  If you want to try it, just go to 145 or so and all should be good.

In any case, the extra heat helped to drive off some of the acidity of the beans, but more importantly catalyzed some nice acid induces hydrolysis flavor reactions in the chocolate and really smoothed out the flavor and bumped up the complexity of the chocolate.  The temperature only stayed elevated for 4-5 hours.  I think 8-10 would have been better, but I will have to play with that more.  I considered the chocolate finished at 20 hours.

torte.jpg

The chocolate itself has some great liveliness and was deemed almost too sweet by some household tasters.  Says something for a nearly 70% dark chocolate.  I used 1 lb to make the following torte.

Chocolate Torte

1 lb 70% chocolate (homemade is best in my opinion)

2 cups sugar

2 cups butter

8 eggs

(If you like coffee, 6 oz of espresso can be added to the eggs for a Mocha torte)

Preheat  oven to 350 F.  For really even baking, make a 1" water bath with a 12" pan and get that also pre-heating. Pull your espresso and let cool if you want a Mocha torte.  Melt the butter and chocolate together.  Also let cool to room temperature. Butter and dust with cocoa powder a 9"  pan.  I find a springform or cheesecake (removable bottom) pan works well.

Whisk the eggs and sugar together.  Whisk in the espresso if desired.

Fold in the cooled chocolate mixture (chocolate to eggs so you don't set the eggs).  The "batter" may well gel up - kind of odd, but ok and what allowed me to put the nice spiderweb pattern on the torte.

Pour into the prepared pan and put in the oven (in the waterbath if you are doing that).

Bake 45 minutes.  Edges will be set but the middle may jiggle a little.  It's ok.  Remove and let cool.

This supposedly serves 16. It is VERY rich.  I like it the next day best. The rest of the  chocolate we molded up.  I tested out a new mold.  It holds 72 0.2 oz chocolates.  I will be selling a limited amount of these.  Look for them in the next week or so.  Someone (thanks Jasmine) got creative as soon as they were out.

aztec.jpg

Our Ode to the Aztecs.

We just ran out of Ocumare, and are very low on the Papua New Guinea . But the new Panama should be in Wednesday, and available soon there after.

3 Comments

2 Comments

Behmor 1600 now in stock

Our stock of Behmor 1600's are now in stock and all pre-orders have been shipped out.  I opened up and tested a couple units and there were as expected.  They now have a new clasp on the drum that I like quite a bit.  Much more secure.  I will get a photo up this weekend. You will see two options.  A non-labeled USA model and a Canada model.  The ONLY difference is that I have included and defrayed  a little of the Canadian shipping costs for our friends up north.

A few notes and reminders.

  • 2 lbs is my recommended minimum.  Less than that and you run the risk of over roasting.
  • Don't forget to register your Behmor online with Behmor.com.  It's is how warranty information is tracked.
  • Don't forget to read your manual.  A lot of it is geared for coffee, but it has applicable information.  In particular, don't fail to do an initial "dry burn" before roasting for the first time and while you are not forgetting things, check the underside of the chaff tray for residual sealing plastic.  The factory sometimes leaves a bit and it smokes if you roast it.
  • Finally, there are a number of "warning" labels on the roaster that are meant to be removed before roasting.  The glue used sometimes is a little too good.  If it is still tacky after you take it off, a little nail polish remover does a good job of cleaning it up.

And as always, if you have any questions, please don't hesitate to ask.

2 Comments