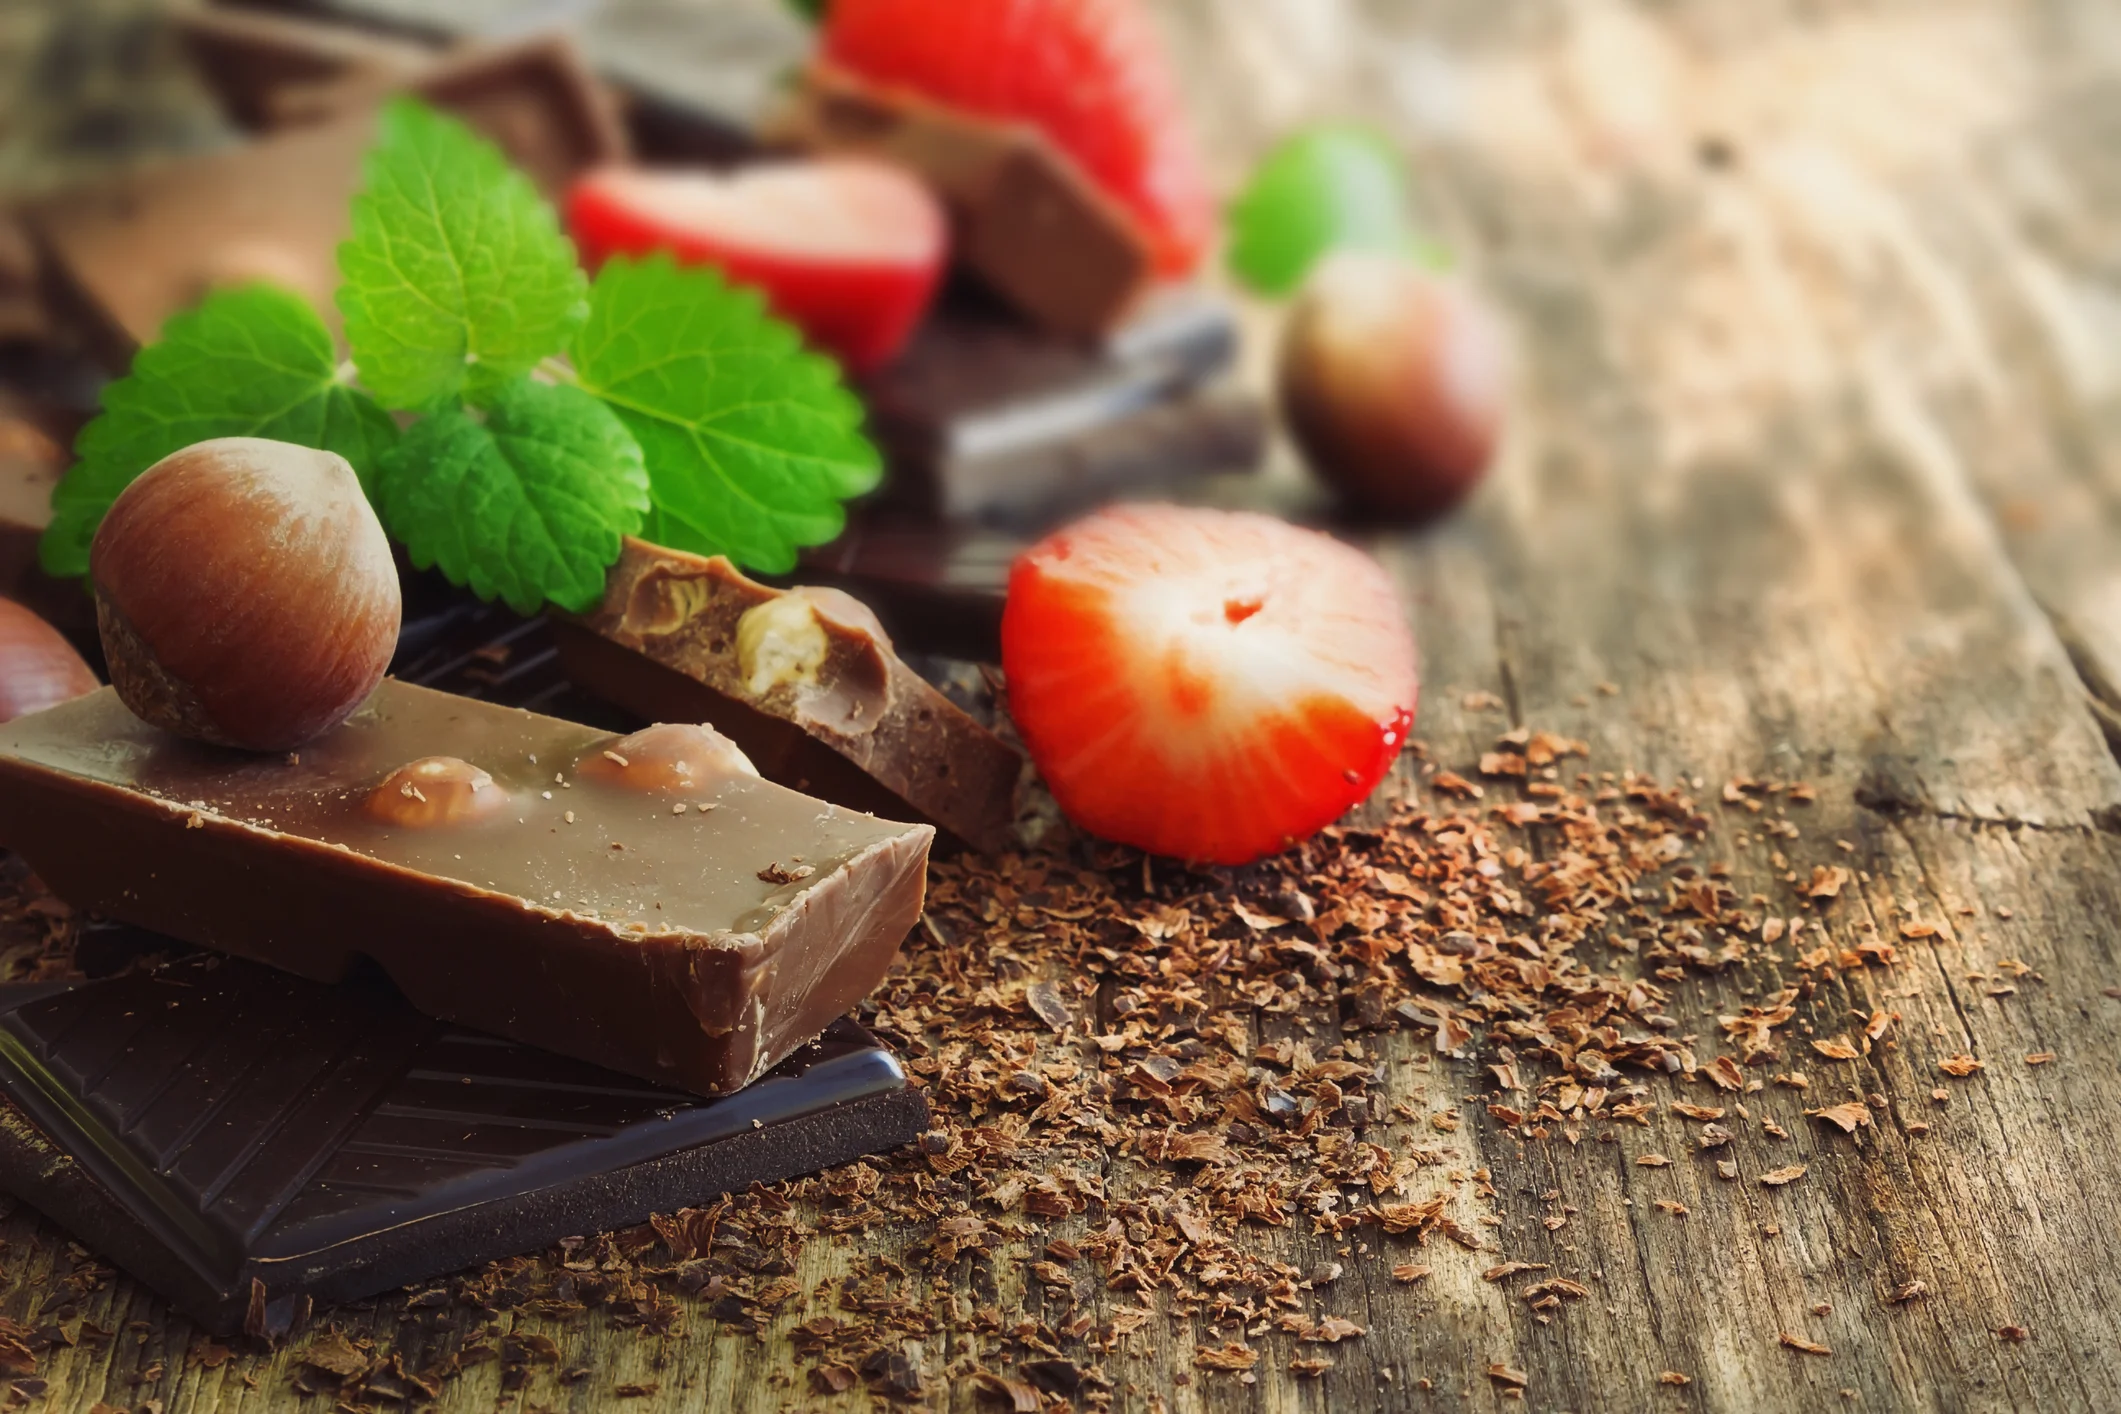

How long does it take to make semi-sweet chocolate and what is the recipe?

Daily musings and writings from the Alchemist
Viewing entries in
Recipes from the Laboratory
How long does it take to make semi-sweet chocolate and what is the recipe?
We've noticed that different beans seems to have different amounts of intrinsic oil. The Peruvian Maranon seems to have quite a bit of oil and produces a chocolate that flows very easily but it tricky to temper correctly. Is there a way to know in advance the amount of oil in a bean so we can adjust the amount of cocoa butter we add?
I have tried making a milk chocolate with coconut milk powder but it is really soft and it is driving me crazy. I want the flavor really strong so I used 35% coconut power but it won’t set up. Should I use less cocoa butter? I put in about 8 oz to a two pound batch. I’ve even tried tempering it and it stays soft.
It looks like you ended up with the perfect storm of a recipe to just not behave in a cooperative fashion. You both have too much fat in the recipe and too much of it is coconut oil. Let’s see if we can get you a good coconut milk chocolate recipe that is still strongly flavored.
Level: Novice
Reading time: 8 minutes
I want to make drinking chocolate. Can you give me a recipe?
I’ve touched on parts of this in the past but now is a good time to bring all the options together.
Level: Novice
Reading time: 4 minutes
I was just wondering, how important is a melanger is for this recipe of white chocolate? I know it’s important for grinding regular chocolate, to smooth the texture of the cocoa solids – but does separated cocoa butter need the same grinding, or is it already quite smooth? I’m sure it’s both useful and convenient, but I was curious if it is indispensable to this recipe or how much of a difference it would make to try making white chocolate without one.
If the use of the santha grinder in this recipe is grinding the powdery ingredients (sugar, milk powder, soy lecithin) into the cocoa butter, could pre-grinding those ingredients very fine (say, to maybe a powdered sugar texture) make a good white chocolate without needing the santha grinder?
A melanger is indispensable for any chocolate be it dark, milk or white as long as you are defining chocolate as modern chocolate with a smooth and silky texture.
Cocoa butter doesn’t need further grinding by a melanger, but everything else you add does.
Nothing available by the home chocolate maker can get chocolate as smooth as a melanger. I’ve tried everything I could think of and they all fail to do the job.
The reason has to do with the vague term “fine” or “very fine”. Those just fail to mean much of anything. Sure, powdered sugar is fine compared to corn meal, but both are coarse compared to the particle size of the sugar once it has been refined in the melanger.
And that is worth noting. It isn’t just, or even primarily, the cocoa solids that are getting refined down. It is the sugar and milk powder. Let’s get away from ‘fine’.
The sugar and any other solids in chocolate are in the 10-15 micron range. That is 1/100 of a millimeter. In contrast, granular sugar is somewhere around 500 um( microns). Fine castor sugar can get down to half of that. Now, if you go searching around you will find that 10x superfine sugar can reach 15 um. Home free right? Unfortunately not.
Commercial powdered sugar contains cornstarch and/or other anti-caking ingredients which can lead to a gummy chocolate. As for powdering your own, I just tried it. I was able to get down as low as 25 um, but there were still some pieces larger than 50 um. And that size will be coarse in your mouth.
I even tried filtering it through a sieve, and what came out was in the 10-15 um range. The problem though was that I could only get about 10% of the sugar through (less than 1 oz) before it started clogging and caking (hence the anti-caking in powdered sugar).
Really, it isn’t a viable method for anything more than just a couple ounces of chocolate.
Finally, that neglects the aeration and minor conching that occurs in the Melanger. Non-refined white chocolate has to my tastes this odd, harsh taste that goes away over the 12-18 hours needed to make white chocolate in your Melanger.
There you go. There is no making modern chocolate without a Melanger at the minimum.
Level: Apprentice
Reading time: 10 min
i want to make chocolate peanut butter. So can i use such grinder I can make in 2 steps namely 1 grind peanuts with cocoa powder and sugar in grinder then for proper and smooth consistency like nutella grind in such stone grinder
You can use the Spectra 11 to make a variety of things. Nut butters and their variations are one of them. Since you can also make praline (hazelnut and sugar) there is no reason you cannot make your peanut butter chocolate creation. But you may or may not run into some practical considerations.
The main issue you are going to run into is that if your goal is something like Nutella, it may well be too thick for the Melanger. It is spreadable and does not really flow. At least if you produce it with the standard Nutella ingredients.
This is one of those times that the use of cocoa powder is called for. If you are keeping traditional as it were Nutella consists of the following:
If you do some calculations you will find that it is about 30% fat, which is a touch lower than the recommended 33% fat for most chocolates. Lower than 33% and your mixture may be too thick to work properly in the Melanger.
But you were asking about peanut butter, not Nutella. In that case the gloves are off and you no longer have to follow those proportions. And it is also worth noting that neither peanut butter nor Nutella are actually as smooth as chocolate, which will also work to your advantage. As will the relatively small amount of cocoa powder the above recipe calls for.
I would recommend first off making sure you are using roasted peanuts. The same moisture rule applies to nut butters as it does to chocolate. Too much water will cause the nut butter to get very viscous in the Melanger. It may flow with it stopped but the sheer makes it push back as it were. I once almost broke my melanger trying to grind raw almonds. It wasn’t pretty.
So start with your peanuts. How much? I’d start at 60%. Unlike chocolate that is a solid at room temperature, peanut oil is a liquid so you can avoid having to heat them and the Melanger bowl. Add them a bit at a time until you have as much as your recipe calls for. I would suggest giving it probably an hour or two to grind before continuing with your next addition.
That would the sugar. Even though the Nutella recipe is 55% sugar, I would start off with 25% and see what you think. Again, I would give that a couple hours to grind down. You can always add more and keep grinding.
Now you come to a decision. I said before that cocoa powder would be ok here. And it would be. At around 7% you could very possibly just stir it in and be done. Remember, Nutella isn’t as smooth as chocolate. Except we are not exactly following the recipe and to make it to 100% total, you are going to need around 15% and past experience has shown me that the melanger is going to have trouble with that. So, you can either try stirring it in and being done, or, try this upping of the ante.
You have gone through the trouble of using a Melanger and fresh ingredients. I would suggest going ahead and dropping the cocoa powder and instead use roasted cocoa nibs. Just put the 15% cocoa nibs (don’t forget to warm them) right into the Melanger. Since cocoa is about 50%, this gives you the same percent of cocoa in your mix as Nutella but has the advantage of that you will be adding some cocoa butter which will help thicken your mixture (since it sets up at room temperature) without the need for high sugar and other ingredients. And keep in mind it will be a bit thinner in the Melanger because the cocoa butter is melted.
And after all that, I am going to toss out one more piece of advice that is closer to how I would actually approach this. At least the first time as I am formulating the exact recipe I want. Keep in mind I gave you some approximations (60% peanut, 25% sugar,15% cocoa nib) that may or may not be to your tastes both flavor wise and from a consistency/viscosity standpoint. And at the same time I’ll show you why Nutella has some of that vegetable oil in it.
When I did this I made a batch of sweetened peanut butter and a batch of chocolate and mixed them together (in the kitchen, in bowls, not the melanger) until I hit the flavor proportions I wanted. For me this was 25% sugar in each. Then I mixed them in small batches at various proportions until I hit the flavor I wanted. 75% peanut was both too peanut heavy and too thin. 75% chocolate didn’t have enough peanut flavor. For my tastes 45% peanut butter was just about right but it was too thick. It was like a chocolate fudge and not spreadable at all. Enter the vegetable oil. Or close enough. Since I already had peanuts in there I added a small amount of peanut oil until the consistency smoothed out to where I wanted it. In this case it was about 7%.
And a little tip. When you are testing your proportions, I had the peanut mixture about 60 F and the chocolate at 90F so when mixed, the chocolate set up. It saved me time waiting for it to cool and solidify.
Once I had my proportions, I was able to make it in the melanger in one go since the cocoa butte kept it fluid while hot but solidified just right when cool.
So there you go. Three different ways to make a sweetened chocolate nut spread. See which one works for you and your tastes and go from there.
Level: Apprentice
Reading time: 10 min
I am struggling making my 70% chocolate with only two ingredients. It seems like what I should do but it is really thick and hard to work with. It blooms really badly. What am I doing wrong?
Why are you not adding a little cocoa butter?
I mostly keep my head down in social media but I’ve heard through various grapevines that two ingredient chocolate is becoming a *thing*. And I completely do not understand it. It is talked about like it is superior or the maker is superior for using only two ingredients.
I guess I am going to soap box here a little, and I don’t mean to offend anyone in particular. Just take it as my musings on the subject.
It seems maybe this is where you are getting the idea you should be using only two ingredients. Cocoa beans and sugar I assume. Trying to suss out why, people toss out phrases extolling the purity of flavor or staying true to the cacao or other such nebulous statements. At the end of the day, it feels like marketing. A way to set themselves out from the crowd. Ok I guess.
If that is what you like, by all means make it. But I caution the thinking that using only two ingredients is in inherently better. By what metric? Sure. Few people want to eat a chocolate with 27 ingredients where 95% of them are chemical names. But once you are out of that mindset, I don’t truly get how 2 is better than 3 or 4. Why not 1 ingredient?
But to my way of thinking, it is some kind of pendulum reaction to 27 ingredient chocolate product. That if that is considered inferior (no real argument there) then the absolute bare minimum must be the best. This is the same logic that raw chocolate folks make. Over roasting is bad, so no roasting is best. That’s bad logic and the world does not work that way. Too much food (obesity) is bad so no food is best? Really? It is the same logic and makes as much sense. None.
Going back to metrics and why two ingredients are better I would propose these two metrics for consideration.
1) Adding a little cocoa butter (2-3%) to you chocolate can actually enhance the perceived flavor of the chocolate. It does this by allowing the chocolate to dissolve faster in your mouth, creating the sense of more flavor. You are familiar with this phenomenon in regards to sugar. Which seems sweeter? Rock candy or granulated sugar? Both are 100% sugar, but the granulated seems sweeter since it can dissolve faster.
2) Two ingredient chocolate can be thicker, and more temperamental to temper. How does this make it better? It doesn’t.
It is also worth noting that in conversations with supposed two ingredient makers, well over half say they used *a little* cocoa butter in their melangers to make life easier…..which suddenly sounds like 3 ingredient chocolate to me. This more than anything makes me think they are just playing a marketing game and that it really doesn’t matter.
That all said, let’s see if I can help.
First off, I am going to recommend you reconsider why you want to use only 2 ingredients. Put aside what you see other people doing. Keep in mind that that two ingredient chocolate you tasted and love *may* contain extra cocoa butter. Evaluate the chocolate you are making for what it is. Did you actually try making it with a little extra cocoa butter and if so, did you like it better without added cocoa butter? And why didn’t you make 1 ingredient chocolate if you wanted to *pure* cacao flavor?
Seriously, this is about what you like and enjoy. And that means the process too. If you can’t temper it because it is so thick, and it blooms, and you didn’t like the chalky texture, just how did you improve the experience and/or final product by keeping it *pure*?
Ok. I was going to offer help. I have heard that people have had difficulty with Tien Giang being especially thick. So I roasted 6 lbs and divided it into 3 batches.
1) The control. 74% cocoa, 26% sugar.
2) Heated control
3) 20% vodka soak
Spring boarding off my success with the honey chocolate, I mixed in vodka 20% by weight into the roasted nibs. After soaking in for 2 days, I dried them in an oven for 2 hours at 150F. To make sure it was not just the heating that made any difference, I also heated an equal amount of roasted nibs the same way. My hypothesis here was that moisture was causing the extra thickness and that by reducing that moisture, I could reduce the viscosity.
The final results were everything I hoped they would be.
1) This was thick and very hard to work with.
2) This was thinner and easier to work with.
3) This was the thinnest of the three.
The extra drying helped significantly to dry out the nibs, even though they had been previously roasted. In many cases I think this might be all you need to do if you insist on only 2 ingredients.
The vodka really helped to pull out extra moisture. I took weight measurements before and after drying and out of 740 grams of nibs, the heated control lost 5 grams of water, and the vodka treated lost 12 grams.
And the flavors were basically the same.
Alternatively, 3% cocoa butter reduces the viscosity nicely and if you are not allergic, 0.5% lecithin will very nicely bind with the water and make the chocolate easier to work with. And to my tastes, they all taste just as *pure* and true to the cocoa’s potential. Your mileage may vary.
If you have not guessed, I lean toward solid data and rigorous evaluation. Don’t follow a path because everyone else is. Make what you like and be honest about it and challenge your per-conceived notions. Maybe they will be right….but maybe you will find there was a heavy placebo effect going on and that 2 ingredient chocolate isn’t anything particular special.
Chocolate you made yourself. That’s special.
Level: Apprentice/Alchemist
Reading time: 13 min
How do I sweeten my chocolate with honey?
Sit back. It’s story time.
For years now I have not had an answer to this question. Or at least I didn’t have an encouraging answer. The best I could say was that you could not just pour it into your chocolate while in the melanger. If you do that the water in the honey will cause the chocolate to seize.
Over and over I’ve been told it was possible, but it was always via the classic friend of a friend. Or whoever told me had seen a *real* chocolate bar in the store sweetened with honey. In three separate cases I tracked down the makers of said honey chocolate. And in every single case they admitted, rather quietly and with their head lowered just a bit, that the chocolate just didn’t quite work well and that it was very difficult to remain stable. In 2 of the 3 cases all they did was stir honey into the chocolate during tempering, very gently so as not to cause a seizing reaction, and hoped for the best….and still had a high failure rate and shelf life issues due to the moisture.
For me this challenge had the same feel as my initial chocolate making endeavor back in 2003 when no one knew how to make chocolate at home. My goal then was to make real chocolate in a straight forward and approachable way. I wanted to do the same thing with honey. I wanted to come up with a way that anyone could do without hedging, and without admonishments to be careful.
Toward that goal, I have failed quite a bit. Failure is always an option. Let’s run down my list of failures.
The low hanging cacao fruit was powdered honey. The issue there turned out to be one of false advertising. I could find no real dried or powdered honey. It all contained huge amounts of dry sugar. There was enough to give a honey taste in teas and baked goods, but not what I was looking for. It’s is worth noting I did find one on-line but it was both horridly expensive and often out of stock. That in itself violated the goal of being straight forward and approachable to anyone. So I moved on. Failure.
I had this epiphany while making a batch of praline. Part of that procedure is to make caramelized sugar. You start off by making sugar syrup and then boiling the water off. I could find no good reason I could not boil off the water in honey.
It all went really well. It boiled. It hit hard crack temperature. I poured it up and it gave me a beautiful sheet of honey glass. And proceeded to suck up moisture fast and become tacky in the time it took to cool. Trying to powder it so I could use was a choir and by the end it was sticking together and in no shape to go into chocolate. Failure.
After that I decided it was time to step back and make it simpler so I tried to dry my own honey. I actually didn’t have high hopes here. AI tiny test confirmed that all you end up with upon dehydrating honey is something a bit akin to a taffy. Super thick but nothing you could add to chocolate. It forms a skin that keeps it from 100% drying out. Failure.
From there I jumped to coating a batch of roasted nibs in honey and drying those. I really thought I was onto something there. I had spread out the honey, radically increased the surface area and made the coating of honey so thin that it effectively could not form a skin.
After about 6 hours at 120 F the nibs were a tiny bit tacky. After cooling they firmed up and were crunchy. Looking good! I had previously weighted my nibs and honey and when the weight showed I had lost the 16% of the weight of the honey (the average moisture content of honey) I called it done.
I put the honeyed nibs into the melanger. I put some warmed cocoa butter and a little lecithin in just to help things along. After an hour they were all in and while not looking perfect, didn’t look too bad. Unfortunately somewhere between 1 and 24 hours disaster struck. What I came back to is virtually impossible to describe. But I will try. The melanger was still running. But it looked so very weird. It was bumping and thumping and splashing in ways it was not supposed to. Somehow, from the best I can tell, the honey started sticking to itself as it worked. There were globs of hard honey all over the sides of the bowl, the bottom of the bowl and there was this utterly bizarre ring of …..something…..around the central shaft. From the best I could tell it was wax or at least wax based. Pretty flavorless, kind of hard, but not really. It took me two days of hot water, repeatedly scrubbing and lots of elbow grease to get it clean. Oh, and the chocolate? Nasty. You know that odd flavor after you have chewed up all the flavor out of a piece of honeycomb? That! Failure.
But it’s funny. I have this streak in me that refuses to give up as long as what I am trying doesn’t go off and break physical laws. No perpetual machine tests for me! So I kept thinking, letting the idea rest and turn over in my mind. A few months later I was doing another test and had great success. It was not a honey test, but it was the key. I was playing with infusing some whisky with cocoa, noticed how much liquid the nibs soaked up and wondered what would happen if I went the other way.
I proceeded to add a small amount of bourbon to some roasted nibs. After 12 hours there was no bourbon left. I put the bourbon nibs into the oven and an hour later I was back at my original weight of nibs. And the nibs were totally dry. I made chocolate with them (recipe later) and I had a lovely bourbon chocolate that behaved perfectly.
As I said, this was the key. I think most of you know I am a retired chemist. This got me thinking about sugar’s affinity for water (everything gets tacky), but also alcohol’s affinity for water. I wondered if I could use the later to out compete the former. I’m not going to delve too deep into theory but I will say water and ethanol forms a mixture that is called an azeotrope. This mixture contains about 5% water. And the key is that no matter how you heat it you cannot make that water go away. My thought was to use that characteristic to force the water out of the nibs. Basically by heating ethanol soaked nibs, when the ethanol evaporates/boils off it draws water out with it. That is why the bourbon whiskey worked. I wondered if I mixed honey and ethanol (vodka) I could force the same reaction.
I guess by now you know it worked or I would not be writing this. It worked fantastic.
I dissolved 250 grams of honey in 160 grams of vodka. There was some calculations behind the choice of that amount of vodka involving partial pressures of water/ethanolmixtures, but suffice it to say it worked and it might well be possible to use even less. It took heating the mixture to 122F/50C to getthe solution to go clear. After that I mixed it with the nibs and let them soak for a day. I dried them in an oven at 150 F (the lowest setting in my oven) and they dried right out. They had a pretty sheen on them and were crunchy, not sticky. After some hours they stuck together but broke easily apart again.
Hedging my bets I heated 10% cocoa butter and a teaspoon of lecithin, and made a batch of honey chocolate. This time there was nothing funny at all. After less than 1 hour it was looking like this:
https://www.instagram.com/p/BI5qAJ8AuNj/?taken-by=chocolatealchemy
And after 24 hours this:
https://www.instagram.com/p/BI8DgcXAtWp/?taken-by=chocolatealchemy
Success!
For those that want to follow along I started with 750 g of roasted nibs, 250 g of honey and 160 g of vodka for a total weight of 1160 g. If everything works like you want it to, you should end up with the 750 g of nibs plus the weight of the honey minus 16% water or 210 g for a total of 960 g. 100% of the vodka is gone. I ended up with 948 g. I count that a total success as the 16% was an estimate.
Given how thin the chocolate was I think I could have greatly reduced the cocoa butter and/or lecithin amount. And it is very possible the amount of vodka would be also reduced now that I know what to look for. As I think about it I wonder if the vodka helped pull out extra moisture from the chocolate resulting in a thinner than standard chocolate. That might be worth looking into.
And the flavor? Here is the funny thing. I’m not a honey fan. It tastes of honey. I’m not a fan. But it tastes like I would expect honey chocolate to taste like. A little floral, a little tangy and a little back drop of comb and loam.
So there you go.
Honey chocolate.
Real honey chocolate.
Straight forward. No being delicate, no disclaimers, no conditions.
Pleasegive it a try and let me know how it works.
Level: Novice
Reading time: 10 min
I've tried to make "just add hot water" drinking chocolate. However I'm having two problems:
How could I improve these please? My basic recipe is:
27% sugar, 39% cocoa liquor, 9% cocoa butter, 24% milk powder, 0.7% vanilla, 0.3% sunflower lecithin
Also, how best can I imbue caramel flavour into a milk chocolate? I've tried caramelizing sugar, chopping it up and then conching it. But the caramelized sugar is super hygroscopic and also gets stuck in my conche. What else could I try please?
What you are running into are the preconceived notions of what and how hot chocolate should behave. What it seems you are used to with "just add hot water" is very significantly processed chocolate. I don't mean this negatively per se. Just that you are not seeing the massive amount of work that went into making a product that will dissolve virtually instantly for the American consumer market.
My very first thought on 1) is "that sounds about right". Chocolate is oil based and you trying to dissolve in a water. It would be exactly the same if you were surprised if you lightly stirred an egg yolk and cup of oil together and didn't get mayonnaise. It takes a very specific set of conditions to get oil and water to mix and be stable.....as you are seeing.
Now that I've said that, what I have had some success with is making a ganache with my chocolate and then mixing that into water. If you combine chocolate and water (or cream) at approximately 1:1 at 100F, rather gently, then let it set up, you may well find a spoonful of that then dissolves much easier into hot water without all the stirring and blobs at the bottom. Basically you have made an emulsion. Just like mayonnaise.
Your second item is playing right into the first issue. Let's go back to the egg yolk and oil. If you just mix the two together, it would look watery and thin. Certainly not creamy, yet mayonnaise is creamy. It's the emulsion that is giving it its creamy texture. Again, there is quite a bit added to instant hot chocolates to give them their creamy mouth feel instantly. Quite often guar gum, gelatin, modified starches, and the like. Basically a ton of food chemistry to get the mixture to behave smoothly and easily.
On to the advice now. Where you are going to find success is developing your technique. Basically, it is a variation of the ganache prepared on the spot. Have a look at both of these.
http://zoomyummy.com/2010/11/11/hot-chocolate/
http://www.wellplated.com/two-ingredient-homemade-hot-chocolate/
In short, I kind of hate to tell you, is that you have to give up the idea that you can have both an instant hot chocolate and one that didn't take time to prepare. It's sort of like a magic trick. You are used to only seeing the final trick - Ta-da! just add water hot chocolate - without realizing how much behind the scenes work there is to pull it off. i.e. pulling out a pan, heating everything just so, so that you form a nice thick, creamy emulsion.
As for the caramel flavor. I don't have a surefire answer for you. I can give you hints, but just like the above magic trick references, it isn't as easy as adding caramel to your chocolate as you have found. What I've found is you need to create it in the chocolate. Using high acid beans and elevated refining temperatures greatly increase the amount of caramel flavor in chocolate.
The hands down most caramel chocolate I ever tasted in a milk chocolate was from a Madagascar. In this particular case the 20% cocoa butter had been pressed (using the Nutrachef Oil press) from the same Madagascar beans used to make the chocolate. It resulted in a deep caramel flavor.
It is also worth pointing out you want a full fat spray dried milk powder. The process itself adds caramel notes. That’s one of the main reasons I offer the milk powder that I do. Non-fat milk powder just doesn’t seem to do it.
And I should clarify. Do you want the caramel flavor in your chocolate or in your hot chocolate? Making your own caramel syrup is the direction I would go if you want it in your hot chocolate. Basically, caramelize the sugar as you did before, but then immediately dilute it with hot water. This spells it out:
http://www.copykat.com/2015/01/19/caramel-syrup-for-coffee/
Prepare your own homemade caramel syrup for coffee (or chocolate) from scratch. It's easy to do.
Ingredients
- 1 cup sugar
- 1 cup boiling water
Instructions
Heat sugar over medium high heat until it begins to melt. Stir constantly. If the sugar begins to burn, discard, and try again. When the sugar begins to brown quickly stir in boiling water. Stand back, as the mixture may steam. Stir until well blended. Cook mixture for an additional 15 to 30 seconds. Do not let the sugar burn. Remove pot from heat source, and allow mixture to cool before placing in an air tight container.
That you can even add to your ganache as the liquid portion and the sugar content will both help it keep longer (ganache is perishable when made fresh) and allow the mixture to incorporate more water or milk to turn into hot chocolate.
I hope that helps.
Level: Novice
Reading time: 5-15 min (depending on how you follow maths)
I have a batch of 75% chocolate running. 70% cocoa nibs, 5% cocoa butter, the rest sugar. I want to make it 80% by adding cocoa butter. I started with 85 oz of nibs. Can I just add the same amount of cocoa butter again?
Sadly, no you can’t. But let’s run through the maths if you were to add that amount of cocoa butter and then how much you actually need to add.
It goes like this.
First I need to find out how much total chocolate you have so I can know how much cocoa butter you added.
T / 85 = 0.7 Rearrange that to:
T = 85 / 0.7 = 121.43 oz total chocolate
With that, I can get how much sugar.
121.43 * 0.25 = 30.36 oz sugar.
So you have
85 + 30.36 + 6.07 = 121.43 oz
If you add 6.07 oz more cocoa butter it is now
85 + 30.36 + 6.07+ 6.07 = 127.5 oz total chocolate
To find the new cocoa butter percent it is
(6.07+6.07) / 127.5 = 9.52%
The new chocolate total percent is:
(85 + 6.07 + 6.07) / 127.5 = 76.2%
Not 80%, even though the cocoa butter is near 10% as the new total is higher. The cocoa nib portion has dropped from 70% to 66.6%.
85 / 127.5 = 0.666 = 66.6 %
If you want to actually make it 80% you have to pull out algebra again.
0.8 = (85+6.07+x) / (121.43+x)
0.8 (121.43 + x) = 85 + 6.07 + x
97.144 + 0.8x = 91.07 + x
97.144 - 91.07 = x - 0.8x
6.074 = 0.2x
x = 30.37 oz
So, you make it all the way to an 80% bar with only adding cocoa butter you have to add a whopping 30.37 oz as:
(85 + 6.07 + 30.37) / (121.43 + 30.37) =0.8 = 80%
You didn’t ask, but I would add more cocoa nibs and/or a mixture of cocoa butter. Just for fun, let’s run through the maths involved in making it 75% cocoa nibs, 5% cocoa butter still, and sugar from your existing batch.
I’m going to take this in another direction calculation wise since we know how much sugar we have and don’t have to change it.
S = 30.6
We have decided it will be 20%, so we can get the new total from this:
30.6 / T = 0.2
T = 30.6 / 0.2 = 153
With that in hand, we can find out how much cocoa nib we need.
153 * 0.75 = 114.75
And since we had 85 oz:
114.75 – 85 = 27.75 oz cocoa nibs
We can do the same thing with the cocoa butter:
153 * 0.05 = 7.65
7.65 – 6.07 = 1.58 oz cocoa butter.
The main downside to this option is you have to refine your chocolate further.
Either way, there is the maths. I hope that helps.
Now that you have a cocoa butter press, have you experimented with different ways of making chocolate (to improve flavor/texture/etc...)? While I realize that "just because you can, doesn't mean you should".... My mind is now spinning with thoughts of things that could be done during the process... pressing butter out of the liqueur before putting it into a melanger to refine/conche... Doing something to warm/process the butter to change its flavor before reintroducing it to the cocoa "powder"... different ways to introduce the sugar into the butter and/or powder?
Well, the first answer is that no, I have not yet experimented with this. I am actually in the middle of a long series of oven roasting tests. So far I have 10 different combinations of roasting beans and nibs in a conventional oven. More on that later.
For those that are missed the 'press' that is being discussed, it is the Nutrichef oil expeller that works on cocoa beans and gives your own cocoa butter.
What can be done? Well, given we are limited to a Melanger, I think some of our options are limited by the necessity to have a flowing product. You could press some cocoa butter out, but you still need to maintain 30-35% fat, so even with a 70% dark chocolate, you are already there and can't remove any cocoa butter.
I am glad you mention 'just because you can, doesn't mean should". We CAN process our chocolate more, but I'm not sure we should. It's one of the big reasons I constantly make it known that I don't find you can make a good chocolate from cocoa powder. It was been processed too hard. But there is also no reason not to try. This is fresh cocoa butter and powder and is 'processed' more gently than others by nature of the small scale. I will certainly try making a batch recombined. For science's sake.
What does come to mind though is a cocoa powder, cream powder chocolate. At 72% fat in the cream powder, you have the ability to get that chocolate flowing again. That is now on the list too.
That all said, I think the first place to start is making your own butter, and using it in 5-10% amounts in your existing recipes and seeing if it makes a difference. I know it can make a radical difference in a milk chocolate where there is 30%. Time to play people!
Finally, I will mention that the resulting cocoa powder is not as fine as commercial powder. But it is pretty fine (straight out it is coarse, but a quick run in a whirly blade grinder gets it fine). And I've been using it in mochas (it mixes nicely with hot water), hot chocolate (ditto with hot water and sugar) and quick mole spicing (I sprinkle it on sauteing chicken and add a little chili sauce).
So, what do you folks want me to test?
What recipe should I use?
This is a follow up from all the possible combinations and permutations that are possible when making a batch of chocolate. Clearly you can’t make all 7 billion combinations. You can’t even make 70 really. But what you can do is go about it systematically and zero in pretty quickly upon what you like. And the best part is you will hopefully learn along the way what various changes produce in a finished chocolate.
What I am going over here is not for everyone. If you want to make a good chocolate, that is pretty straight forward. But if you want to experiment, and learn to dial a bean in to your tastes, this is how I do it.
First you have to choose a bean. I have around 30 beans. It’s overwhelming, I know. But in short order, you can winnow it down to a pretty easy selection. Go by your own preferences in foods. I love meats, nuts and savory flavors. I also like deep bold flavors. Look for descriptors like, well, nutty. And savory. Nicaragua, Honduras, some Ecuador, Tanzania. The corollary to that is staying slightly away from fruity and acidic beans. Dominican Republic, Madagascar, some Guatemalan. I don’t like hoppy, citrusy ales. Nor light fruity drinks. And if you drink coffee, that is a great indicator. Sumatra? That’s earthy and Ugandan is going to be up your alley. Bright Kenya? Madagascar. I think you see the pattern. You know your tastes.
Roasting. That is critical. The current trend is to not ‘over roast’ your beans. And on the surface, I agree. In practice, unfortunately, the result is I am dealing on a weekly basis with people that are terrified to fully roast a bean and the result is under roasted beans that are overly acidic, over astringent and lacking in good chocolate flavor (that is developed from a full roast). So here is my suggestion. Plan to roast twice initially. Once specifically light, once significantly longer. The whole point is making them radically different. So, using the Behmor 1600 as an easy way to talk about profiles, do one roast with 2.5 lbs of bean on P1 for 15 minutes. The second one you are going to take to 20.5 minutes. Yes, 5.5 minutes difference. Cocoa can take it. The idea that a bean can go from ‘perfect’ to ‘ruin’ in under a minute is in my mind totally crazy.
Now onto the recipe. What do to? Well, what do you like? Clearly you are making your own chocolate because you or someone you love likes chocolate. Start there. You can reverse engineer virtually any chocolate bar. If it is 70%, that mean the cocoa nibs plus cocoa butter equal 70%. On average, 50% of the cocoa nib is butter/fat. So if that bar says 35% fat (50% of 70%) then you know they didn’t add any cocoa butter. If it says 40%, you know they added about 5%. And the rest is sugar.
So, take that recipe and your light roasted nibs. 65% cocoa nibs, 5% cocoa butter and 30% sugar. Weigh out your ingredients. This is where we start to go kind of crazy. Put your cocoa and cocoa butter (if you are using any) into your melanger.
And add HALF the sugar. Let it run 24 hours.
Take some out (just a couple tablespoons) and then add the rest of your sugar.
Let it refine another 24 hours. Remove about half of it, and add another equal portion of cocoa butter and let it run another hour. Remove a tablespoon or two sample and let it run another 24 hours.
Remove the chocolate and repeat this with your fully roasted nibs.
At the end of this you will have 8 different chocolates to try that are pretty different – all from 2 roasts. You will have:
1) light sugar
2) “target” chocolate
3) Extra cocoa butter chocolate
4) Extra long refined chocolate.
You (and friends?) should sit down and taste them. Mostly just judge whether or not you like them. Don’t try and rate them or anything fancy. Maybe put them in order if you can. What should become apparent pretty quickly is that the majority are not ruined. Under roasting didn’t ruin it. Over roasting didn’t ruin it. Extra time maybe helped one or the other extreme roast in an unexpected way. Who knows. The main thing here is that you have 8 chocolates and patterns that should help you try the next batch of chocolate. And you didn’t have to make 8 separate batches.
What you should gather from this ‘data’ is what sweetness level was your favorite. The ‘light” was good but the standard too sweet? Split the difference. How about the roast? Maybe split the difference if you can’t decide. Did the extra cocoa butter add or detract? How about the extra time? My bet there is either it had no effect (i.e. relax about how long you refine) or slightly improved the ones that you didn’t like as well.
That’s it. For the next batch try and keep as many things as possible the same, tweaking only the really obvious ones so you can go back and compare. And of course plan out your own changes along the way and turn that single batch into 3 or 4 or 5 different versions. Very quickly you will find YOUR favorite recipe for the bean you picked. And that last part is worth noting. If you finish all 8 chocolate and dislike them all, there is a good chance you don’t like that bean, not that you did anything wrong. Pass it around and see what other people think.
Happy chocolate making.
I am planning to open a chocolate making business. I’m trying to come up with the perfect chocolate that stands out from the crowd. What recipe should I use?
I can’t tell you.
I’m going to tackle this one with math. And I’m going to try to walk a line between utterly absurd and merely impractical.
Let’s get utterly absurd out of the way (except there are SO many fun ways to be utterly absurd). Let’s talk absurd roasting. You can roast beans anywhere from 5 minutes to 60 minutes. And even in that I am trying to be reasonable. You could roast 5 hours but I’ve never heard that so I’m not including it. In those 55 minutes, there are 3300 seconds. You need to take them to some final temperature. Staying with the absurd (but safe!) let’s say your range is 150 F – 300 F. My thermometer has 0.1 degree increments. That means I have 1500 temperatures I can choose from. That means (by multiplying the two numbers together) I have 4,950,000 possible roast combinations. Nearly 5 million ways I can roast. And that is keeping the ‘utterly’ absurd ‘reasonable’ still since I didn’t even bring up HOW we are going to go from room temperature to our final temperature. Technically there is an infinite ways to get from one temperature to another, but that isn’t practical to help you understand. I’ve talked a bit about profiles in the past. That just means the shape of the curve if you plot temperature vs time. Here is a picture of a few curves. They are start and end at the same temperature and do it in the same amount of time, but they look different in graph form and will produce different tasting beans (and thus chocolate).

If we just say it has to be one of those, the choices go to 15 million. Absurd enough? I think so.
Now let’s talk ‘reasonable’. You want me to give you the perfect chocolate recipe? Ok, what are our options? At the basics, we have these options.
1) Bean
2) Roast
3) Recipe
Pick a bean. I have about 30 choices.
Next it needs to be roasted. I’m going to suggest we use the Behmor since it has 5 pre-defined profiles. Without getting crazy, there is still the decision to make of how long to roast. Let’s keep it to 1 minute increments (even though it goes down to 15 second increments). I have had good tasting roasts from 14 minutes to 22 minutes. So that gives us 40 choices.
I really hate to do this but it does make a difference in how the Behmor or any roaster roasts. How much are you going to roast at a time? 1.5 lbs on P3 for 18 minutes will give you a different result from the same profile and time if you roast 2.5 lbs. If we pick ¼ lb increments, that is 5 choices there.
What formulation? Well, we need a percentage of cocoa beans, sugar and cocoa butter. At this point the permutations start getting out of control even when I try and keep them reasonable. From a calculation standpoint, let’s look at how much sugar to add. Reasonable is 20% to 40%. As much as I want to increment that at 5% and give us 5 choices (20, 25, 30, 35, 40) experience tells me it’s more like 2%, so that is 11 choices.
To add cocoa butter or not? I’m going to really keep this simple and say it’s either none, 5% or 10%. 3 choices.
So what does that give us for possible chocolate recipe choices?
30 beans x 40 roasting profiles x 5 weight choices x 11 sugar percentages x 3 cocoa butter percentages.
And keep in mind I tried really hard to keep this reasonable and grounded.
198,000 combinations. And you want me to pick ONE? How about if we par it down to really basic.
30 beans x 5 profiles (go with the Behmor defaults) x 5 sugar percentages (5% increments) x 2 cocoa butter (0 or 5%)
There are still 1500 combinations!!! And you want me to pick for you the ONE that stands out from the crowd? Not possible.
And how about sugar type choices. Or cocoa bean blends. Should you mix the beans before or after roasting? Then there are different cocoa butters. Lecithin? Milk? Vanilla?
There are currently about 7 billion people on this earth. I would not be surprised if couldn’t come up with 7 billion different ways to make chocolate. I mean, we didn’t even address refining times (24-72 hours – 48 options), temperature of refining (105 – 145 F – 40 options),
There are 12.17 BILLION combinations right there. And I didn’t even break a sweat.
Look, I’ll admit many of those would seem identical. I’m just trying to make a point and explain why I just can’t hand you the magic perfect chocolate recipe. And also why you will never make a chocolate that will appeal to everyone or stand out like a shining beacon of chocolate perfection. There are just too many choices. It’s just numbers. It’s why you didn’t win the recent Powerball lottery (I’m assuming the winners are not reading this).
And we didn’t even talk about that what is great to me isn’t great to you.
Which leads me to my advice. Don’t try to please everyone. You can’t. You can only make the chocolate that sings to you. If you do that, those that like what you like will find you. I’ve seen it over and over. Be passionate about what you make and your passion will be infectious.
That all said, I’m going to make this a two part answer. Next week I am going to talk about how to practically dial in a chocolate recipe without doing thousands of batches. Stay tuned.
As always, submit YOUR questions for Ask the Alchemist to question@chocolatealchemy.com
Before we get to this week's Ask the Alchemist; a few announcements. First, the Holidays. We will be closed:
12/24/14 - 1/4/15. Basically Christmas Eve through the New Year's weekend.
I'll be answering e-mail off and on, but no shipping in this time. It is family time!
You have until 9 am PST 12/23/14 to get orders in if you want them to ship before we close.
With that in mind, I would not advise waiting until the new year if you want any of the Peru Maranon. It was well over half gone (hundreds of pounds) in two days. The last bag is opened and going fast. You have been warned.
On to this week's question.
Do you have any tales to tell about additional ingredients you’ve added to the chocolate during the refining process (nuts, toasted coconut, coffee, salt, etc.). Other than water content, anything to watch-out for?
Well, er, um…..if I can’t talk about water to watch out for, then I can’t think of a whole lot. That seems to be the place where all issues start. So instead I will just talk about things I’ve tried via free association.
Praline. 50/50 hazelnuts/sugar. You can make it either with granulated sugar or sugar you have caramelized. I’ve tried it both ways and as pretty as the sheets of burnt umber sugar glass were, they loved to suck up moisture, and in the end, I liked the flavor of the granular better.
Nutella. This is easy. Just roast up your hazelnuts as you would the cocoa and mix in anywhere from 1/4 – 3/4 in with your chocolate. It really depends on what you are after. It takes a bit of a balance if you want it just solid or just spreadable but it’s not all that hard. Start 50/50 and go from there.
Nut butters. Same. If you can do chocolate, then you can make nut butters. And they are actually easier. Do keep an eye out if you try it raw. The moisture can cause shearing against the oil, and can still seize.
And remember for all those, dry sugars. No honey, agave, etc. unless you stir it in by had at the end. Just not in the Melanger.
From a request by my daughter, we have made unsweetened milk chocolate more than once. At 20-30% milk powder, there is plenty of residual sweetness from lactose to make a great chocolate.
And from there, if you toss in roasted coffee (2-6 oz / lb) then you can end up with a really interesting ‘mocha’ bar. The coffee will refine right down.
On the same coffee rift, if you start with white chocolate, and add coffee, you have what I call a latte bar. And of course you could add coffee to any dark chocolate.
Spices for me come to mind next. Nutmeg. Cinnamon. Cardamom. The all grind up just find and add some great flavor options. And of course, peppers are hot right now (yes, that was on purpose). You can add any selection of dried peppers right to the Melanger. I do like to pre-powder these, but if you do, be REALLY careful. You do not want to be breathing in hot pepper dust. Chipotle chocolate? Damn straight!
That leads me kitchen spices. The most fun I have had was with one that had parsley, sage, rosemary and thyme. It’s amazing how many people could not suss out the flavors. It was very familiar but so out of context it stumped nearly everyone. Basil chocolate anyone? How about tarragon? Lavender?
What else is herb like? Friendly chocolate? Sure, if that is your thing. It would certainly be aromatic. More to my taste would be something else aromatic. How about hops! Hopped chocolate! Just remove the stems and in it goes. And 5-10 % malt (dry) and suddenly you have ‘beer’ chocolate.
Finally, if you really have to indulge your wet ingredients, there might I suggest truffles? The centers and coatings just spiral out of control. I’ve worked out this year that you don’t need cream at all for a truffle filling. Any liquid will do. Just keep the proportions 2:1 chocolate to liquid and you are there. This year I and friends made over 1300 truffles out of the 50+ pounds of various evaluation chocolate I had laying around. Just look at what you can do.
Cherry/rum. Just blend rum pot cherries in a blender and strain. That’s your liquid.
Pear liquor
Scotch/sugar
Rose water
Orange water
Chai (just steep any number of teas in your cream and away you go)
Earl Grey (for my daughter)
Eggnog (my personal favorite)
And the filling does not have to start with dark chocolate. Grab one of those variations above. Chipotle? Mocha?
And then coatings!!!!
Sure, anyone can roll them in cocoa powder. But how about powdered rose petals? Or nutmeg. Coffee. Cinnamon. Cardamom? Yes!!! For all those you really need to ‘cut’ them with a bit of sugar. It’s amazing how strong they are. 1:5 – 1:10. But it is up to you. Remember that earl grey center? Earl Grey and sugar makes a great coating! You have that interesting blueberry tea. Sure! Raspberry? That works! It’s really up to your imagination.
I’ll leave you with this as the height of our 2014 truffle fest experimentation.
Chai/eggnog center with a Hot ginger/curry/cardamom coating on a tiny 1/4 oz truffle ‘shooter’. So intense but gone in a flash.
Happy Holidays everyone.
I notice that you have always advocated a minimum 35% of cocoa butter... yeah, I know about the basic 50% pre-existent in the cacao! However, my 62% is an easy pour, - enjoy this - easier than the 60% that I've tried.
Would I be right in thinking that the bean I'm using, a 3-day dry, Trinitario hybrid in Fiji, has enabled me to get that wee bit of 'extra' cocoa butter that makes the 62% a nice pour, but the 60% that little bit too much of a bother without added cocoa butter.
Your musings, please...
As nice as it might be, I would not say you are getting any ‘extra’ cocoa butter. I believe your thinking is flawed based on the assumption my advocation of 35% is the absolute, bare minimum you need and it is a scientifically rigorous number. Thank you for the potential pedestal placing, but in reality it is actually a rather carefully crafted number, padded enough to reduce the number of problems people have during formulation.
What that means is that given that the percentage of cocoa butter can range from 45-55%, and we ball park 50%, we don’t actually know how much we are using. We also don’t know how well you roast, what other ingredients you use, how much they absorb moisture (which requires more cocoa butter) or if you use lecithin (which requires less cocoa butter).
When using cocoa beans roasted well and protected from moisture, sugar that has been dried right before I use it and a little lecithin, and a cocoa bean of know ‘high’ cocoa butter percentage, I have been able to make a chocolate with a calculated cocoa butter percentage of 26%. On the other hand, using another bean, and a milk chocolate recipe without lecithin, just tossing cool ingredients in here and there (but recording of course), my percentage of cocoa butter showed a whopping 42%. The average? 34%. But look at that spread. 14%!! So for the easy of a neat and tidy number, and hedging my bets a little, I bumped my recommendation 1% to 35%. My goal for a ‘minimum’ being that 99% of the people that try it will succeed. That’s all.
So, your 62%? That’s somewhere in the 31% cocoa butter level. Yep, that’s between 26% and 42%. Totally in the realm of ‘normal’.
Most of my suggestions and advocations (I like my new word) are just that. They are starting points to ease you into success. After that, you SHOULD move to your tastes and circumstances. That’s the real Alchemy part.
I am an avid home brewer. I am about to brew a chocolate porter and want to you cocoa nibs. Can you give me advice on what techniques to use?
Disclaimer: This is going to be aimed at home brewers and not really chocolate makers at all. With that, there may be a bit of home brew speak going on that I’m not going to explain for the non-brewer. Google is your friend and you are never too old to learn something new.
I am an avid home brewer also. I have a smoked chocolate pumpkin Imperial stout in the works. What I did is add 1 lb of dark roasted (a new blend I’m working on) Brewing cocoa into the mash. I treated it as I would any other moderately flavored specialty malt. But I came by that number by taste testing different levels of infusions of nibs and brewing cocoa. My thought process was that if the resulting infusion did not have substantial enough character in just plain water, how could I expect it to contribute in any meaningful way to an complex grain bill.
While I was in the homebrew shop getting my grains, I noticed little 2 oz bags of ‘cacao nibs’. These were in the same section as the spices. Unfortunately cocoa nibs are not spices and don’t extract the same way. Take a tablespoon of cinnamon or coriander and put it into a quart of boiling water. The result will be a nicely perfumed quart of spice. It’s there. You can smell it and taste it. Do the same thing with cocoa nibs….and you get nothing. Do it with 10 tablespoons of cocoa nibs and you get tinted water. Trying to treat nibs as spices just does not work. They are water insoluble. They are 50% oil and that ‘oil and water don’t mix’ thing is fighting you the entire way. And even if you grind them up, it’s basically the same.
That said, LOTS of brewers that I sell to put nibs into the secondary. Generally I roast pretty heavy for them. And they add a bit. On average, between 50-100 lbs per 5 barrel batch. At 150 gallons per batch, that is between 5 and 10 ounces per gallon, or 1.5-3.0 lbs per 5 gallon batch (the home brewer average). That is WAY higher than those 2 oz ‘spice’ packs. And they usually set for 4-8 weeks in the brew. And I’ll be honest. It does not contribute a huge amount. Some, sure, but certainly not ‘wow, that’s chocolate milk’ flavor. It’s more subtle.
But there are other options. And it’s basically a variation of a problem that has already been sussed out. That answer is Brewing cocoa. And the question is ‘how do you water extract cocoa?’. You roast cocoa beans a bit heavier, grind them husk and all pretty fine (1000 fold increase in surface area after all), and use proportionally, a LOT!. 4 T per 8 oz of water is my recommended dose, based purely on taste tests. Scaling that up to gallons, you are talking about one pound of brewing cocoa per 5 gallon batch. Interestingly very close to what you would use for a crystal or brown malt.
So that is what I added and what I would recommend as a starting point. 16 oz of dark roasted brewing cocoa into the mash for 5 gallons. The result has some chocolate character. And personally, I think 1.5 lbs or even 2 lbs would not be too much. I’m thinking that a good test would be a nice chocolate ESB to really test the contribution of the cocoa.
One final note. Even fully roasted, when I tried adding brewing cocoa to some finished ale as you would do in a secondary I ended up with contamination. So cold side addition is not something I would recommend.
Relax. Don’t worry. Have a chocolate homebrew!
Hi, I am using chocolate chips for tempering, since it is kind of thick for coating I wonder if I can add cocoa butter to help liquify it?
I’m not 100% sure what you mean, but I think I get the basic idea. It sounds like you are using chocolate chips to coat something with and the melted, in temper chocolate is a bit thick.
If that is the case, yes, you can add cocoa butter to reduce the viscosity some so the coating is not quite so thick. I would start with 5% of the weight and see what that gives you. And feel free to keep adding until you get to 15%. If you make it there, and it is still too thick, something else may be going on. At that point (or instead) you can try adding a some (0.5-1%) lecithin. And I personally like that even better. Sometimes thickness comes from a touch of water that has found its way into the chocolate and even adding cocoa butter does not seem to help that much. Instead adding something that binds the water helps much more.
Over the weekend I helped a local 8 the grade class make over 50 lbs of truffles for a fund raiser. About 1/3 of them were dipped in tempered chocolate and the dark chocolate was as you described. A bit thick and made the coating too heave without a bit of work. We have been having a stretch of rather cold weather (for here), with snow on the ground for a week (2 days is a lot here) and temperatures in the low teens. I suspect all that snow and humidity found it’s way into the chocolate and I need to do something about it. I melted up about 2 oz of cocoa butter, added 1T of lecithin, stirred until melted/dissolved and added it to the 10 lbs of chocolate. That took care of it. The water was bound up after a few minutes and the viscosity dropped nicely. But that would not have happened with just that small amount of extra cocoa butter.
The other thing I would suggest is checking the label on your chocolate chips. I did some research and although most of the chips were just cocoa, sugar, cocoa butter and lecithin, there were a few that had other oils in them. And a few that had tons of things in them ( Sugar, Cocoa Butter, Chocolate, Milk, Nonfat Milk, 1% of Artificial Flavors, and Natural Flavors, Soy Lecithin, Yellow 5 Lake, Yellow 6 Lake, Red 40 Lake, Blue 2 Lake, Salt, Partially Hydrogenated Cottonseed Oil, and Soybean Oil. ) which I would not be surprised would make it basically impossible for you to temper and dip in with a thin, even coating.
So, check you ingredients. If those are good to go (no oils, no dyes, no water based anything), add some cocoa butter and lecithin and see if that helps.
And for those that are curious, here is the truffle recipe. It’s still not too late for holiday gifts.
Truffles 4 dozen 1 oz truffles
3 lb Chocolate (2 lbs for filling, 1 lb for dipping) (27 oz Ecuador nibs roasted, 6 oz cocoa butter, 15 oz sugar, 1.5 t lecithin, 1 vanilla bean scraped into melted cocoa butter)
1 pint heavy cream
Cocoa powder (I like Dagoba personally)
Sugar
Heat 1 pint (1 lb) cream to 160 F. Melt 2 lbs chocolate to 150 F. Combine gentle. I prefer to stir the chocolate into the cream and fold it together until there are no streaks. Allow to cool and set up, usually overnight. You may find a small layer of cocoa butter on the top…or not. Just stir it in or scrap it off. It is usually a result of over mixing but does not hurt anything.
Scoop out 1 oz amount and roll into balls. This is a very soft filling and you WILL get melted chocolate all over your hands. Allow to harden.
Make a cocoa powder/sugar coating. Mix 1/4 cup cocoa powder to 4 cup sugar and powder in a blender.
Melt your remaining chocolate. Pour some onto a warm plate or parchment paper. Roll your truffles in the chocolate, coating thinly and immediately toss/roll in your cocoa powder mixture. Allow to set up.
And let your inspiration be your guide as far as coatings. Cinnamon, coconut, cocoa nibs slightly ground/crushed (I adore these, but some people find them too far outside their comfort level). And of course you can dip them in tempered chocolate with no extra coating.
Oh, and one of my all-time favorites is substituting eggnog for the cream, and using a nutmeg/cinnamon/sugar coating.
Happy holidays all!!!
----- Submit your Questions to the Alchemist: question(youknowtoremovethisright?)@chocolatealchemy.com -----
I probably receive a request a week from people wanting to make milk free "milk" chocolate. After a bit of experimenting, some suggestions from various customers and numerous taste tests, I am really pleased to submit the following two recipes for those with milk allergies and/or sensitivities. My daughter can not consume anything with cow's milk, but does just fine with goat's milk, so this recipe is for her.
This formulation will make almost 7 pounds of "40 % cocoa" Goat's milk chocolate.
Ingredients
Proceedure:
For others that can't abide any dairy products at all, I submit the best soy "milk" chocolate you will ever taste.
This formulation will make almost 5 pounds of "40 % cocoa" "Better than Milk" Soy milk chocolate.
Ingredients
Proceedure:
I hope you really enjoy them. Please let me know.
It is not really chocolate, but I have received enough requests, that I finally had to put a batch of White Chocolate on. It was very simple. The only piece of equipment you need is the Santha Wet Grinder. Just combine the following: Homemade White Chocolate
26 oz Cocoa Butter 25 oz White Sugar 22 oz Dry milk powder 1 t vanilla extract
I put all the dry items into a 150 F oven for about a hour, then slowly combined them and the vanilla in the Santha Wet Grinder and let it refine for about 8 hours.
I then got a little creative with molding as you can see above.
Well, I finally finished putting a number of recipes together.